Stanier 8F in ScaleSeven Part 15: balance weights

Just an update.  Partly because of the difficulty painting behind the driving wheels, and partly because I realised that I needed to put the balance weights on the wheels (and this would probably be much easier if I could lie them flat), I partly dismantled what I had done so far to put together the chassis.  Also I realised that the return cranks were on at an exaggerated angle, and although this makes the valve gear move more satisfyingly, I should probably re-do the soldering to make it more realistic (10 degrees is right).

Of course to put the balance weights on is easier said than done. First of all I had to choose exactly which 8F I wanted to model! I found a picture of number (4)8067 which seems to have the right characteristics: a rivetted tender, balance wheels of the earlier type (not all of the weights are crescents) and based in the north of England. So number 8067 it will be.

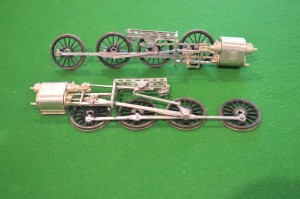
Both types of weights are supplied in the MOK etches, as pairs (so four of each shape). Using the S7 Group Slaters wheels makes sandwiching the pairs of etches together relatively easy, one on each side of each wheel: the plastic spokes can be cut back a little to accommodate the etches. Not too much on the outer side, though, as the balance weights stand proud of the rims on the pictures I have seen.
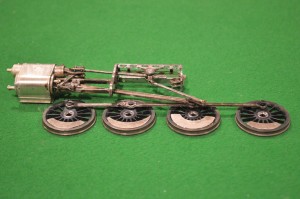
Small Balance weights 1I then filled in the gaps between the etches with Milliput filler.

Now seemed a good time to use Birchwood Casey metal black on the rods and valve gear, to obtain a good “polished steel” finish. I used Hi-Chem “All-Surface Primer” on the wheels (probably only available in Australia, but I’m sure motorcar paint shops anywhere would have a similar product) – it’s a marvellous very thin and very effective metal primer: it sticks to anything, in my experience even glass or granite benchtops! Therein lies a separate story, as you might imagine ….

Small Balance weights 2


Finally, a “dirty black’ initial topcoat. My engine is going to have a realistic (I hope) weathered appearance.

So there you are.

David


Stanier 8F in Scaleseven part 14: putting the boiler on the frames

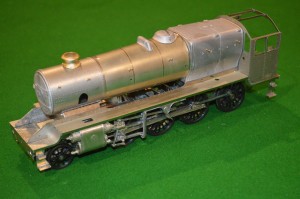
It’s beginning to look a bit more like an 8F (admittedly I have placed the pony truck in place and the smokebox door just for this picture, though).

Small Boiler meets framesA question however: when I started this project, I saw the picture of a lovely model 8F in brass-and-whitemetal finish. I was looking forward to the day when mine might look similar – but how can that be done if I am also going to have to paint parts of it before I complete construction?
I guess it doesn’t matter really, but if I am to have a realistic painted finish in places like the frames behind the driving wheels, surely this will have to be done by taking the wheels off.  Especially if I wish to have a good finish on parts like the springs, which are right behind the wheels, of course. As you’ll observe from the above picture, I haven’t put the braking gear in place yet. Once I have done that the wheels will be very difficult to take off. At present the wheels can be removed easily, because the excellent design of the MOK kit allows the motion bracket, valve gear and wheels to be removed as a unit.

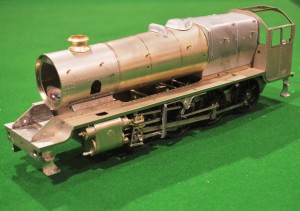
Small Boiler meets frames 2So, how do other modellers manage it?
How do you make a whole brass-and-whitemetal kit up, and later get a good finish on it, without giving yourself a huge amount of unnecessary work dismantling all the careful modelling done to put it together in the first place?


Answer (I think): you cannot.  On the ‘net are articles describing how people have made up a model completely, then have to spend lots of effort systematically pulling them apart so that they can then be painted!  When it comes down to doing that, I do not think pictures of the unpainted model are so important, so I will paint the frames behind the wheels at this stage (and probably most of the stuff in-between the frames also).

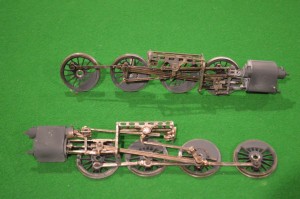
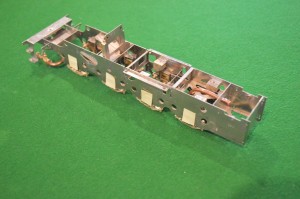
Small Chassis dismantled 1First stage, take the wheels and the motion off the frames.  Fortunately this doesn’t prove too difficult.

This will also give the advantage that I can put the balance weights on the wheels whilst they are flat on the desk, rather than mounted on the frames.

Small Chassis dismantled 2The frames themselves will be easy to paint I hope, although I will have to mask off the sliding hornblocks (bearings) for the driving wheels, and avoid painting the compensation mechanism on the insides of the frames.


The balance weights will have to be chosen.  I hadn’t realised, but there are many variable configurations of balance weights between difference individual locomotive which are otherwise indistinguishable.  So I will need to find a picture of a locomotive in the area where I want to model (not too important) with a rivetted tender (which I think looks nicer), and then try to match the available parts from my kit to make the appropriate balance weights on my locomotive.  So, where do I find a side-on view of a Stanier 8F, pulling a tender with lots of rivets on the side, on the Settle-Carlisle Railway (or, at a pinch, anywhere in Lancashire or the North-West?