This is serious nerd-iness, so look away …. [updated 15th March]
I wish to make a track upon which to run my trucks and Dyak, and whilst straight track is OK, I will also want some junctions. Now this is an example of a British inaccurate sense of superiority and better command of language, over the New World (!). In America, just like in the automotive world the word for what Brits call “bumpers”, they more accurately call “fenders”, and the components which Americans call “dampers” (because they damp down oscillations in the springing of car axles), the Brits call “shock absorbers” – which is not what they do at all. In the railway world, the junction parts where a train can change tracks is called a “switch” by North Americans (accurate and descriptive) whereas I was brought up to call the same thing a “point” – what is the sense, or point, in that?
To get back to the point, I bought a kit to make the switch from a guy called Cliff Barker in England. (sorry!)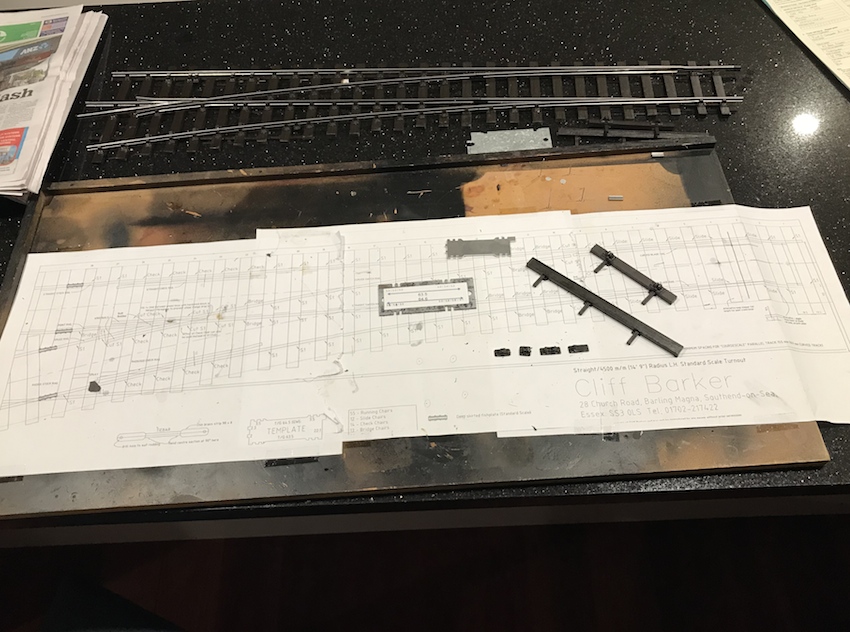
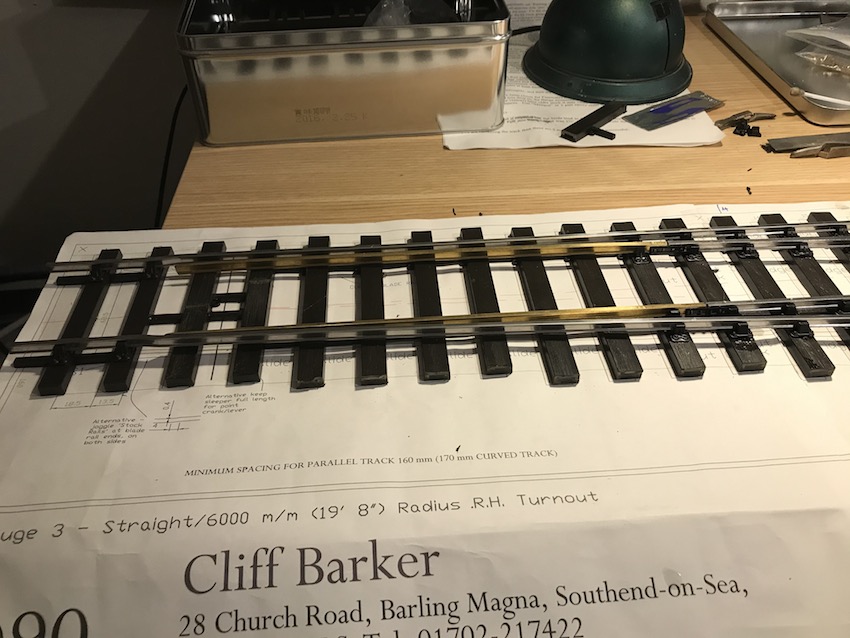
It comprises a plan, lengths of rail, rail “chairs” (for the rail to sit in), “sleepers”, or “ties” as the americans call them, and instructions. At the top of the picture to the right can be seen the switch as I have made one so far.
OK, OK. I will call the switch a “turnout” as a compromise, and the ties will be “sleepers” – although why they are called this I really do not know ….
Here are some of the rail chairs.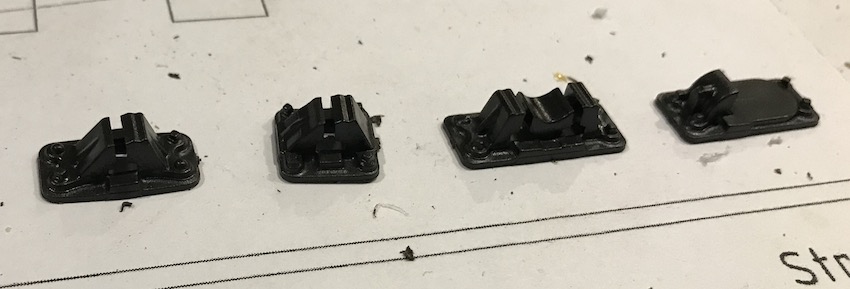 Left-to-right are standard rail-chair, and narrower one for tightly-spaced rails (called a “bridge chair” for some obscure reason), and double chair for the check rails (see later), and a slide chair (ditto).
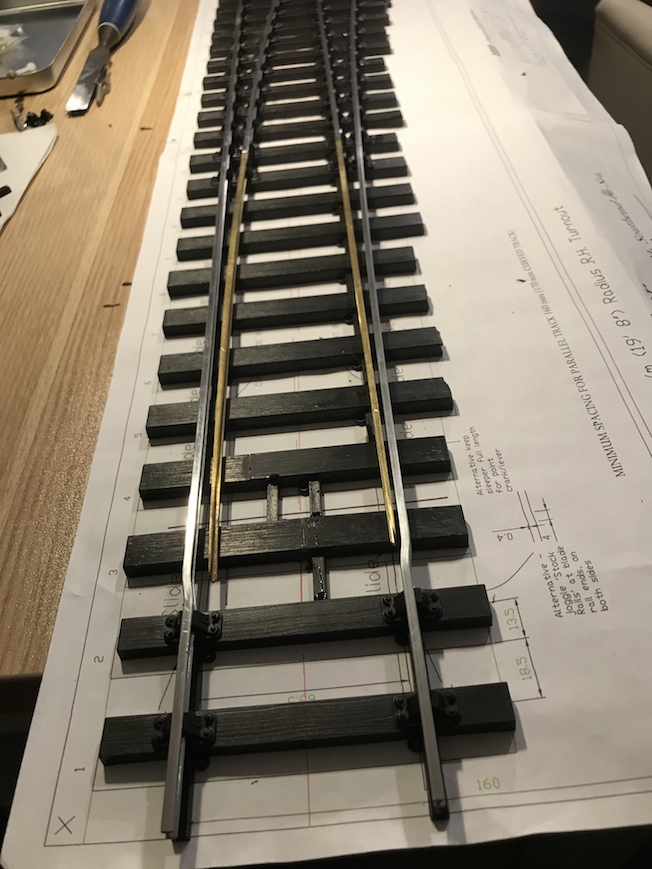
 This is a closer view of the plan and the parts.
The instructions suggest that the turnout is largely built using the plan as a definitive guide to positioning the parts, but using my experience for ScaleSeven, I disagree, as will become evident later.
There is also a rail gauge – a device which sets the correct width between the tracks. – you can see two in the picture: the nicely made one from Cliff Barker, and the cruder one cut from a flat piece of steel by myself – with paper stuck to it to show what the actual dimensions are. Not always quite what they are supposed to be!
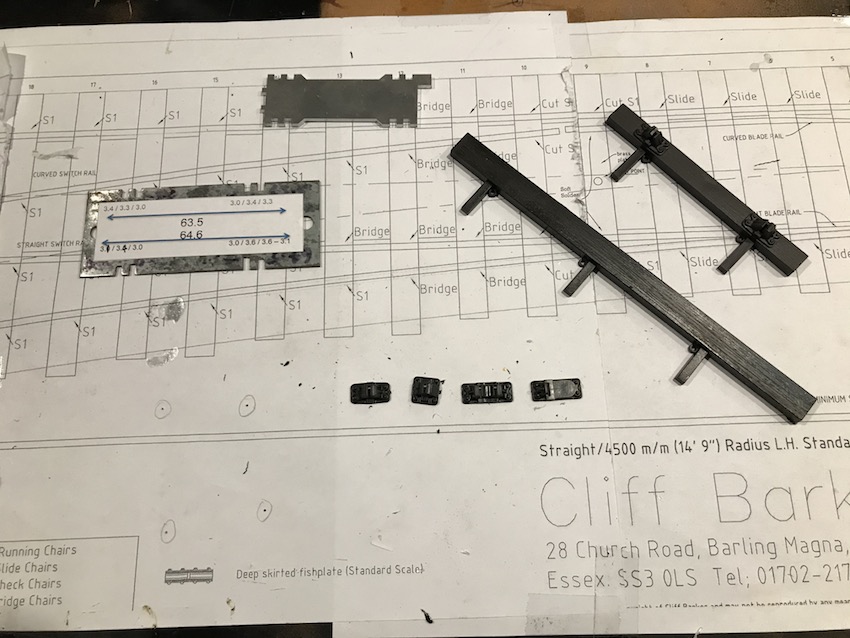
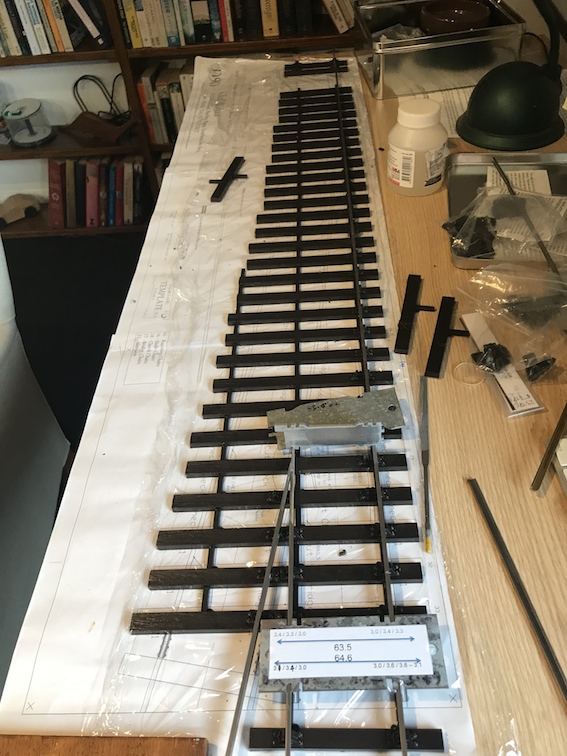
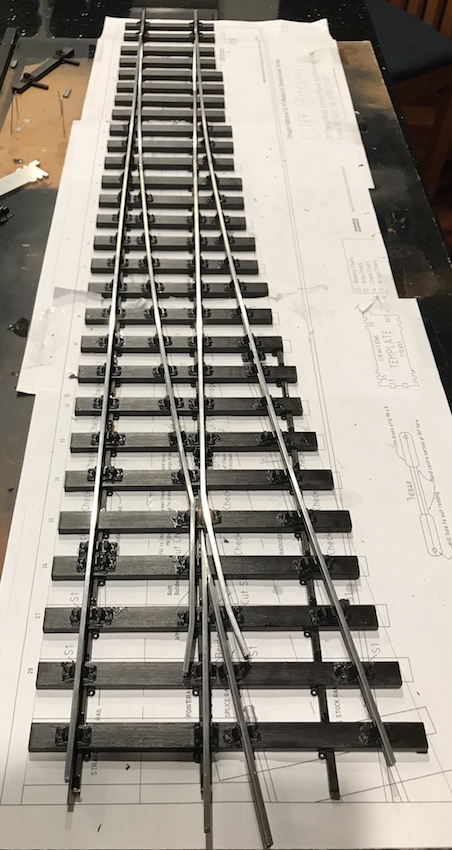 Here is the first one I built: a 4,500mm curved “turnout”. I’m now onto doing a 6000mm one.
The instructions from CB suggest building the turnout mainly relying on the printed plan. A problem with that is that this does not guarantee that the distance between the rails is accurate. In straight track the distance between the inside edges of the two rails should be 63.5mm (exactly 4 foot eight-and-a-half inches or Standard Gauge, scaled down). On curved track this has to be widened slightly to stop grinding of the wheels on corners. Up to 64.5mm on curved track.
In turnout construction/pointwork this is crucial.
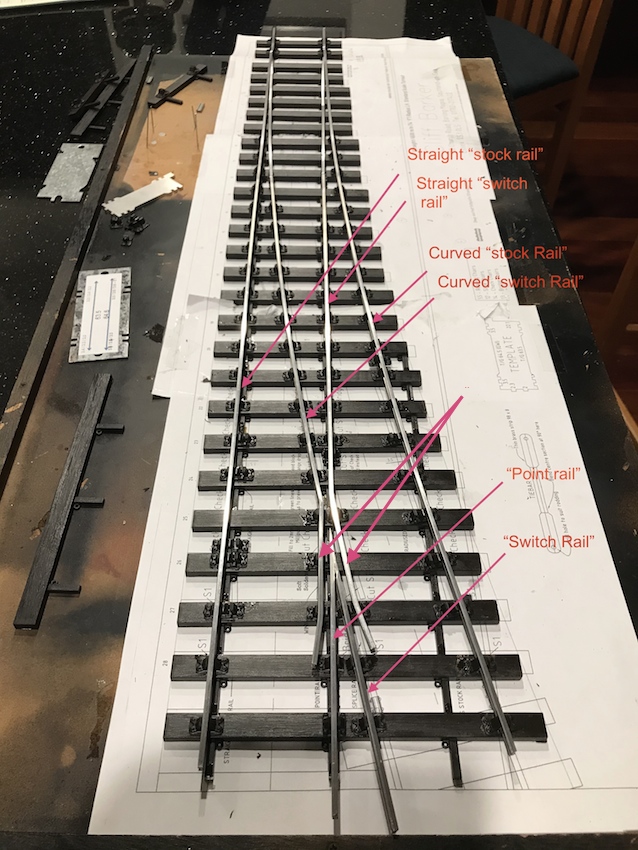 It is also difficult to follow the nomenclature of the turnout’s various bits of rail: see the diagram. Click to enlarge.
IMO the best way to construct a turnout and get the gauges correct is to glue the straight “stock rail” down first. The ties are plastic, and methyl-ethyl ketone (“MEK”, or plumbers welding compound) is used to weld the railchairs to the tie-bars/sleepers.
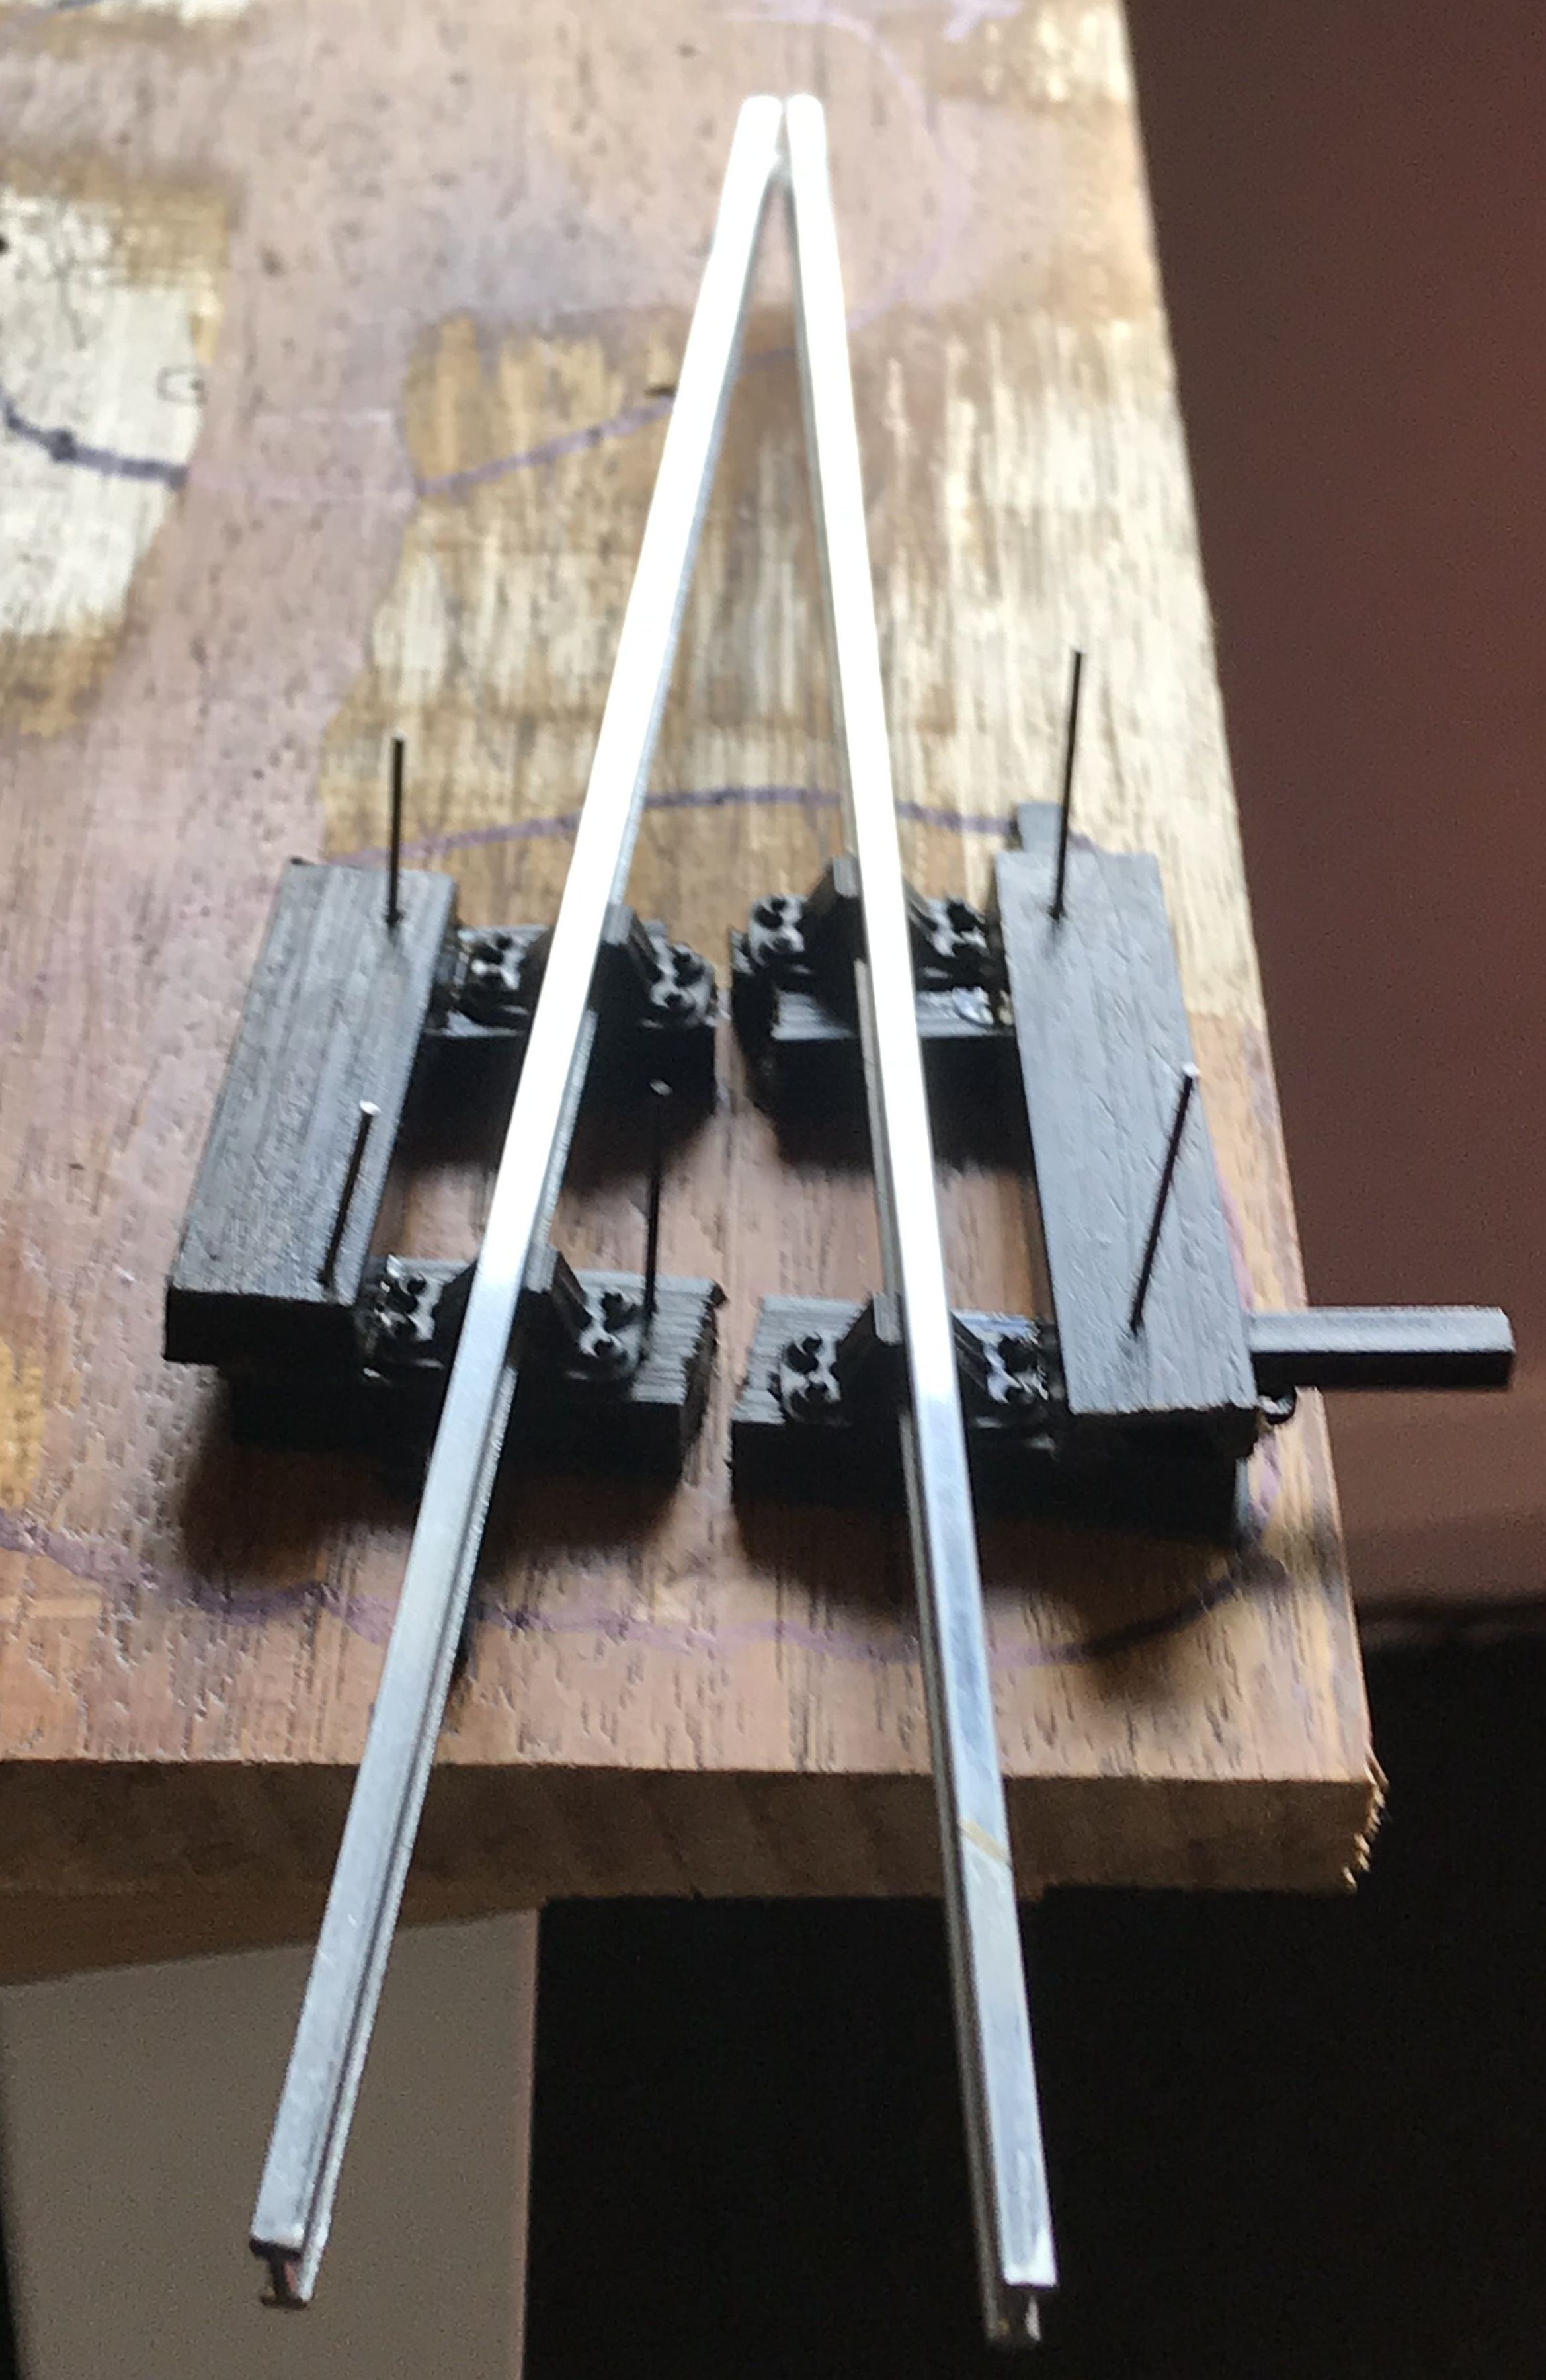
It is then necessary to weld/silver-solder/soft solder the point rail and the switch rail together, at the correct angle (tricky). On 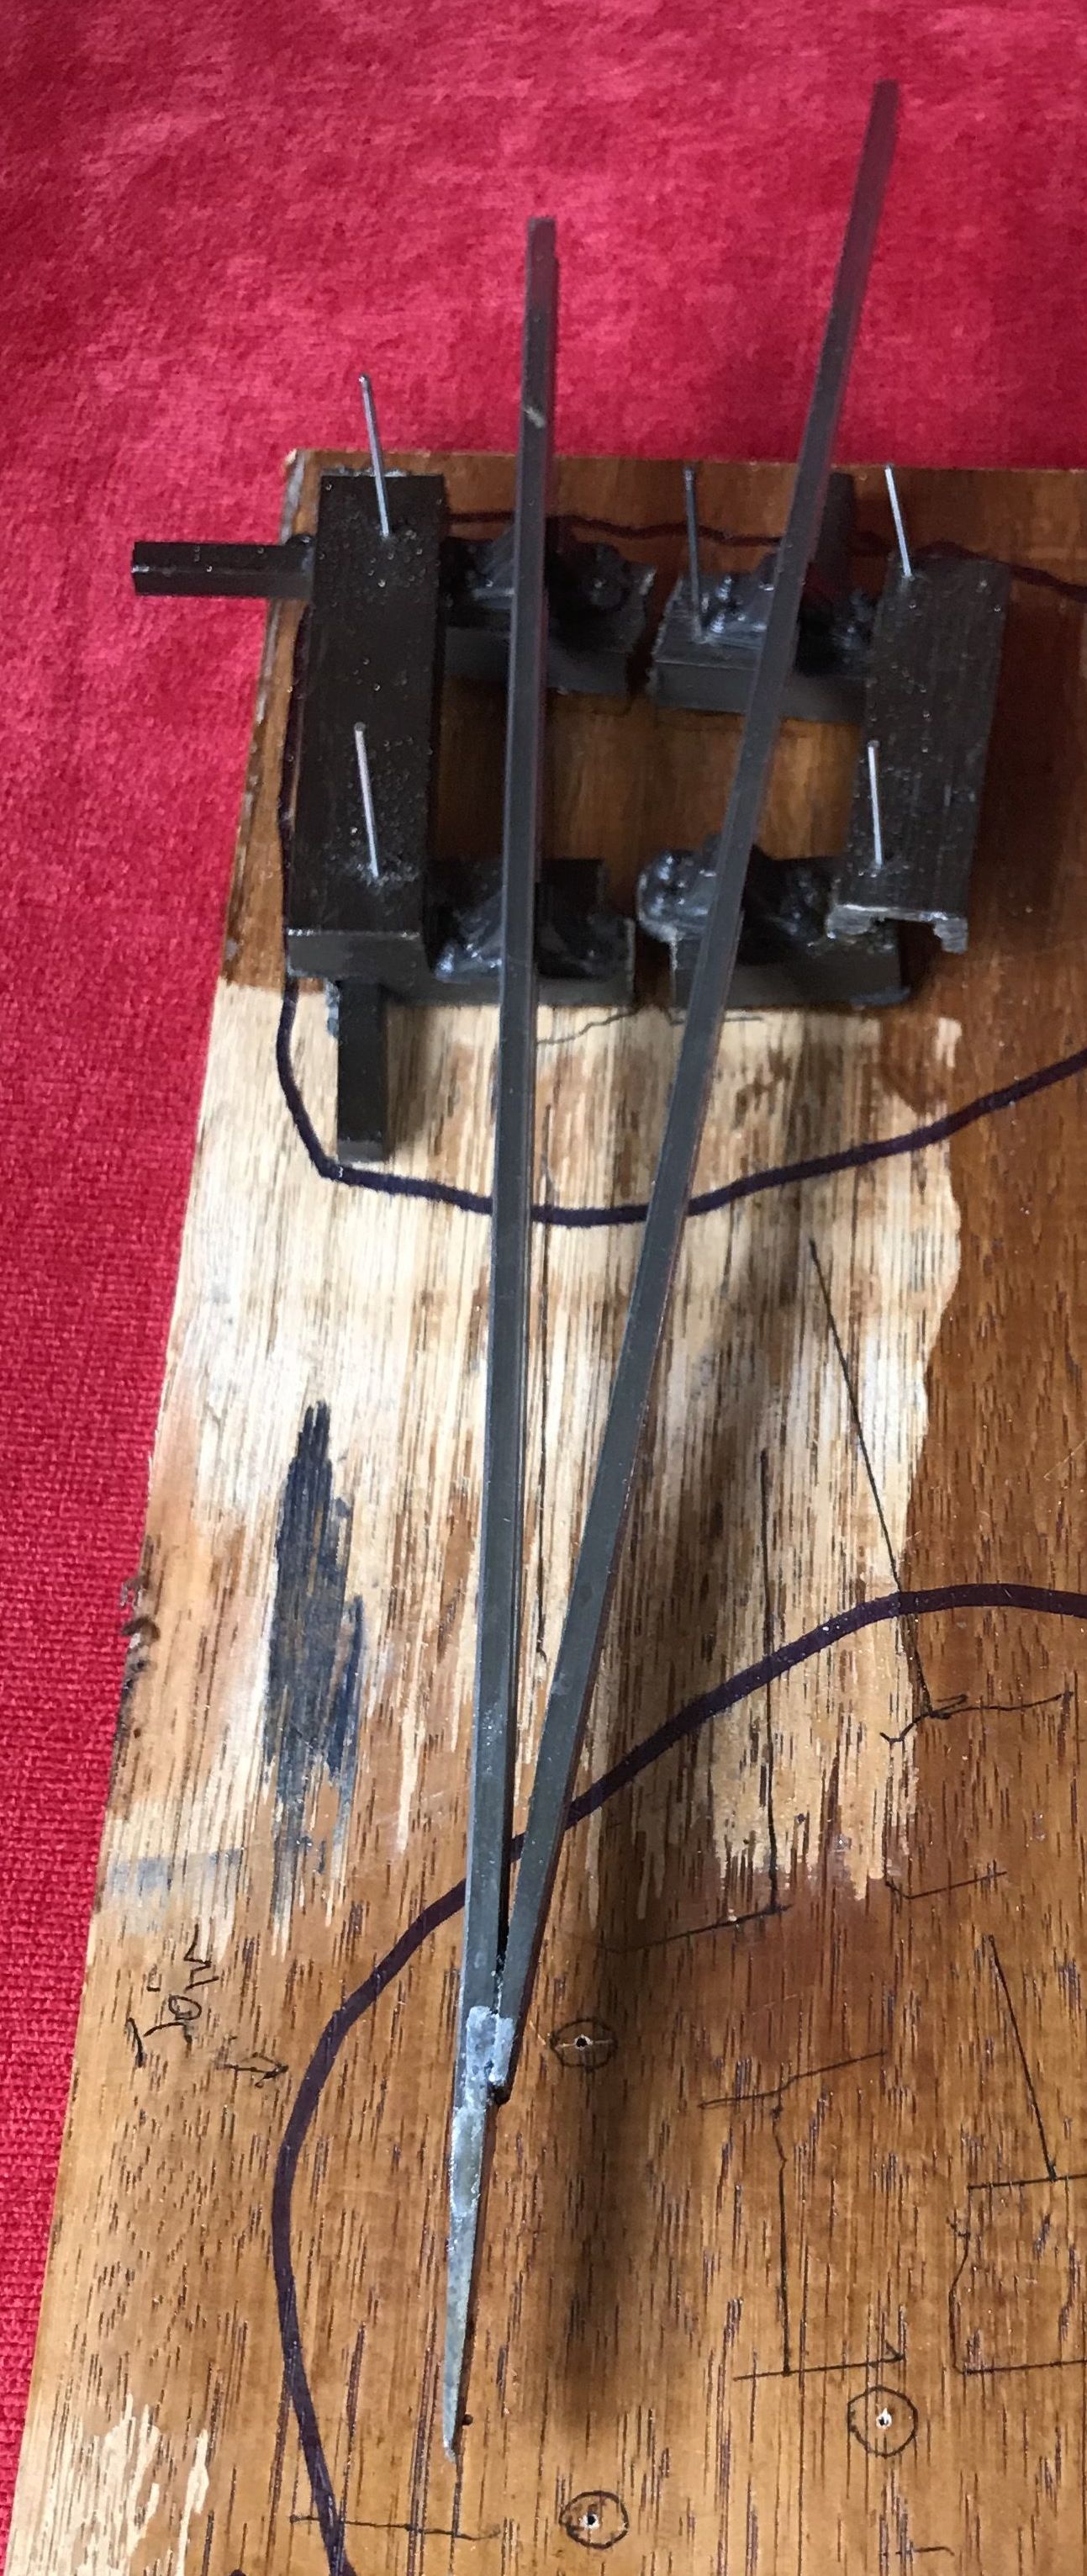 the left is the “jig” I have made to help with this: four rail-chairs are used to hold the rail (at the correct inclination). The chairs are stuck onto offcuts of sleepers/ties and arranged on a flat piece of wood at the correct angle for the switch. The rails are bent and filed to the correct profile then silver-soldered (it could be soft-soldered, but the silver-soldering will be stronger).
When I made the first turnout I followed instructions to position and stick down the curved stock rail after the straight one, fitting the switch/point V-constuction in between. The problem with this approach is that acheiving the corrrect rail gauges (including gauge-widening for the curved rails) is very difficult. In fact I had to take some of the railchairs off the sleepers to adjust their position – very difficult as they had been “welded” together! Constructing it progressively from the straight to the curved side makes setting the rail-to-rail widths easier, I believe.
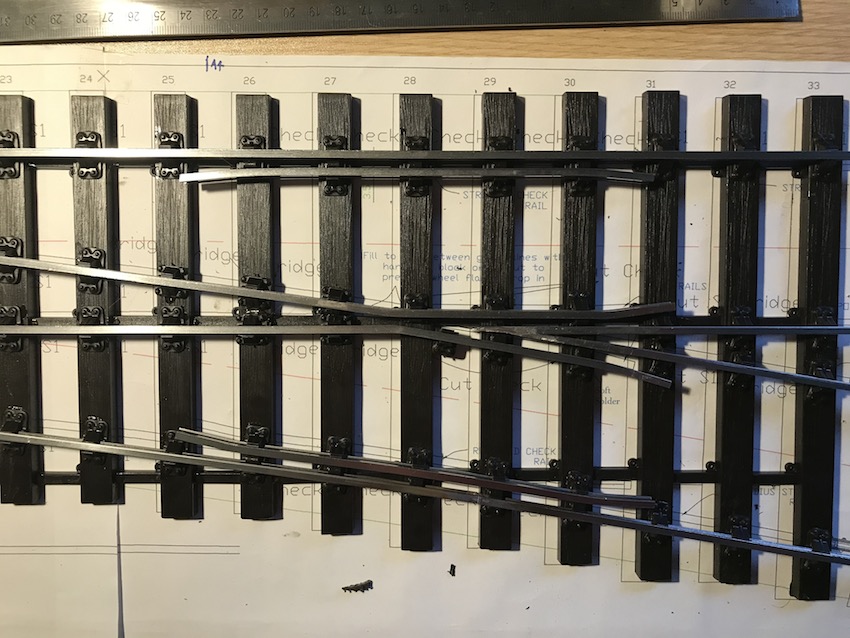
 Before one starts sticking the rails down, however, it ts wise to shape/file/machine the “stock” rails – the long ones on the outsides of the switch – to allow the point blades to direct the wheels smoothly one way or the other – see the picture, taken from later in the construction, but which shows how I chose to make “joggles” (as Cliff Barker calls them) to allow for the point blades effectively to be recessed into the running rails. By bending the rails outward about 10-15 degrees, then at a short distance further along (CB suggests just 8mm) bending the rail back into line, the minor bend is made which accommodates the point blade.
An alternative is to file recesses into the running rail, but this is more difficult. It is good to remember to make mirror-image “joggles”. I did not, but as I was making two or more turnouts it didn’t really matter! Clear thinking before sticking the straight stock rail down to the sleepers/ties is needed, but this is the first thing to do. The printed plan is useful to space out the sleepers at this stage.
 So position the V-shaped point/switch rail construction at the correct gauge from the straight stock rail and the correct position along the whole plan, with regard to where the curved stock rail will be. It is helpful to shape the curved stock rail approxiately beforehand to allow the positioning of the V-shaped point/switch rail construction.
In my experience it is best to position the straight stock-rail to V-construction at the correct gauge first. Put simply, I construct starting at the straight stock rail and then work towards the curved side, using the plan as a rough guide only (especially useful for bending the curved switch rail).
 Next are the curved, then the straight switch rails. Both “switch rails” need to be bent to include the “wing rails” which go on either side of the V-shaped construction.
The “switch blades” are machined rails narrowed down to provide the narrow blades redirecting the wheels straight on or into the “turnout”
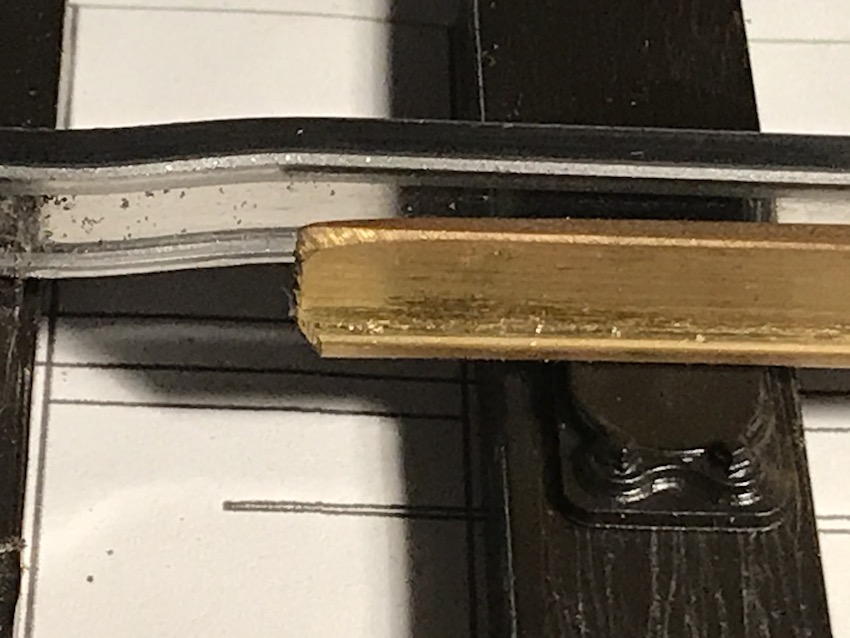 To the left is the picture showing the “joggles”.
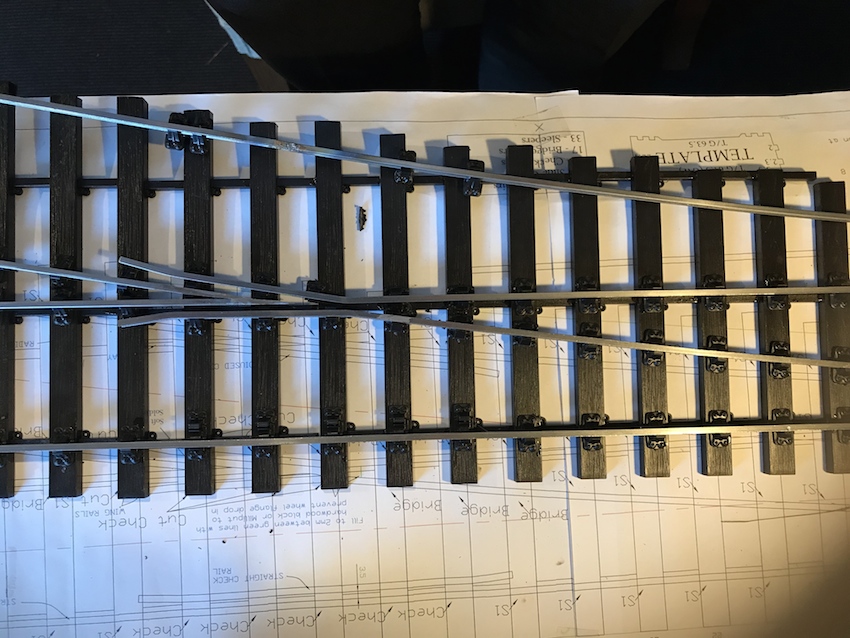
 The switch blades are joined onto the switch rails in my turnouts using a plastic connector which looks like a real fishplate but here is acting as a hinge point. In the picture below, about 9 sleepers up the switch blades from the sharp end can be seen the joint to the switch rails.
Now the running rails are now all in place, but as can be seen if you inspect closely, the chairs aren’t in place to support the switch blades, These supports need to allow lateral movement of the switch rails, and so are the “slide chairs”, which allow this lateral movement whilst supporting the weight of the rail (and locomotive) when necessary. One such slide chair can be seen under the tip of the switch blade above.
 I have also now put in place the “check rails”. These are mounted in the “check [rail] chairs” and make sure that the wheels go the correct way through the V-shaped point/switch rail construction.
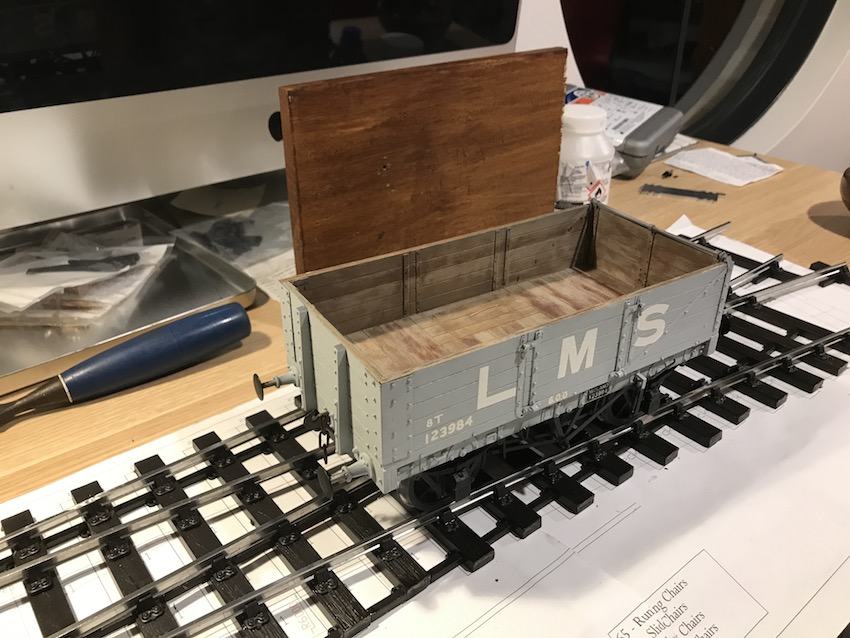
Here is one of my trucks being used to check that it runs through the wing-rails and check-rails successfully.