England June ’22

I went to Manchester earlier this month,then went up to Cark for abut a week.

I invited any of my friends who could make it to come up to Mark’s and John’s house there.

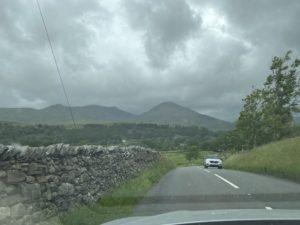
To the right is an evocative view (evocative for me, anyway) on the road up the west side of Coniston towards the Old Man.


So we set off up the Walna Scar Road towards Seathwaite.  Fortunately although it was fine when we had left Cark, I had remembered this was England, and took my waterproofs with me.

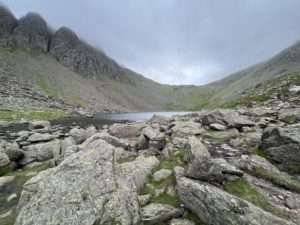
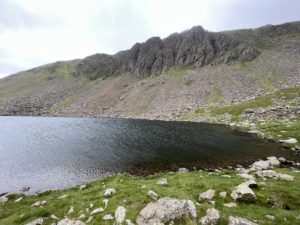
By the time we reached Walna Scar it was raining.  We turned up to get to Goats Water, below Dow Crag, and then walked around the tarn, rather than climbing up any further because the low clouds meant that we would have seen nothing for higher up the hillsides


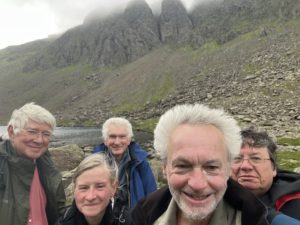
This the walking party at Goats Water.


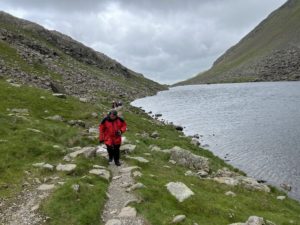
Walking around the tarn.


Dow Crag, visible above the tarn.  At this point, NOT covered in cloud.

It remained dry as we walked down the mountain, but it had definitely been a good decision not to attempt a ridge-walk.

A good day out and a great Lake District walk.


Baddesley wagons

I had some wagons to make in Gauge 3.  Coal wagons to a particular design, chosen by me on the grounds that they were relatively easy (! – see later) to make, and were colourful to make them more attractive.  Also, they are to a design compatible with my unlikely-to-come-true ambition of making a “William Francis” industrial Garratt locomotive in Gauge 3.  The trouble was or is, that no-one makes the relevant transfers in the right size for Gauge 3.There was no way I could free-hand paint the designs, so I had to think of a way to get transfers made.  If I could produce a computer file design, perhaps I could persuade POWSides to make the transfers (though at what cost, I hesitate to think).My first try was to do the whole side at a time, black background and all.  However on-line advice suggested that this was not a good idea, and a guy called “Overseer” on the website offered to do some transfers for me if I could do the design work, which included making files where all the white lettering plus the background is coloured black instead!
The reason for this is that it is possible to buy transfer sheets to go in an inkjet printer, but printing onto them is not straightforward, as they are clear backround sheets, and printers are made to print onto a white background.  So in order to produce the correctly-coloured letters it is necessary to print the letters first in white, then overprint the relevant colour a second time through the ink-jet printer, hoping that the paper is in exactly the same place a second time through. White is not a usual ink-jet colour, so the black cartridge is changed for a white-ink one, and the “black” printing done in white!
Fortunately we have a friend locally who is a graphic designer, and he was able to produce the relevant computer files of single-colours only, and I sent them all to “Overseer”.
Eventually the process was done, and I could try the transfers out.  There were a number of defects, but overall it was a very pleasing result. The number was angled, and the application of colours one on top of another was very difficult exactly to position.  Overseer sent some transfers in single colours as well as overlaid colours.  To try to position TWO colours (red and green) exactly onto the background white with the printer is clearly extremely tricky. 
The raised detail on the wagon sides was clearly a problem for me also.
Anyway, here is a view of the first complete wagon.
Many thanks to Overseer, who made the transfers, my friend Chris Burns who did the drawings, and of course Mike Williams who makes these kits.
It’s not weathered as yet.
Now I just need an industrial Garratt to pull it.
A long time coming, over a year, but here is the rake of three Baddesley Colliery coal wagons.There is a story as to why it’s taken so long, and why they are in different state of repair of course.
2111 has clearly just come from the works after an overhaul.


2116 has clearly had some sort of accident, and has had to have a plank replaced.However overall I am very happy with my little group of wagons. I’m quite proud of the end result, although I think more “weathering” is needed to be at all realistic.


Here is the story behind a couple of the wagons. Even if it doesn’t reflect well on my common sense, there may be some lessons in it.
I started off to build the two wagons as 2116 and 2117 together, as I had two sets of Baddesley transfers to use and two of Mike Williams kits. Building the two at the same time turned out to be a mistake: you see Mike had inadvertently put three of one side in and one of the other when he sent me the kits. Unfortunately I didn’t notice this, even when painting them, and even more extraordinarily when putting transfers on! So although 2117 was OK, spot the trouble with 2116! By this time I had run out of transfers. I’m absolutely sure Mike would have sent me a new side if I asked (even to Australia!) but that was no use to me as I had no transfers left. So I thought about what to do, and decided to butcher the kit and I cut the ends off one of the side-pieces and reversed them, using Araldite and “Milliput” to try to correct the catastrophe.

Not perfect for rivet-counters, and clearly likely to be a little fragile, but in the circumstances not too bad I thought. A little while later:


The next problem which I created for myself came when I tried to Araldite the sides onto the underframe. It wasn’t quite square when the glue set. Not good, but recoverable I thought. Araldite melts, or at any rate loses its grip, somewhere between 50 degrees Centigrade and boiling point, in my experience. So I waited until the household manager was out, and used her oven to heat the whole wagon up progressively towards 100 degrees, thinking to re-stick the sides. The sides weren’t too far out anyway – so I used rubber bands to maintain some of the square shape.

Catastrophe! The whole thing came apart, and the resin warped with temperature so much (the elastic band didn’t help I guess) that the sides were badly distorted and the ends nearly bent back on themselves! “Don’t try this at home, viewers”.
Much anguish and thought later, and fact that the manager was still away, allowed me to use the oven and a pair of surplus flat bathroom tiles to straighten out all four sides and ends, plus the distorted underframe.

So in the end, the appearance of 2116 could have been much much worse. The wagon was put back together but now I saw that one of the transfers was distorted anyway, so I decided to “weather” the wagon, and paint it to look like one of the planks had been replaced but not yet painted.

Good recovery, I think.