
Author Archives: admin
Gaia?? Where are we going ?? Does anyone really care ??
OK, did I get your attention?
The world is in an interesting place (“interesting” as in the Chinese curse: “May you live in interesting times”). Where do I see us as being, and where will we go, and why?
The first part is the current situation: all nations seem to be crawling back into their holes – fine for a nation such as Australia which could be self-sufficient if it chooses, less good for (physically) smaller nation-states dependent on trade, How long can this be sustained? A year? Six months, three months. one month? My guess is that after a month the fragile consensus with break down. What happens after that is dependent on what Imports/exports a government allows – and how much hypocrisy the electorate will forgive.
The second question is clearly dependent on the answer to Q1. Assuming that all (westernised) nations come to the same conclusion at the same time, international transfer of food and other goods will resume, although with greater precautions and checks than before, Transfer of people (and animals) will be significantly restricted, for ever, I suspect.
So, where does “Gaia” come into it? The Gaia hypothesis was proposed (I think) by James Lovelock. Basically it says that the Earth is a self-sustaining entity which alters conditions on Earth to sustain life (not human life, just life in the widest sense). Gaia is the Earth-goddess. So if “the Earth” needs to wipe out Homo Sapiens in order that Life-on-Earth survives, this will occur – through the coronavirus, or some other pathogen or event.
I can no-more believe in Gaia than I could in a Catholic “God” (vide recent events regarding “Archbishop” George Pell), however there can be no doubt that the environment will benefit from the reduction in human actvity – reduced intercontinental ‘plane flights, etc.
I do not think we will EVER return to the previous level of activity – transcontinental flights will forever be more difficult and expensive, the era of inexpensive world exploration is over, I am pretty sure. Overall, though, I suspect that the world be better for these changes.
Gaia, I see your power …
Midland D336 and another wagon
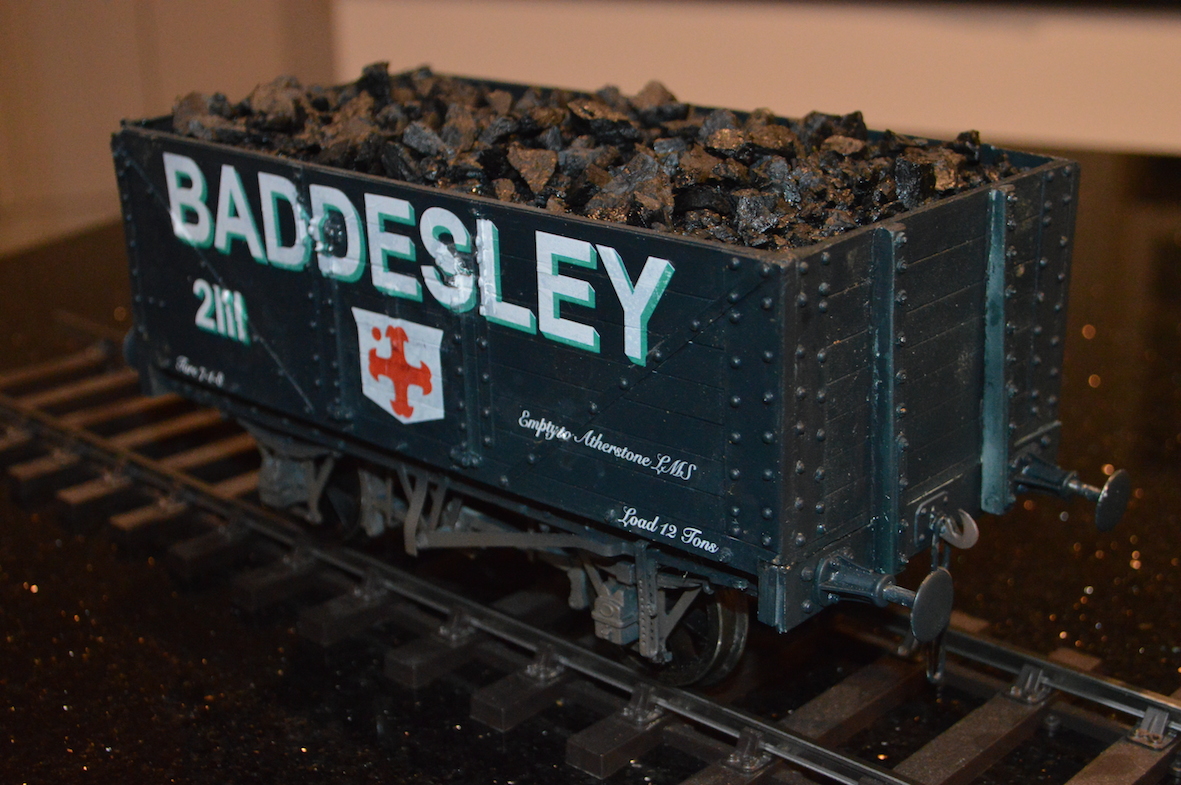
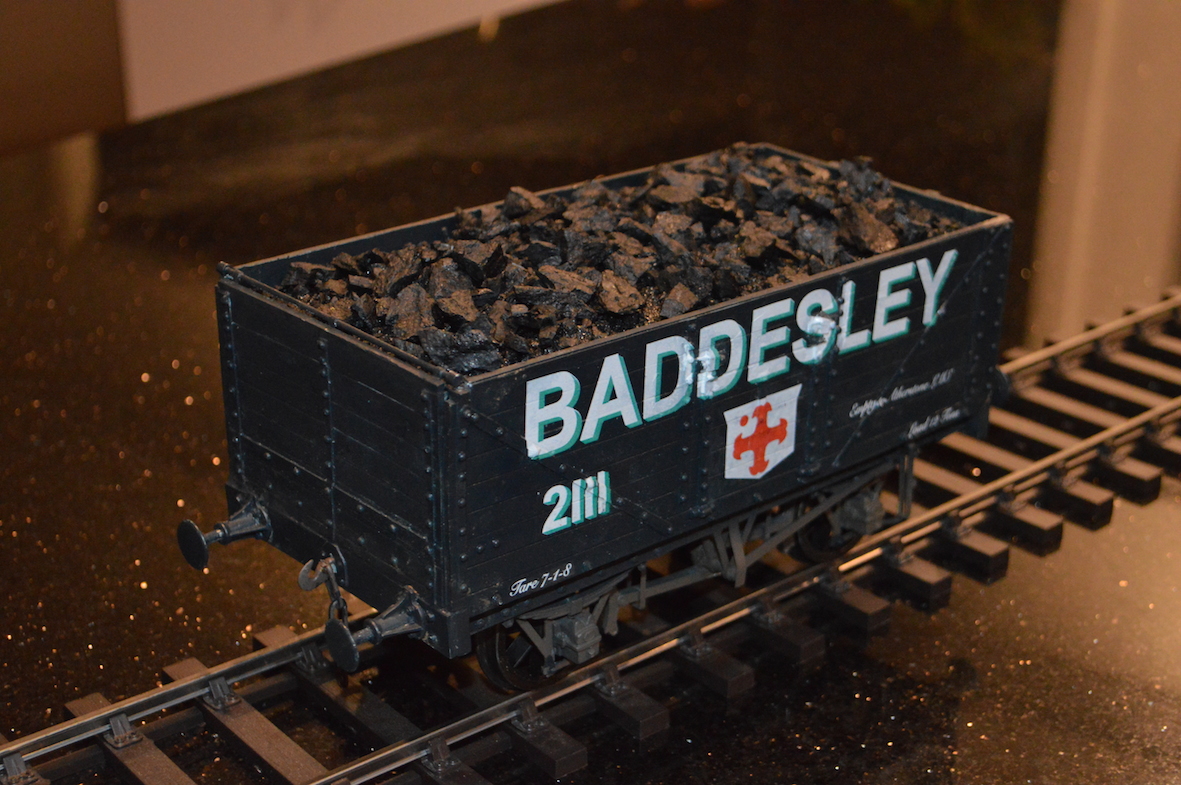
First the Other Wagon: this is in fact a Railway Clearing House 1923 coal wagon, and the main reasons for making this particular kit are firstly that it’s inexpensive, and also that these wagons can be colourful, and can be made in a design that is compatible with my favourite locomotive – an industrial Garratt 0-4-0+0-4-0, not that it is very likely that I will ever be able to make one in Gauge 3 [but see my previous entries about the one which I made in ScaleSeven (1:43.5 scale)].
![]() The difficulty was that no-one makes suitable transfers for the Baddesley Colliery. However in due course and with a lot of help from friends new and old I have been able to have suitable transfers made (!) – see http://www.westernthunder.co.uk/index.php?threads/baddesley-transfers.8434/
The difficulty was that no-one makes suitable transfers for the Baddesley Colliery. However in due course and with a lot of help from friends new and old I have been able to have suitable transfers made (!) – see http://www.westernthunder.co.uk/index.php?threads/baddesley-transfers.8434/
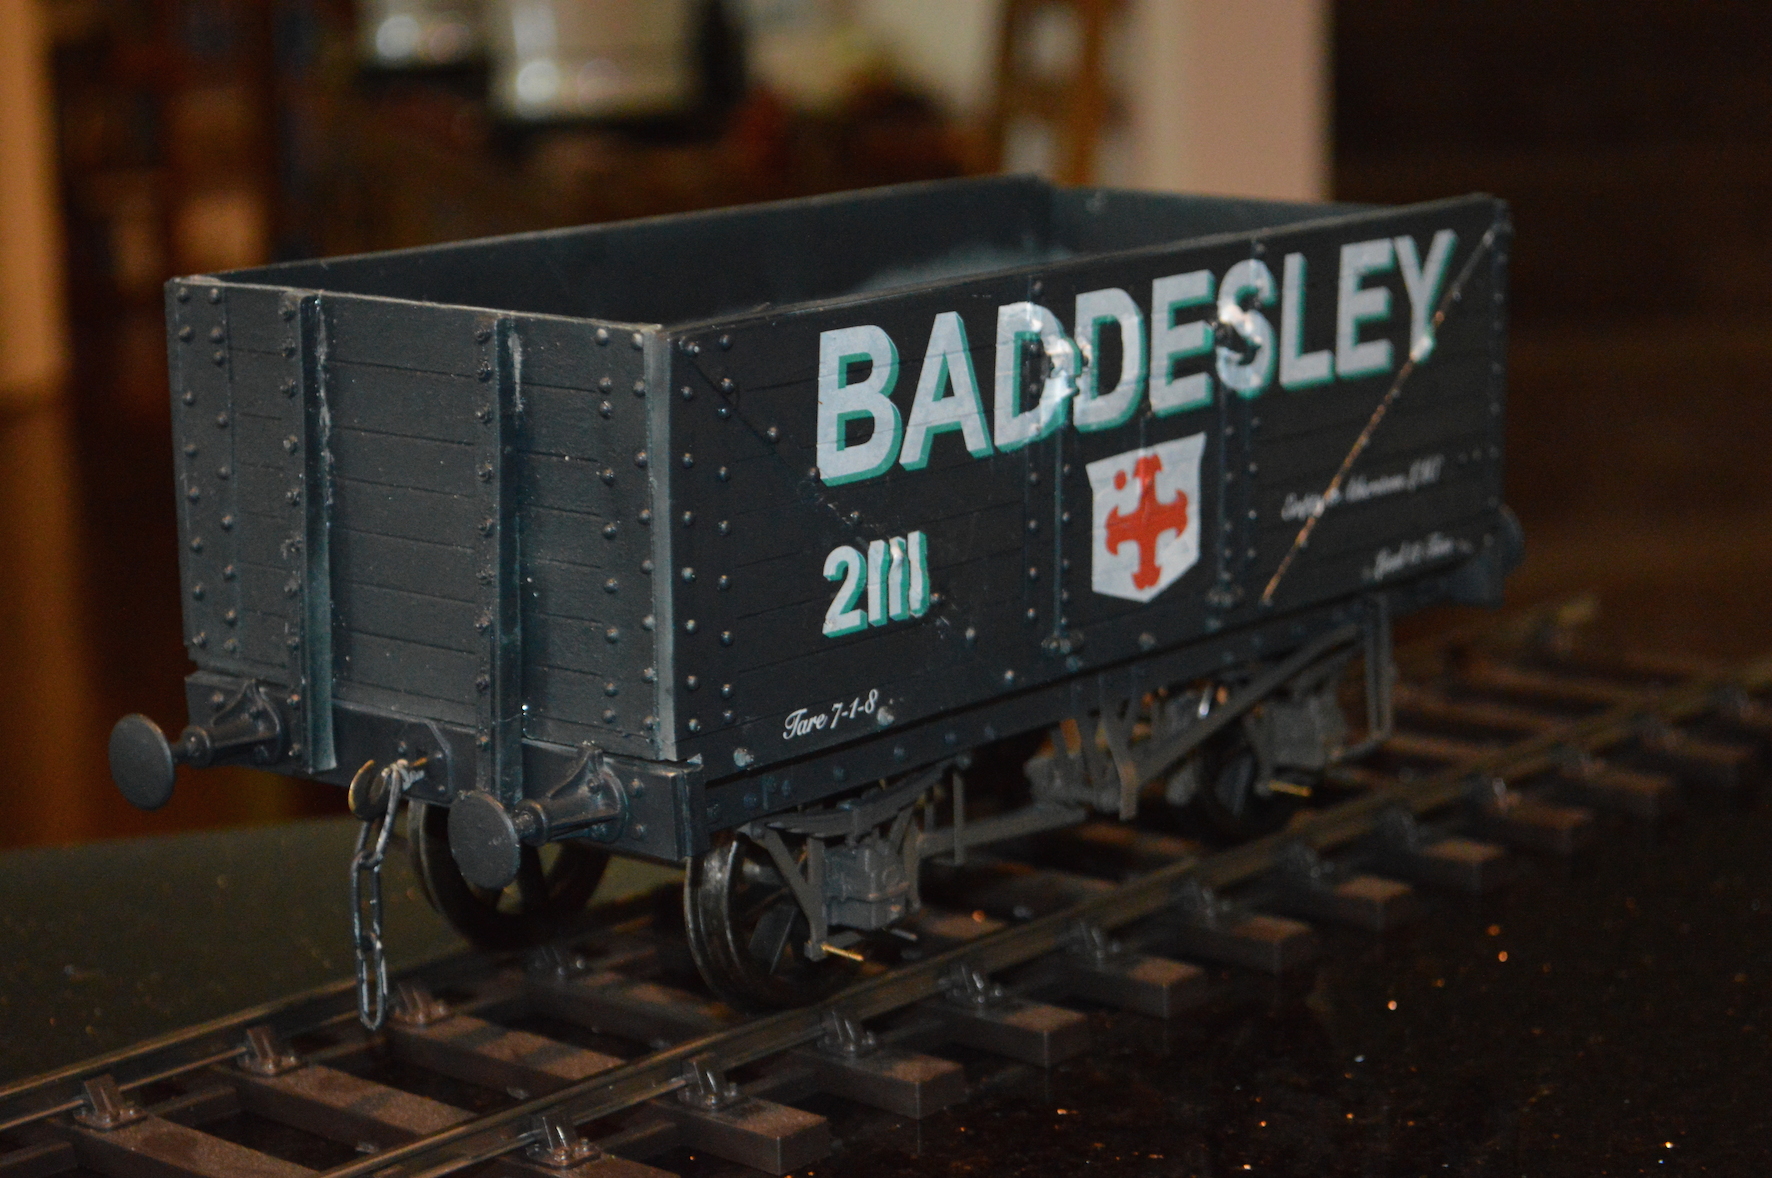
Here is the wagon as my model stands: it isn’t finished quite yet, but the colourful design on the black background is seen to advantage, I think.
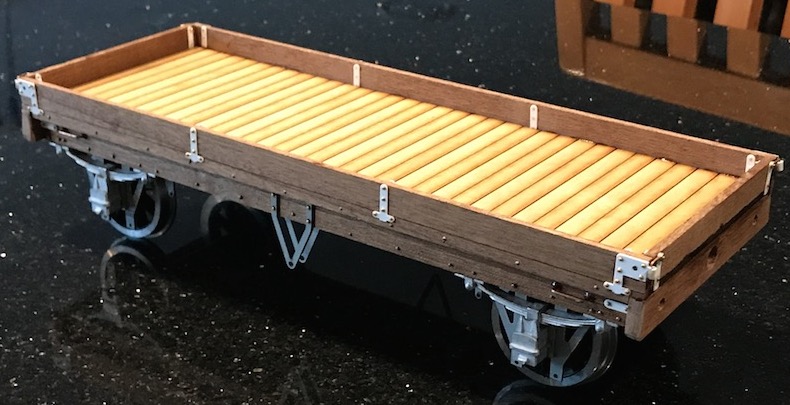
My other wagon-building project at present is the D336 flat wagon. This has progressed also.
I have had a little trouble with this, because I couldn’t see what the loops attached to the W-irons (the metal supports for the axle boxes) were for, and so {thinking they were for use on a different model sharing the same undergear} I cut them off !
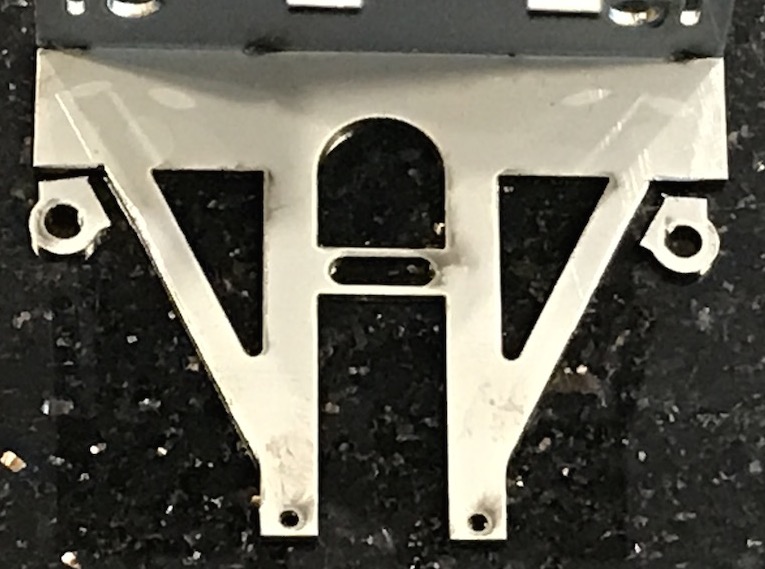 This was partly because the pictures I have of D336 real wagons don’t show anything like the loops on the W-irons.
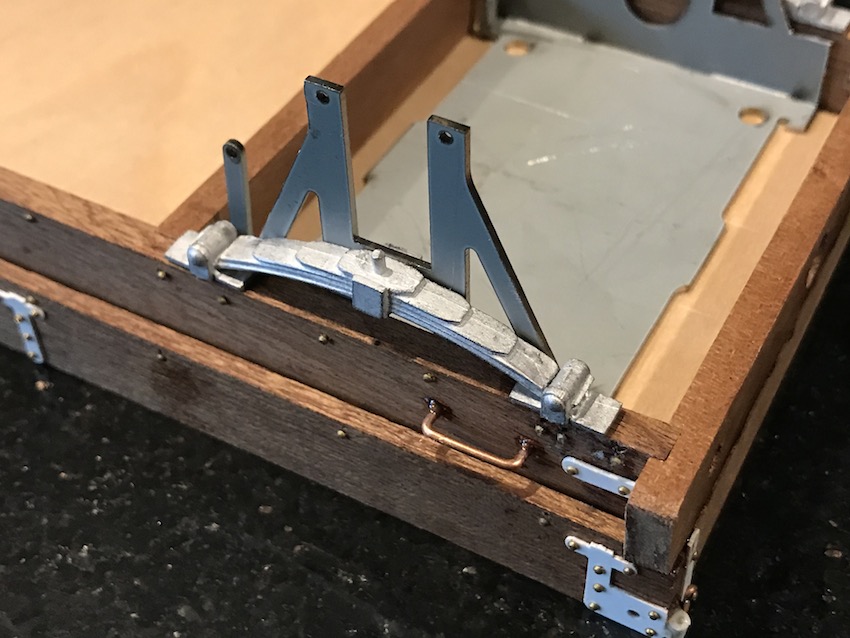
It turned out to be a mistake, as the whitemetal moulded representation of leaf springs were supposed to fit into the holes. However this didn’t matter – the leaf springs could be glued onto the sole bars perfectly satisfactorily.
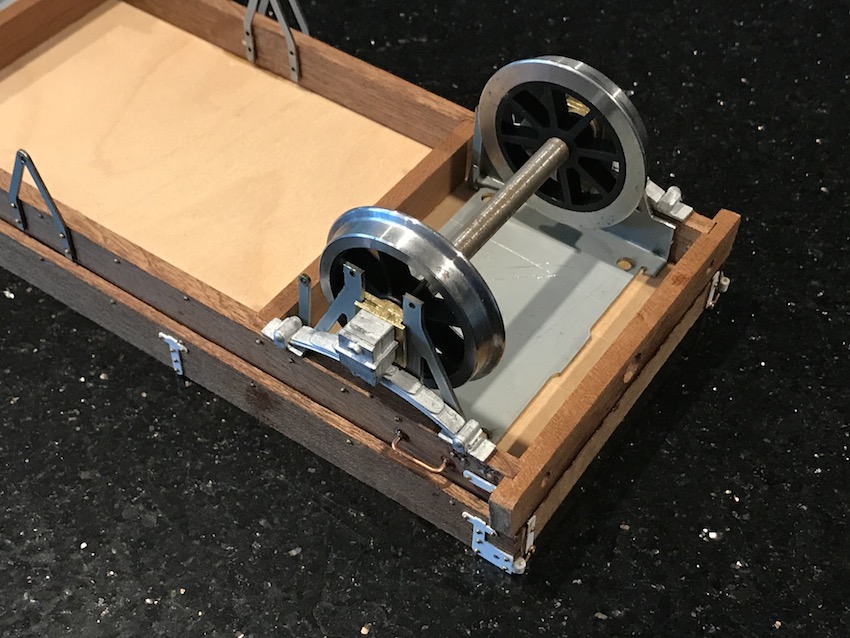 This shows the underneath of the wagon, with the W-irons, the leaf-springs, axle boxes and wheels in place,
Corona Virus
I’m not sure that I have an new insights, but perhaps a little personal perspective. Theoretically We will be on the front line – three doctors and a final year medical student (who may well be drafted in to help). Of these, most at risk will be Nicholas and Andrew, but also those least likely to have a severe manifestation of COVID-19.
I hope this is not a doomed prophecy, but none of us are likely to be severely affected or die. It is possible, but my reading of the literature and newspapers so far suggests that we would be extremely unlucky to die of this virus. Most who die are over 80 years old, over 70 with other significant diseases, or over 60 and immunosuppressed or with cancers.
In my opinion, though, this may be the first of many pandemics: the virus is, I believe, and product of viral evolution, in the same way as antibiotic-resistant bacteria are a product of natural selection. The coronavirus has evolved to defeat modern medical practices. For many years it has been known that the influenza virus mutates/evolves to produce new strains each year with different antigens exposed, which evade the immune response mounted by humans. We are always a year behind in our vaccinations. Now we have a series of viruses which behave a little like ‘flu: first came virus-based deadly diseases such as SARS and MERS – respiratory infections with systemic manifestations. They were deadly right from the start, and people catching them became seriously ill. We have defeated their threats with various public health measures and medical innovations. So the viruses evolve: the coronavirus has become a “sleeper” virus, with most cases going un-noticed (especially in children), but with some people severely affected, and some dying. Much more difficult for modern society to deal with and eliminate the risk.
Australia is not doing well. Between panic buying of toilet rolls (and COVID-19 doesn’t even produce diarrhoea), a government too slow to act, and one which spent much time deriding the financial measures used by the Labor Government in the GFC, but which are now universally agreed to be necessary, we are in a bad place. Between the drought, bush fires, Corona virus, and electing a Coalition government, we are in a bad way
Talking about toilet roll panic buying, a commentator on the radio that working from the average number of toilet rolls bought, a family of four isolated for a fortnight, using an average of eight sheets per visit, would have to go to do a poo 184 times per day, collectively, to use up their panic-bought supply.
Gauge 3 – good news and bad news
The bad news is to do with my steam-powered locomotive. I took it to my friend’s house to have its boiler “hydraulic test”, which it failed spectacularly. A hydraulic test is when you fill the boiler up with water, put it under pressure, and see if it leaks. I had high hopes of this, after all it had run on compressed air. My friend Warwick Allison clearly had high hopes also, but when we tried it, water leaked out all over the place – from the regulator fitting, from the front boiler plate, from the top of the backplate, possibly elsewhere. “I think it’s a ‘boiler off’ job”, said Warwick’s son-in-law (Andrew, who is a boiler inspector). When air leaks out, you cannot see it. When water comes out, it is very obvious!
Clearly a fairly major setback, but I always knew this could be a major undertaking.
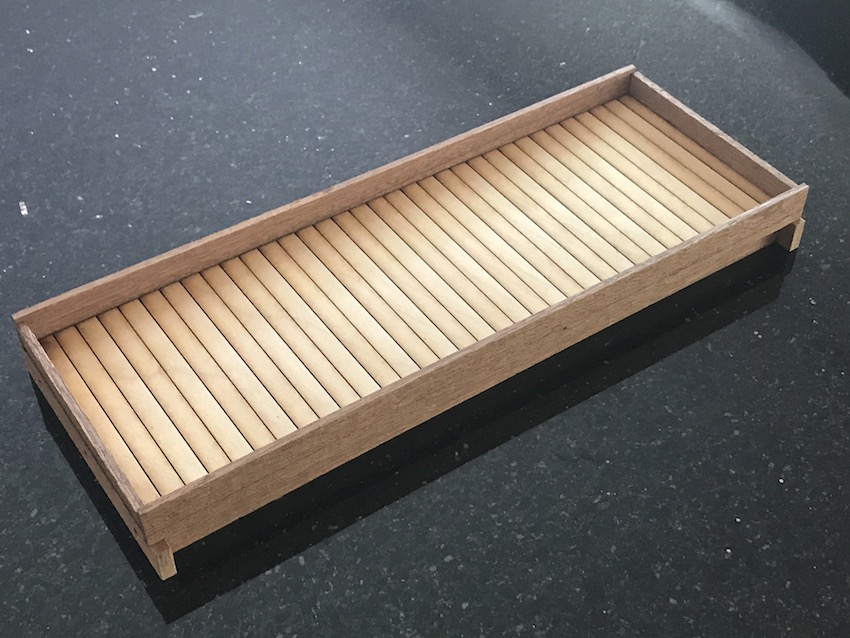
The good news is progress on a fourth G3 wagon. This is a long flat truck, and model of the Midland Railway D336 single-plank wagon, the kit coming from Peter Korzilius.
As you can see, the basic construction is out of wood – “mahogany stripwood” (a little ideologically unsound?) with a plywood floor.
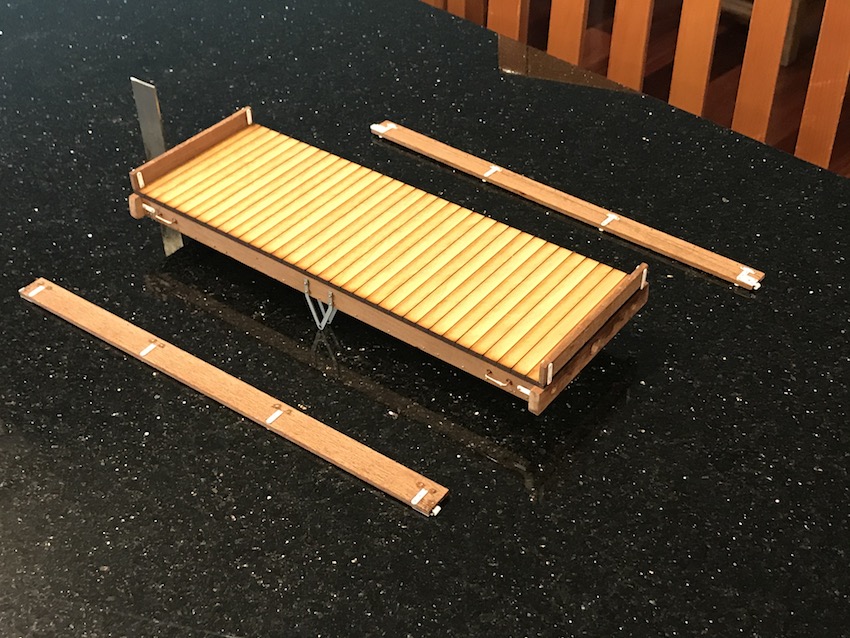
Reproduction of the metal framework is in styrene, with little brass rivets to represent, well, rivets.
This is also a very satisfying wagon to make, and I like working in wood.
The other good news is that the man in Victoria who has offered to make the transfers for my coal wagon has finished them. They were a bit difficult because of white lettering with green shading and a red cross design on a white shield, but the colourful nature of the wagon is its main attraction, so we will see if I can apply the transfers adequately once they have been posted to me.
Offsets for air travel
I have been feeling guilty for some time about my “carbon footprint”. I cycle to work when I can, and far more often than Sue would like). I catch the train when I can, I drive a Diesel powered small car, eat largely vegetarian, etc. However my travel to conferences and to visit friends abroad is not (by carbon emission standards) a good thing.
So I have been looking into what I could do to “compensate” for this. Buying “offsets” is not straightforward, as this website shows. https://www.ethicalconsumer.org/energy/short-guide-carbon-offsets
In fact the direct purchase of offsets is arguably a poor way to compensate for carbon emissions and it is better to send the funds to an environmental organisation such as The Red Cross, Friends of the Earth, Greenpeace, etc.
This also appears to be a good source of information: https://www.goldstandard.org
From <travelnav.com>, CO2 emissions are 3.6-9.7 tonnes (upper figure is with radiative forcing. Whatever that is. Return journey. Probably economy.
From <traveller.com.au>, though, the return figure is 16.8 tonnes!
The Choice* figure is 10.7 tonnes return, 20.1 Business class (why different?).
The <clevel.co.uk> return flight figures are 5.5, 16.1 tonnes (economy and business respectively)
So on average: 7.6 tonnes flying economy or 18.1 business.
* Choice is an Australian consumer organisation.
Buying offsets is not straightforward either. According to <choice.com.au>, depending on the type of project, offsetting a tonne of carbon can cost less than $10, while other projects can cost more than $50.
This may be a good place to start: https://www.tasmanenvironmental.com.au
One way or another, buying offsets as such is open to fraud, uncertainties and changing circumstances in future years ruining the investment (eg planting trees which later are cut down or are burnt). The Choice site recommends donating to a charity known for environmentally good projects (eg the Red Cross and their cooking stove replacement project inAfrica) or to environmental groups such as Friends of the Earth, or Greenpeace [largely on the grounds that these organisations are most likely to effect political change for the benefit of the environment].
The easiest way, though possibly less effective than more specifically targeted donations, is to give to “Gold Standard” <http:\\www.goldstandard.org>, which is a subdivision of the World Wildlife Fund.
Qantas seems to have the best airline-run offset scheme, but it isn’t well-supported.
(<https://www.choice.com.au/travel/on-holidays/airlines/articles/should-you-buy-carbon-offsets-for-flights#Why don’t people buy them?>)
Comparing CO2 emissions from different flight routes
Return flight and seat class Emissions per seat (CO2 equivalent)
Figures from ATMOSFAIR http://atmosfair.de/en/
Sydney to Brisbane, Economy 381kg
Perth to Melbourne, Economy 1346kg
Sydney to London via Abu Dhabi, Economy 10,700kg
Sydney to London via Abu Dhabi, Business 20,062kg
Driving a mid-range car for 12,000km 2000kg
From the Choice reference above:
You can calculate the amount of emissions attributable to your seat on a flight (in kg of CO2 equivalent) at Atmosfair, which will also sell you offsets. Compared to Qantas, Atmosfair attributes a much higher offset cost to a Sydney to London flight via Abu Dhabi of $177.67, indicating the discrepancy between calculations and offset programs.
It is also clear that travelling Business Class is 2-3 times as carbon-unfriendly as travelling economy, although I don’t know why. Yes, you have a larger luggage allowance and can eat off crockery rather than paper plates, but that doesn’t seen enough to account for the difference. If weight were the difference, surely the offset amount should also depend on just how much you weigh!
It is never straightforward or easy. Personally I am thinking of donating 10 tonnes x $30 if I fly economy or 20 tonnes x $30 if I fly business to the environmental charity of my choice at the time.
Gauge 3 Woodbury Midland Railway D302 wagon finished
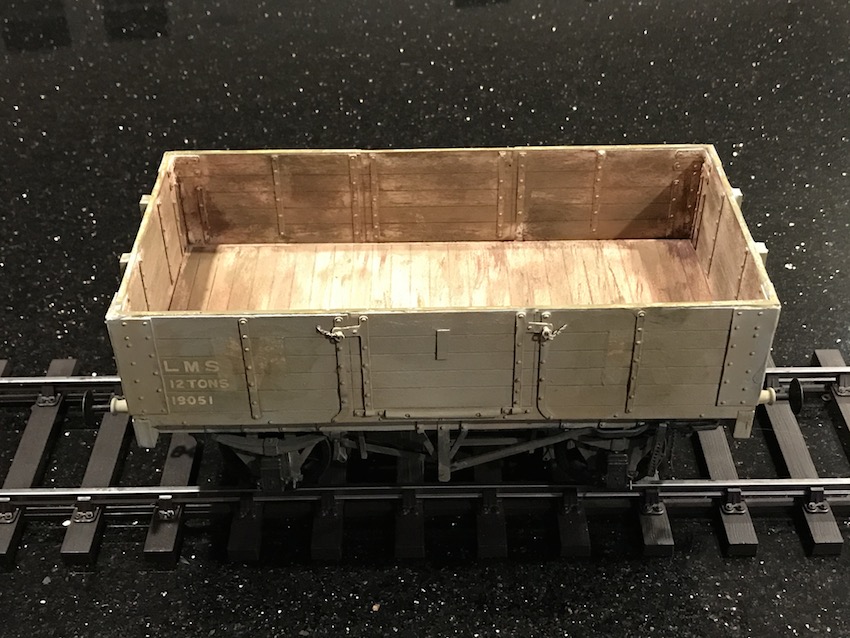
It’s finished!
Finally my model of a Midland Railway D302 5-plank open wagon is complete
Painted to look realistically dirty.

I’m pleased with the weathered look. I have painted it to look like a wagon in the early LMS days (London Midland and Scottish Railway), with the old Midland lettering visible through the paint as it “wears away”. So the LMS letters look just a little dirty, the M and the R are only just visible.
Protected: Someone is travelling in Europe – Update #9 – Manchester
Protected: Someone is travelling in Europe – Update #8 – London
Back to the Gauge 3 Woodbury wagon
Back to the Gauge 3 Woodbury wagon, a model of the Midland Railway diagram D302 5-plank “open wagon”.
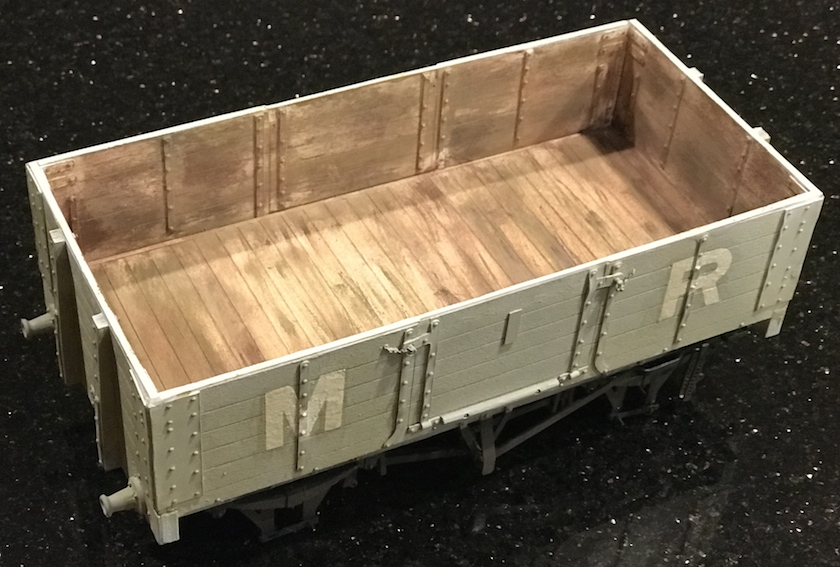
I have now put the (initial) topcoat on – a representation of Midland Railway wagon grey, with black underframe gear. Although it is gong to be a later era wagon (London Midland and Scottish Railway years), I am putting some Midland Railway lettering on it. My intention is then to paint over it, “weather” it, and finish it in LMS colours and script.
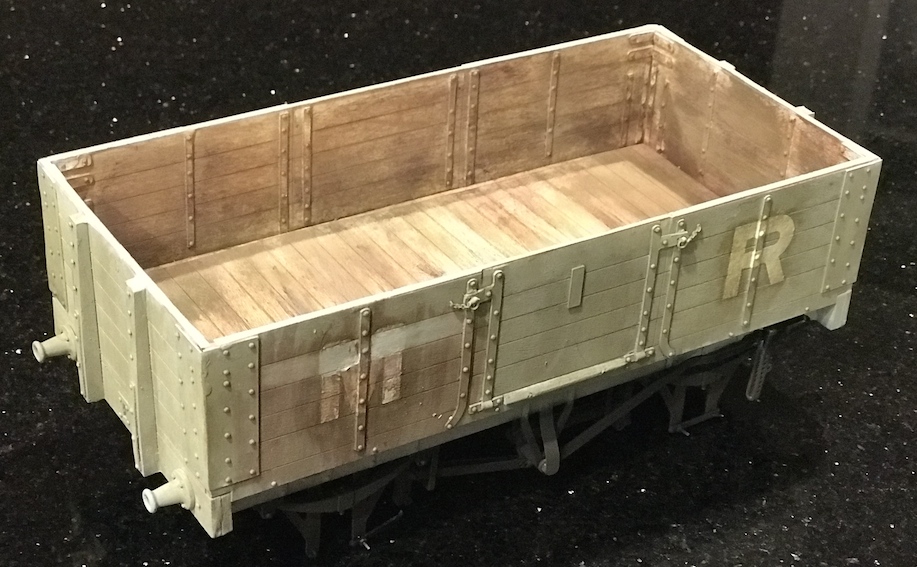 So here it is with MR insignia, some weathering, and with the inside painted to resemble wood. This being Gauge 3, the transfers (“decals”)a re difficult to apply over the lumpy details on the sides without either of both of cracks in the transfers and “tenting” of the transfers over the raised detail molding.
It might be better if I could paint the lettering on, but I am simply not capable of that! On the second view it is possible to see where I am preparing to paint a replaced plank – in unpainted wood finish.