Gauge 3 Woodbury wagon and another

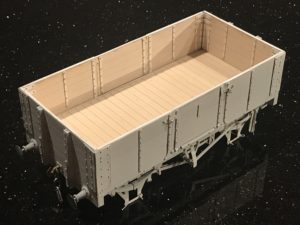
I’ve painted the wagon in undercoat and then a topcoat of what I thought would be a good representation of the Midland Wagon Grey, but it looks too light/pale to me.  The answer might be to put on the MR transfers (white) and then “weather” it to a darker colour.  I’m not sure.

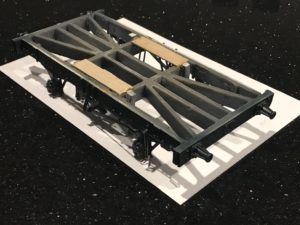
Here it is, without the wheels or buffer heads.  The inside needs to be made a realistic wood finish also.

Meanwhile, I have started another wagon!  This time it is a Williams models “Flexi Kit”.  These are an “economical” type of model, which Mike Williams is a little hesitant to sell, actually – he thinks they are lacking the detail of other kits, and though less expensive are not (in his view) good value.  There is no internal detail, and no floor inside the wagon.  However for coal wagons (which this is a model of) filled with coal, these features would not be visible anyway.  So if I make a model load (with real coal incidentally), the lack of internal detail will become irrelevant!

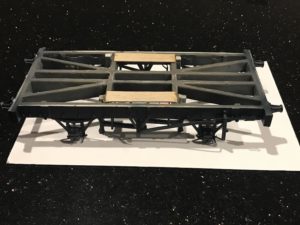
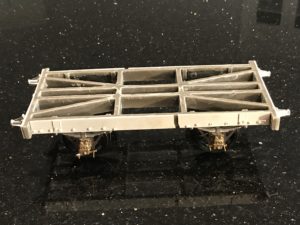
The way it is constructed is very different, as you can see.  The first part is to put the “W-irons” (the bits holding the axleboxes) onto the underframe.

The underframe has NO detail, and this is added by glue-ing detail facings onto the frame – which you can see in the picture.  I think the resin mouldings of the facings must have shrunk when moulded – they are too short by a couple of millimetres.  Fortunately there are no details in the central portion, so I could simply put a cut into the facing and line up the detail (bolt-heads for the W-irons) and then fill in the central cut with Milliput filler, later.

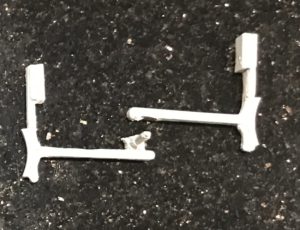
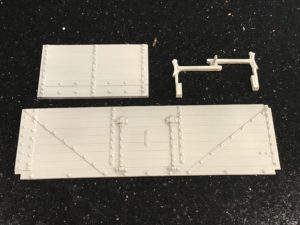
The brake gear is much less complex to put together – it is a single resin moulding, seen here in the top of the picture.

Mike is correct in that it looks crude when first seen.  However with care I think the wagon can be made to look good.


It’s interesting to start the wagon from the bottom and work up, whilst my previous wagons I have built the bodywork first and added the W-irons, wheels and brake-gear later.  The details on the mouldings look OK, so with care I suspect a perfectly acceptable wagon will emerge.  

We will see.  Click on pics. to enlarge.

Gauge 3 Woodbury wagon update

On the wagon front, we have progress as the pictures will show.

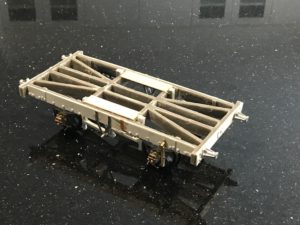
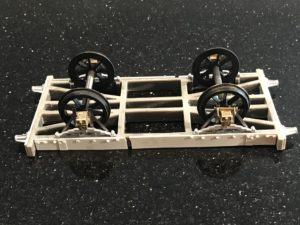
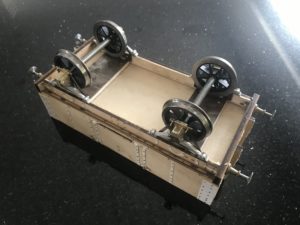
First is the assemblage with wheels.

Importantly the suspension works, the wheels are at the correct height – shown by the buffers matching up with my other wagon.


So it is starting to look the part.


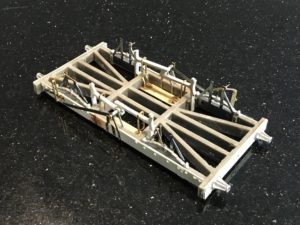
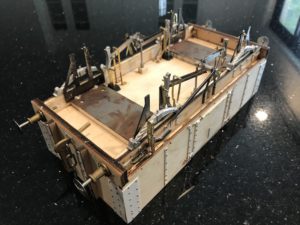
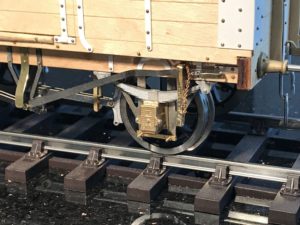
Next is to add all the gear under the solebars: mostly the leaf springs and the brake gear.  This is a picture taken after I have removed the wheels in order to paint the gear.


There are some other items to add, though: the brake lever racks, together with the chains which I have added, with the pins used to “pin down the brakes” as the old locomotive men used to have to do (by hand, down the whole train!) before taking a train of these wagons down a steep hill.

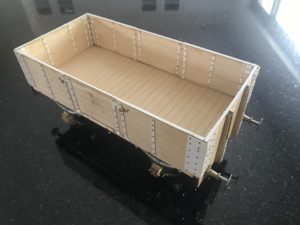
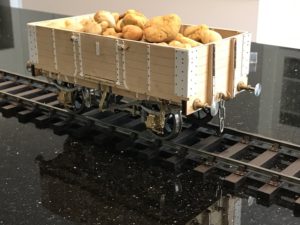
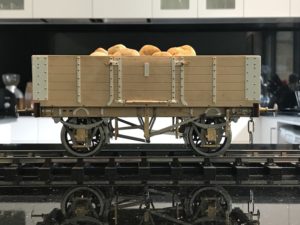
The following pictures are of the largely completed wagon, prior to painting.  I will admit that the load is not “to scale” (merely stones from the garden) but they hold the suspension compressed and so at the correct height.

.

.


Click to enlarge, as always.

Gauge 3 locomotive

I have ‘blogged about this before but last weekend I took my locomotive to see an expert, and the results were good.

IMG_2061

[click on the link toy watch]

At first this Wawrick Allison was very uncertain about it, but as time went by he seemed more confident that it was OK, and so connected the locomotive up to compressed air, and made it go, as you can see from the video.  Complete with whistle!

This was quite a “moment” for me – after all it suggests that I didn’t waste $2.5k on scrap brass and steel!  There is still quite a lot of work to do, but it was a very good moment.

More developments on the wagon-building front, by the way, see below.

You can see from the link which I have posted, I had to have some assistance building my Woodbury Midland wagon.

http://www.westernthunder.co.uk/index.php?threads/information-and-help-please.8158/

I hadn’t found a scale drawing of the prototype to use. The wagon it quite wide (101mm = 7 foot 6 inch inside width at the top). I purchased a set of Mike Williams W-irons to do the stuff not provided by Woodbury, but these W-irons (which need to be up against the solebars if the leaf-springs are to be in line with the axle boxes), don’t allow the solebars to be just inside the side-pieces of the wagon sides. Yet this seems to be the pattern of most wagons. So, should the solebars be a few millimetres inside the wagon sides, or should I have the W-irons further apart, and up against the solebars in what seems to be the characteristic position of solebars looking at drawings of other wagons on the midland railway society website?
Also the Williams leafsprings mounted on the underneath of the solebars leave no movement for the axle boxes up and down in the W-irons. So should the W-irons be packed with something so that the axle boxes are held down lower, giving more room for up-and-down sprung movement?

RESOLUTION.  After asking on “Western Thunder”, I bought some balsa wood to thicken the sole bars, and 2mm thickness of balsa to lower the W-irons to the correct position.

These pictures show the progress.


Tasmania – Cradle Mountain

Last week we went to Tasmania.  Nick had never been there, and in a week off he wanted to go walking in the Cradle Mountain area.  His girlfriend was working and so Sue and I were able to take advantage of his organisational ability: he booked the flights to Hobart, the car hire and the accommodation!  All we had to do was turn up.

This is the sort of scenery we could anticipate

The Cradle Mountain Nation Park is a wonderful area: beautiful scenery, very few people, wonderful food available.

Even the wildlife is easy to find and see.  As you can tell, the wombats are not afraid of humans – somewhat to their detriment as there are many seen dead by the roadside.

Actually the park authorities do well to protect them.  Although cars are not prohibited, there is a free bus service to and from Dove Lake, and the cars cost extra to get into the park, so many people leave them at the park entrance.

We hoped to get to the summit of Cradle Mountain (although both Sue and I have been there before).

It is a very tough climb, especially the last section.

There are well-constructed boardwalks over much of the trails, to minimise tourist- mediated erosion.


Nick gave an excellent lesson to me in how good it is to be tall – he could reach relatively easily from one enormous boulder to the next, whereas for me it was a real struggle.

Sue had to wait for us about 80% of the way up, above the snow-line (it had snowed the previous weekend).


This is us on the way down, and Nick throwing a snowball!


Overall Tasmania was just wonderful – clean environment, beautiful country, wonderful walks and lovely food: we had no less than three memorable degustation-style meals whilst we were there.


[double-click on any image to enlarge]