The house is coming along well. I’m still Impressed with front circular window, but the front entrance is now becoming clearer and more prominent.
As the scaffolding comes down the entranceway becomes more visible.
It is not going to be small, or easily missed! I had always wanted to live in a sandstone house, and the designer and builder are “doing us proud”: the two-level from entrance will be an impressive feature of the building by the looks of it now.
One of the odd things, if you look, is that the “bargeboards” (the front panels just underneath the roof edge) and the guttering are being put in place even though the roof tiles haven’t yet arrived, let alone been put in place.
This weekend we have been having to decide about electricals: we have had to decide on the location of 40 different site for electrical sockets, and the locations of no less than 110 different lights! We have also been having to decide upon the house alarm. Whilst this has never been an issue in our current house, in Glenbrook we will have to have a state-of-the-art house alarm. Fortunately one of our friends is an expert in this industry, so we are able to use his expertise to get an up-to-date system, wireless, linked to the ‘net, etc.
In reality, it all sounds horribly expensive to me, and I have little doubt that it will be. Still, out “Grand Design” was never going to be a cheap or cut-price project.
Whilst Sue and I were away in Europe, there was significant progress on our house in Glenbrook.
We returned to find that the round window above our garage – at the front of the utility room, had been largely finished, with the stonework around it done.
It looks magnificent.
As the house progresses, it becomes ever-more impressive. The round window at the front is going to be especially impressive, I believe.
I hadn’t realised that this was going to be done, so it was a very pleasant surprise.
Mark and John have had their say(s), and so must we.
Madrid is seriously impressive: a modern city with excellent transport (both within the city and to nearby locations also), yet with wonderful historic buildings and outstanding art galleries and museums. Of the latter, neither of my brothers mentioned the Museum of Archaeology [Yes I did! Read the first of my three Madrid blogs again – M], yet to my mind this was a standout – very good displays and interactive pieces (the first time I have used a “Virtual Reality” headset for instance), with excellent video presentations – in English or Spanish.Yet look at the above – the sign hung on the town hall. One of the most impressive features is the tolerance. For what was a left-behind European country under a repressive (Franco) regime, Spain has come a long way, and puts others (e.g. England) to shame. Gay couples are evident and open. Catholicism may be mainstream, but Islam is commonplace, Judaism well established and accepted, and one of the buildings we visited was a synagogue constructed by islam builders during a period of Catholic monarchy.
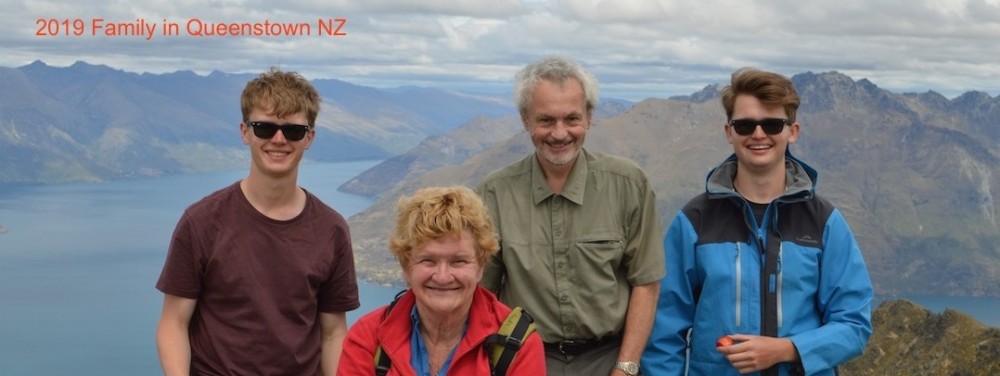
For the two of us the major joy of the holiday was spending time with friends.
Here we are: left-to-right are David, Amaryllis, John, Mark, David, Pauline, Sue and David.
The scene is in a restaurant, with us all drinking Manzanilla sherry. It was an excellent meal, as many were in Madrid.
I hope that this proves to be the first of many such holidays …..
There have been times when I have wondered why we are doing this, but just now I can see all the reasons. Sometimes it has seemed like an enormous indulgence, to buy a serviceable house, knock it down, and build another house of a very similar size. Of course it is also a hugely expensive exercise, and some would regard it as a colossal waste of money. Last weekend we all had a look around the building site, and no lingering doubts can remain: it is going to be a magnificent building, and worth every cent to us!
This is the view from the front gate (or where the front gate was, to the old house, ours will be at the other end of the front boundary).
The outline of the house is now easier to see.
Nick, Andrew and I were able to climb up a builders’ ladder and walk about on the upper level (safe because the floors are there already), and all the framework makes it look like an enormous angular bird’s nest (the nest is angular, not the bird ….).
Here the quoins are visible – the corner pieces have flatter surfaces as you can see.
Here is the front yard.
The whole thing is much easier to visualise now, with a lovely front entrance coming into shape, the “utility room” over the garage, the large master bedroom and huge living area, the lovely bedrooms with their views over th road to the park.
It has become quite exciting now, a more concrete project (literally and metaphorically) developing in front of our eyes. Suddenly it doesn’t seem such a mad idea after all.
We have been away for the weekend to the Hunter Valley.
This represents some of the dichotomy I find in my life in Australia (is that the right word, Mark?): I love the Australian way of life, the culture, the society, the opportunities. Yet I miss some of my memories of the atmosphere of events in England – string quartets playing Schubert in stately homes, elegant gourmet occasions in beautiful surroundings, like our wonderful meal the first time we went to l’Enclume restaurant in Carmel,a few years ago – see my entry dated 24th August 2013).
Perhaps such occasions/opportunities are to be found in Australia, it is just that they are fewer and further between.
Margan Winery is a Hunter Valley business producing absolutely world-class Chardonnay and other varieties. Even that sentence alone shows some of the difference between “New World” wines and the traditional producers from France (and to a lesser extent Italy, Spain, etc.). Here in the New World of wines, they are known by the grape varieties,rather than the “terroir” – the area where they are grown. It is much more straightforward and easy to understand. Anyway once a year the winery has a “launch” of their premier wines, with a lunchtime event to celebrate the latest “vintage” – vintage being the time when the grapes are harvested.
The Hunter Valley is a lovely area of NSW. It was the first area away from Botany Bay to be occupied by the white settlers, and they named the settlement after a coal producing area of England – Newcastle. Even to this day the coal mines compete with the local farmers and vine-growers for influence over planning decisions.
The southern and eastern area of the valley (where we were) is very much wine country, though.
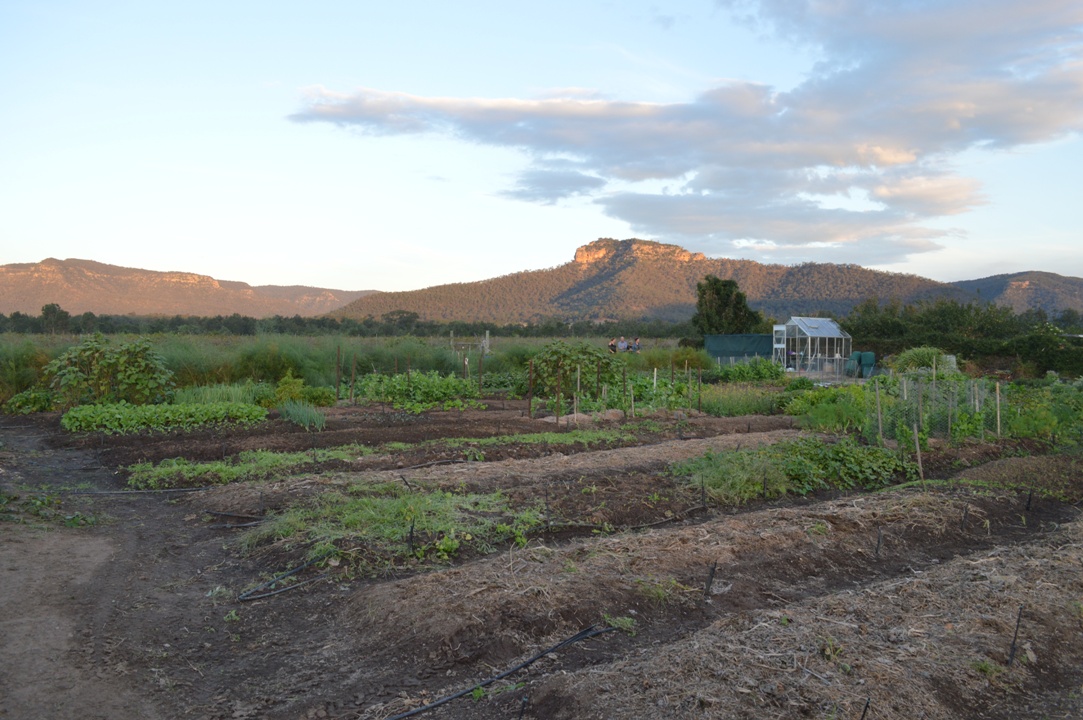
We stayed with some friends at a local rented property.
It had a truly lovely outlook, as seen here.
From this house it was short drive to the winery, where we met with a crowd (150?) of like-minded people.
Margan grow their own market-gardening produce as well as the grapes. How on earth do they stop the local wildlife from eating it all, I wonder?
The food was excellent, and wines a good match….
Sue and I had a very good weekend away from our work, and were forced to buy lots of bottles of fine wine from Margan
As more sandstone arrives at the site of our new house, a few reflections on it in general.
As you can see, the sandstone comes in multiple different colours, or perhaps just multiple shades of brown, from nearly white to very deep brown.
This was one of the choices we had to make at the quarry: any colour? Dark? Light? In the end we asked for anything except the really dark-coloured blocks.
A lot more arrived today.
The decisions aren’t just about colour, though. We also had to decide upon the face (“rock face”, or “Hydrosplit”) and whether we had “Quoins”, which are the corner pieces. If you have these (as we will have) they are the corner pieces which stand out a little, alternating short and long sides as you go up or down the corners.
These are the quoins, waiting to be used.
The walls have just begun to go up, and Michael Edwards is worried about how much we like the sandstone.
We are actually very happy with it.
Here is the first view that we will get about what the house will look like when we finally move in.
I realise that the model railway which I have built in our cellar is almost entirely only for my own amusement and satisfaction. I had originally aimed that our two sons would develop an interest in models, railways in particular (though I also tried cars, boats and a hovercraft). They being Australian boys, though, their interests turned to outdoor games. Actually, in the long term this is almost certainly much better of course: both Andrew and Nick still play hockey/cricket/football. On the other hand, the only other person whom I know to be an interested reader about my models is brother John, so this page is dedicated to him. John has been kind enough to appear enthusiastic about my achievements, and although he only actually sees my railway once every few years (when he visits Australia), he has maintained an interest. A modeller-by-proxy, perhaps?
Mark outlined on his page the origins of the family interest in railways, and I will write a little about model railways. When Mark and I were small, our Dad bought us railway engines for “00” gauge, and I can remember installing a floor in our attic of the house in Woolton, Liverpool, which was largely done so that we could have an “00”-gauge railway up there. Such a railway was built, and we spent many hours up there subsequently. There were echos of this thirty years later when I paved our cellar in Mount Riverview NSW for very similar reasons. Mark (and Dad, I think) were mostly interested in simply seeing the trains run around, with lovely rolling stock (engines, wagons and coaches), timetables and operating schedules. I, however, was always more interested in the details of the models and the scenery/surroundings. I was later bought a smaller scale as my own railway in 3mm-to-the-foot or “TT” scale. John was later started in 2mm or “N” scale.
My interest in detailed model construction led to the construction of model locomotives in “00” scale/gauge, but this proved conceptually unsatisfactory because for obscure commercial reasons the manufacturers of ready-to-run models had created this anomaly: 4mm scale on 16.5mm track: the wrong scale:gauge combination – in 4mm the gauge should be 18.95mm. Originally the 16.5mm gauge track was made for “H0” scale (3.5mm), which is correct. “H0” in half “0-gauge”, you see. I hated the idea of spending hours making a model when I knew that the gauge would be all wrong …
That, combined with the greater detail available in 7mm scale led me to want to build in 0-gauge. Moving to Australia, and having two boys as children, gave me the excuse to get going. So I paved the cellar, and set off in 7mm scale, 32mm gauge. I laid a 4m circle of track on shelves in the cellar. My protestations that my 0-gauge railway was built for the small boys’ benefit was rather undermined by Sue seeing the sticker on the outside of one of the model kits, saying “This is a scale model, not suitable for children under the age of 14” !!! Anyway, I persisted, but has any reader noticed the problem? It took me a rather embarrassing length of time to realise, but the scale:gauge combination is still wrong and the gauge should be 33mm !!!!
33mm gauge/7mm scale is called ScaleSeven. I joined the Scale Seven Society (membership about 300 people, worldwide), took up all of the 32mm gauge circuit and rebuilt it in 33mm gauge, then re-gauged three locomotives and about half-a-dozen wagons. I deny being at all autistic, just seriously obsessive, and it had to be right. These video pictures are of the model railway which I have built since.
Here is a sequence showing the locomotive going through the coalyard of my model colliery. The train is going unrealistically fast in scale speed, of course.
I have just added three more coal trucks to the fleet, and had an interesting experience yesterday as I tried to have the train to twelve coal trucks pulled around the circuit by my model Peckett 0-4-0 saddle tank (actually originally built by my father and John, for Nick, since repainted by me. My layout has a hill on it (not all railways are perfectly flat …..) and the Peckett could not pull the train up the hill:
As you see, wheelslip occurred and the train ground to a halt. Clearly a more powerful locomotive was required. As several real colliery owners did in the UK in the 20th century, I turned to a Garratt articulated locomotive:
My model Garratt has two motors, just like the original articulated locomotives did, and the greater power available means that the gradient was easily conquered.
There is a scenic section on my model railway, also, and the final video shows this:
The weather here has been lovely, although after the rain this rather beautiful fungus has grown on one of our bottlebrush trees.
Building seems finally to be getting under way properly.
The frames for the downstairs area are going up, and some of the steel beams have been erected.
The frames for the upper storey have arrived also, and have been stored above the garage, as seen here!
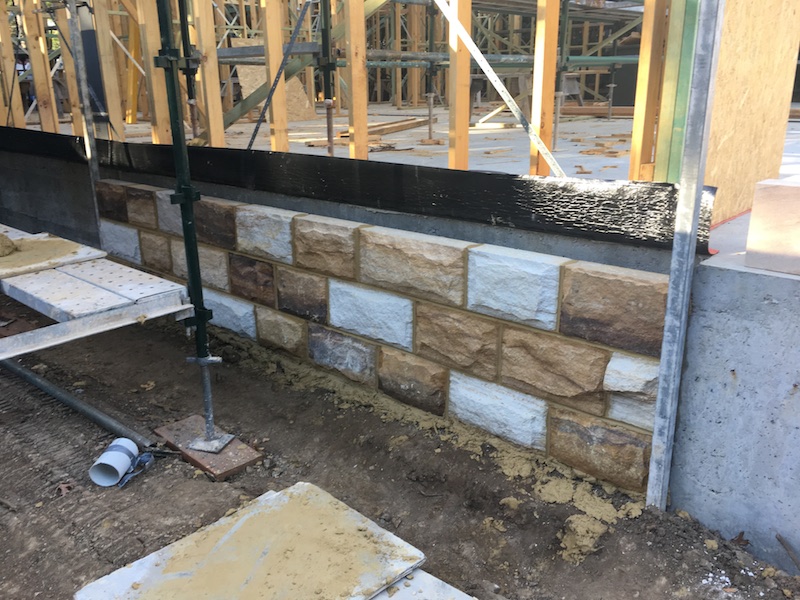
Then earlier this week the sandstone has begun to arrive. I must say that I hadn’t realised that buying sandstone would be so complicated: what colour do you want (well, sandstone coloured ….?); do you want “rock face” or “hydrasplit”; are you having quoins? Quoins are the corner pieces, usually alternate directions long and short sides, standing out a little from the main stonework with smooth faces. Hydrasplit means that five of the sides of each block are smoothed to help construction, but the sixth is left rough. All six sides can be smoothed of course, but we felt building that way you might as well use concrete …. Rock face means that each edge of the stone is split back to give an even edge.
The main stonework is shown here, with the rock face visible, and the different colours that the bricks will be. There are also some pinker parts, but I couldn’t find a good piece not covered in plastic to take a picture of.
Here are some of the quoins.
There is quite a lot of scaffolding around the house now, ready for the stones to be made into walls, I suppose.
It isn’t weathered yet, and there is no coal in the tender, but fundamentally it’s done. The final parts were fitting the cab doors, the coupling hooks and cab glass. Also I needed to stop the electrical shorting from the pony-truck wheels (the swinging small wheels at the front of the locomotive) to the front footsteps. This was achieved quite easily simply by putting little blobs of epoxy resign on the inside of the steps.
After this, testing on my reverse-curved test tracks showed really pleasing results – even running slowly it now seems to run smoothly.
Slow running is actually more important and more impressive, if you ask me [sorry about the music in the background, by the way].
Next will be either fitting Digital Command Control, or starting on the weathering.