Stanier 8F in ScaleSeven – part 23: sanding gear

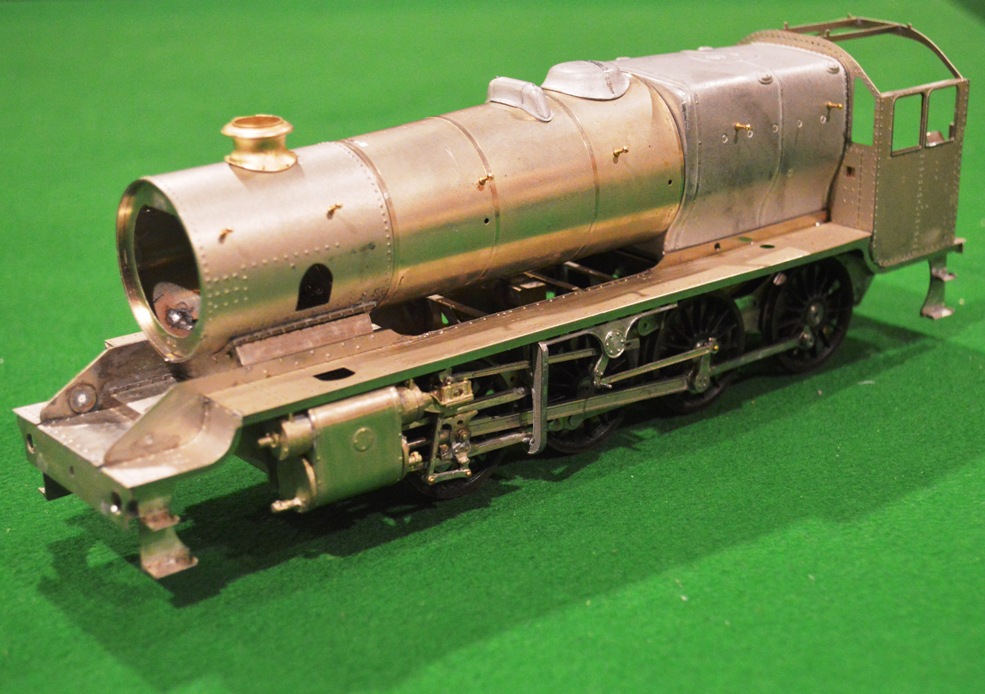
We are getting to the final stages of construction now.

The details is being added to the body and the frames.  I have added much of the detail, provided by the kit manufacturer, to the body itself.  This is about adding the sanding gear.  On the prototype, this is the equipment aimed to spray sand in-between the rails and the driving wheels to improve adhesion in slippery conditions.  There are three sandboxes, with tubes going out of them down to just in front of the leading driving wheel, and both in front of and behind the third driving wheel.

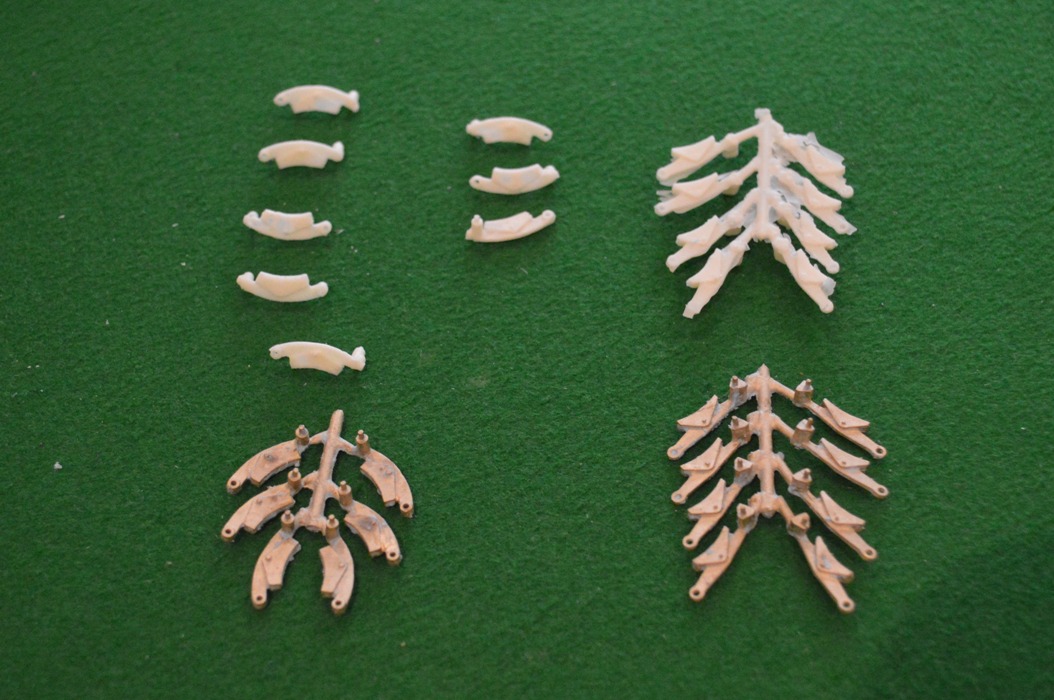
In this kit there are brass castings of all three sandboxes, even though two of them are inside the frames.  The outside one goes to behind the third driving wheel and has an additional mechanism (I don”t know what function it has) beneath the sandbox itself.  The sand-delivery tubes are represented by 0.8mm nickel-silver wire bent to shape, and I made support brackets from thin strips of scrap n/s with 0.8mm holes bored in the ends, twisted and bent to shape.

small-sanding-gear-01


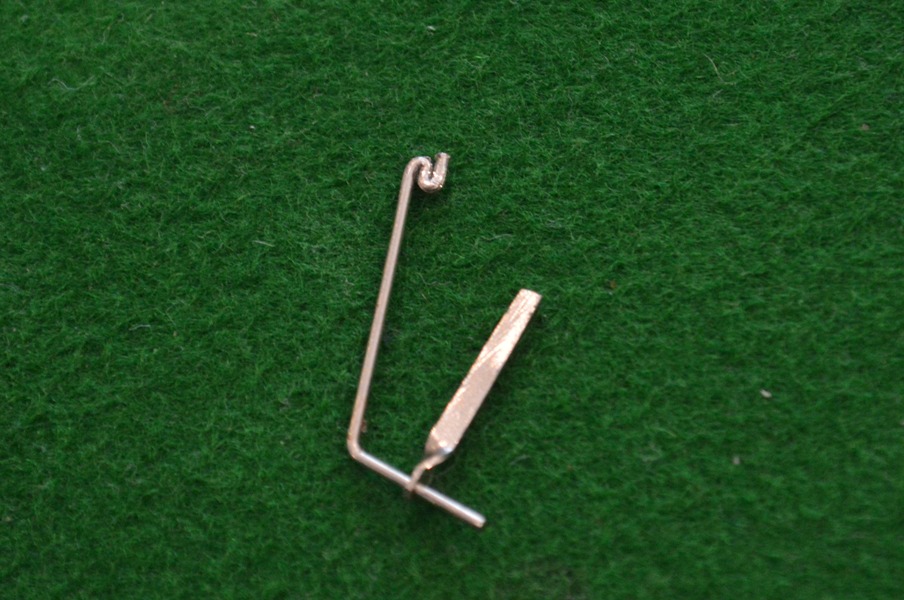
Here is the one for the outside sandbox, with a folded-up section of wire to represent the additional mechanism.


small-sanding-gear-03


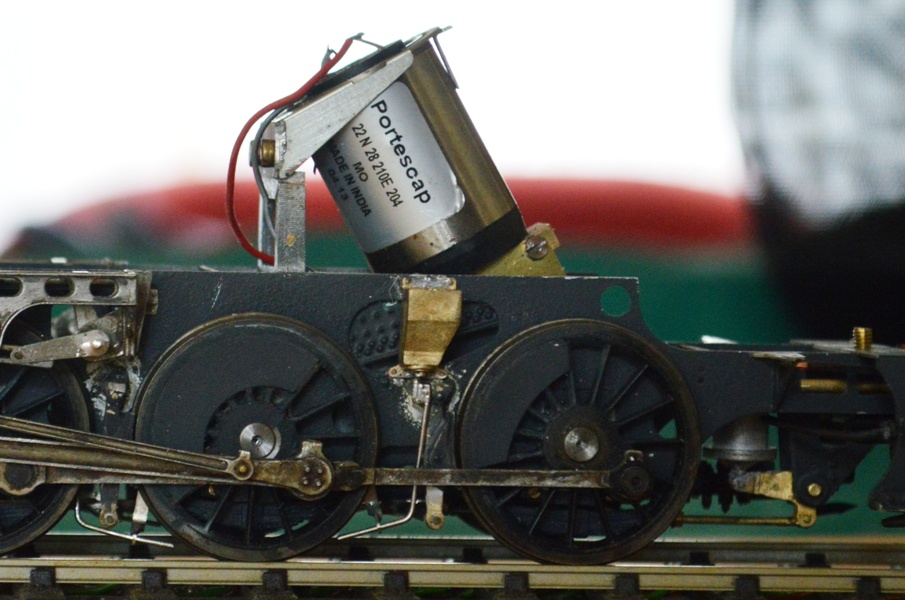
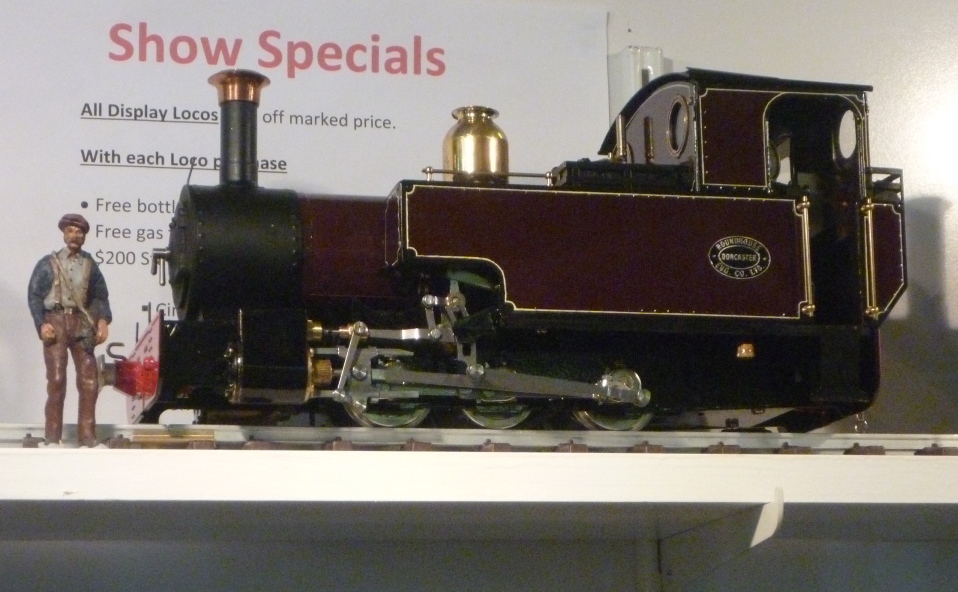
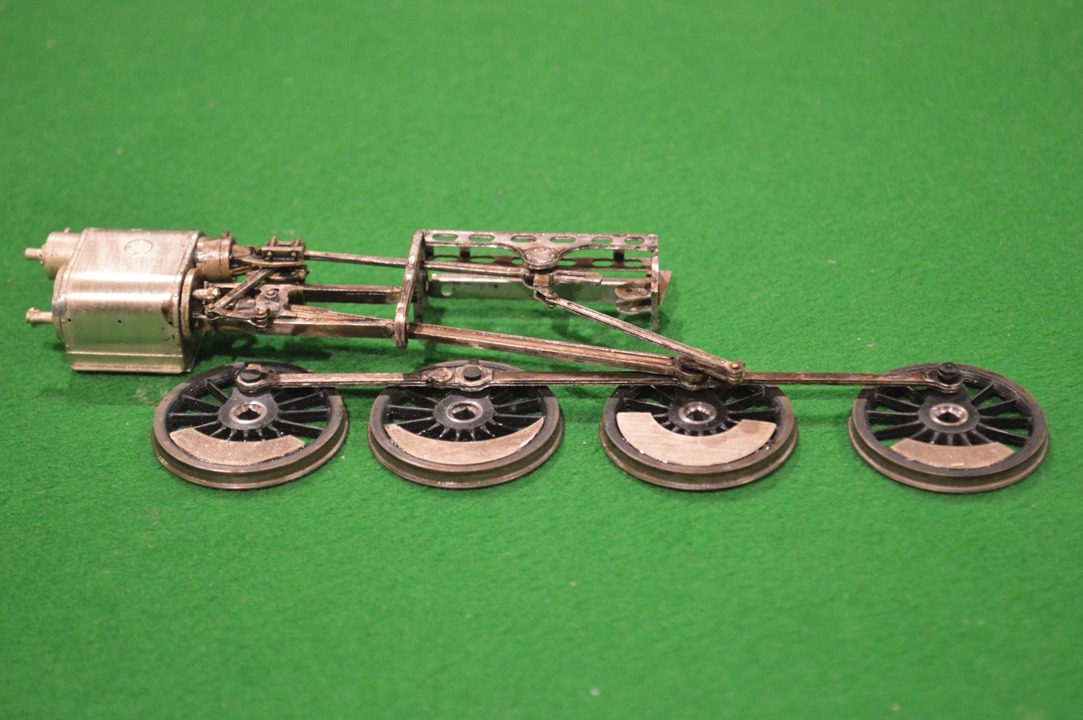
Once bent up and soldered onto the frames, this is the (unpainted) appearance.


small-sanding-gear-02
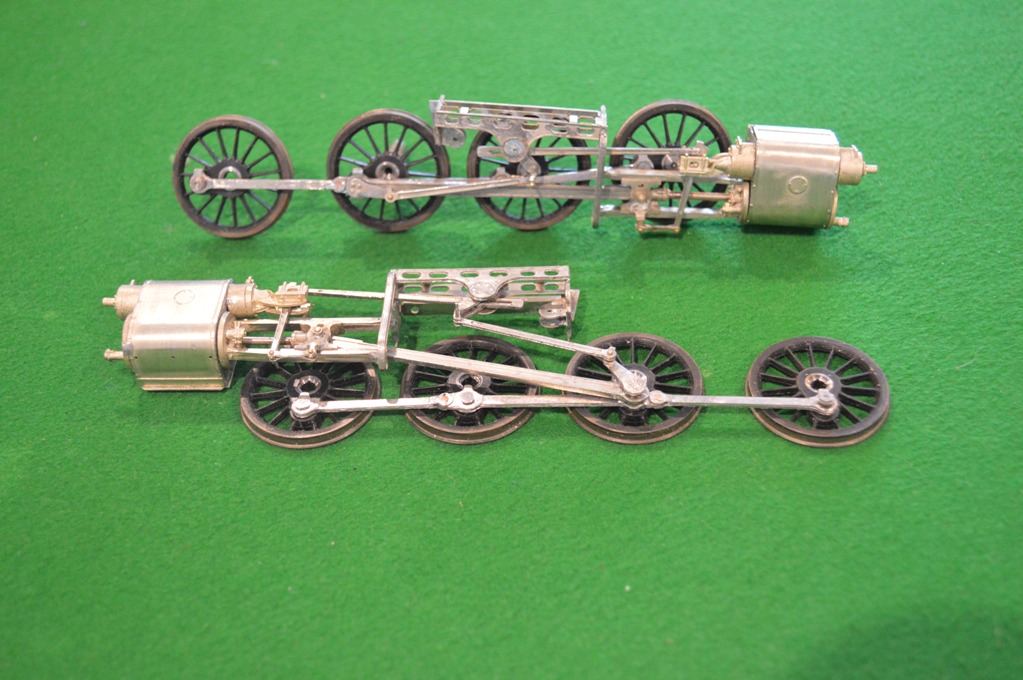
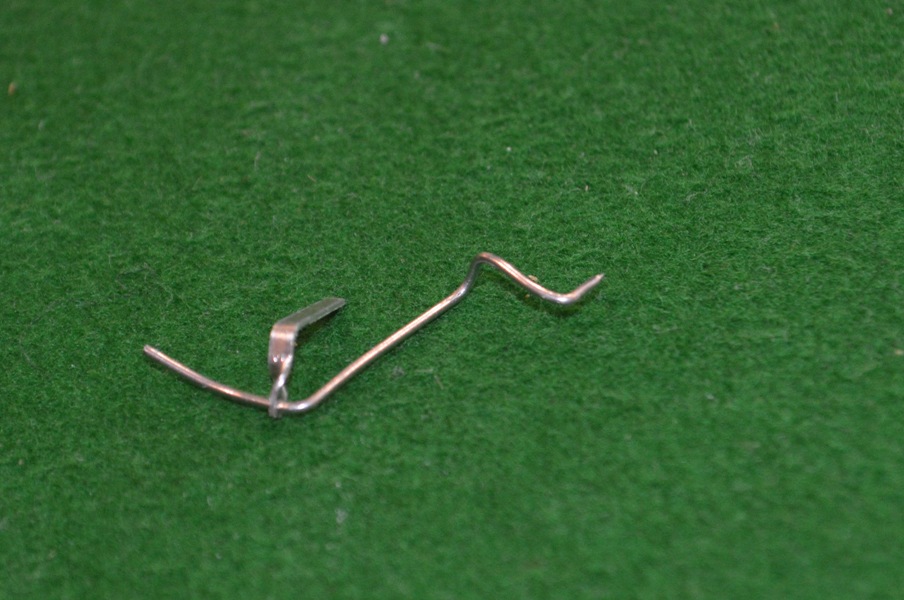
The central sandbox, supplying sand to the front of the third driving wheel, was even more of a challenge, and in the end I made wire with multiple bends in it, allowing one end to be anchored to the sandbox, with the other supported by a bracket in position near the driving wheel.

small-sanding-gear-04

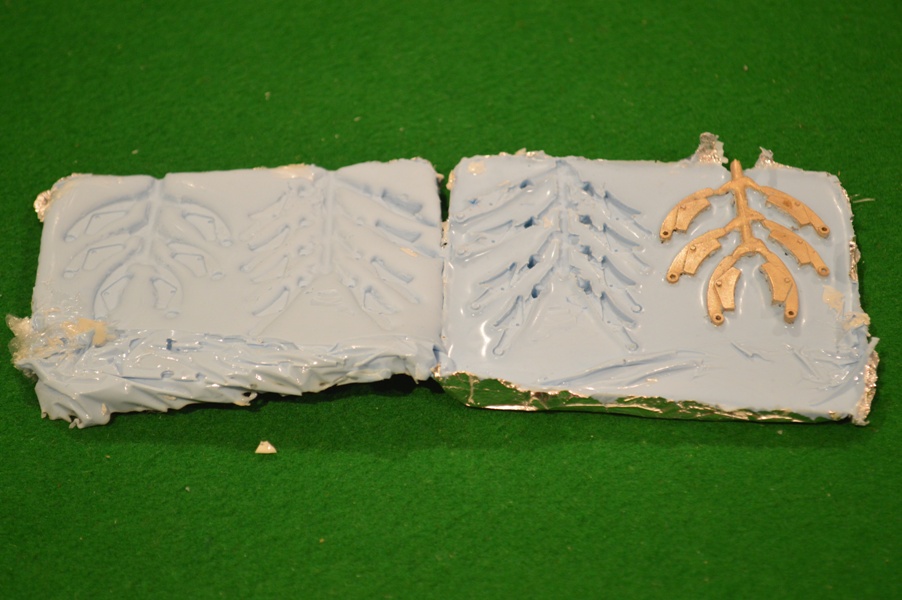
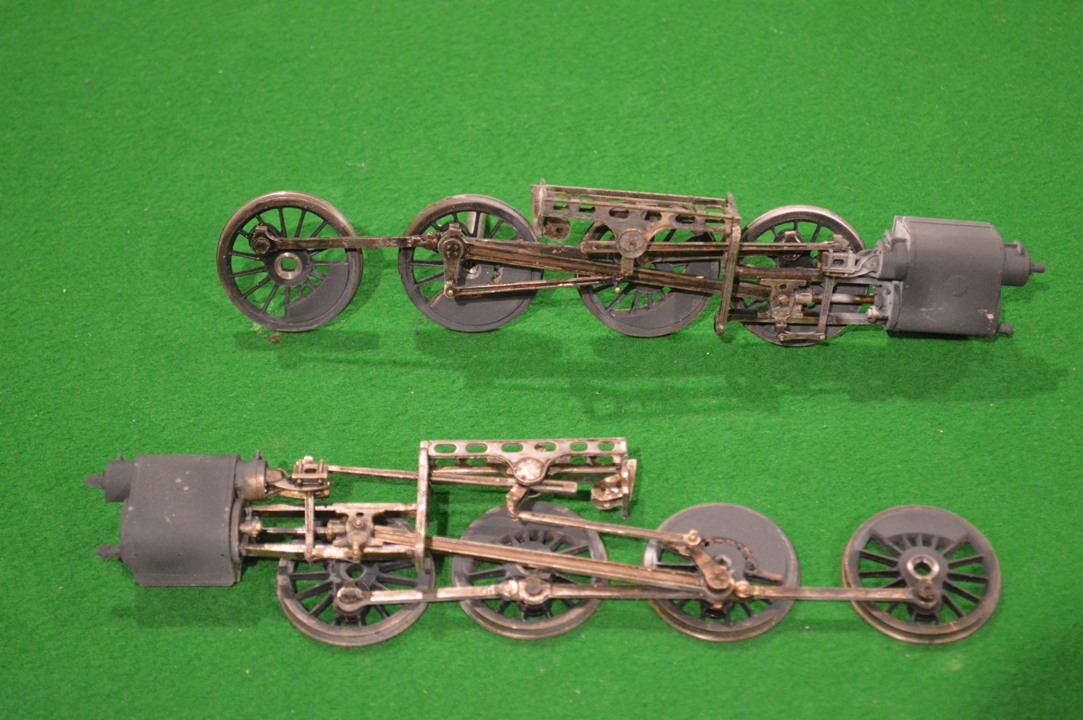
This shows the course inside the frames of the central sandbox “tubing”.


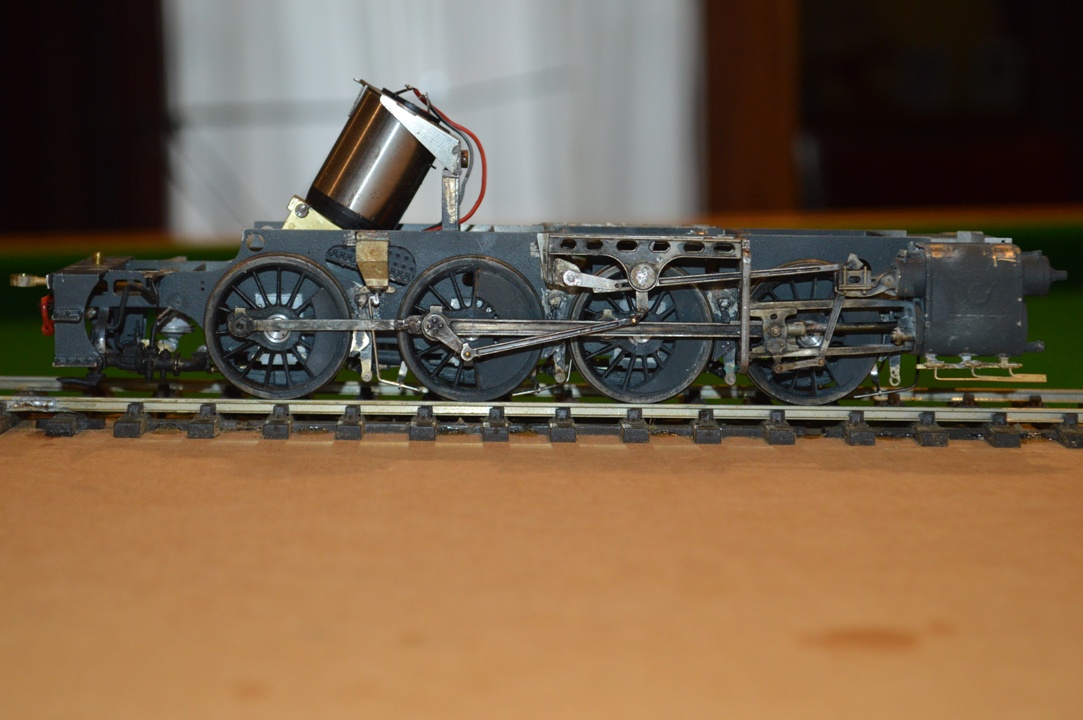
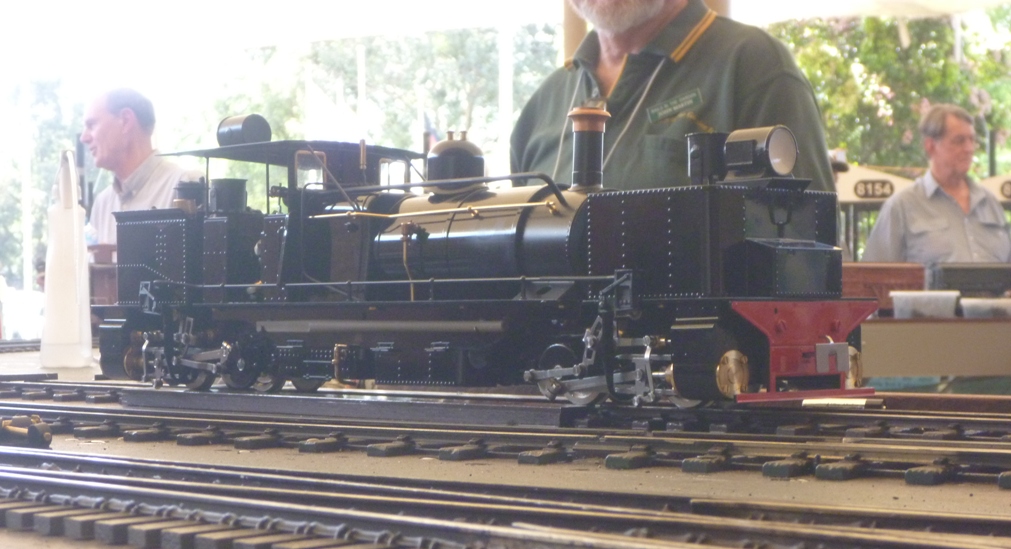
This side-on view shows all the three sanding jets in place.  Of the sandboxes, only the rear one is outside the frames and visible.

small-sanding-gear-05


Yuletide

Late December brings several important occasions.

First was Andrews 18th Birthday.Small Andrews 18th 01

He had about forty friends around to celebrate this event, and all had a good time


Small Andrews 18th 02


This was the family at his party.


Small Christmas 01

Then there was Christmas Day itself, with the family in the form of Sue’s parents.


Small Christmas 02

A picture taken that night:


New House

About five years ago we bought a block of land (OK, technically it has a house on it as well) in Glenbrook.  This is a village on a train line with direct (just over an hour) trains into Sydney Central.  The block is 200m from the railway station, and also 50M from shops, so it’s a good place to have a house.

The exciting development is that we are in the first stages of building a house there.  This is the initial design:

47PSt-p147PSt-p2The block of land was attractive when we bought it because it is also flat – the survey shows only a variation in height of 1/2 metre throughout.

The block is about 50m by 20m, so there is plenty of room.

It will be as environmentally-friendly as we can make it.  Double-glazed, sealed to make it thermally efficient, solar panels on the roof, rainwater-collecting into tanks, etc.  The main construction will be in local sandstone, and we will try to use materials from as local a source as we can.

Click on the images to enlarge (if you are interested ….), these are the ground and first-floor plans:

47PSt-p3Ground floor: large living area, garage swung around so as not to dominate the facade of the house, downstairs bedroom, large deck outside a large sliding glass door.

Front entrance with view up to the second level.


47PSt-p4

Upper floor: three bedrooms.  Large room above the garage for hobbies, etc.


47PSt-p5


Roof with “Velux” windows over the train hobby room.


A few scenes from suburban Australia

Just a few pictures taken over the last few weeks.

The black blob in the pool is a bird!

The black blob in the pool is a bird!

Firstly, a kookaburra using our pool to  have a bath!


Small Kookaburra leaving the pool

Now it’s flying out.


Small Breakfast tableNext, Sunday breakfast last weekend – summer has arrived.  Avocado with lemon juice and black pepper, on toast.


Note the ten cent piece for scale - it is 23mm diameter

Note the ten cent piece for scale – it is 23mm diameter

All Brit.s idea of a typical scene in the Australian garden – this is a redback spider which I found under the lid of the pool-cleaning mechanism when I went to clean out the leaves there.


Small Blackbirds nest in the orchid 1On the other hand, this could almost be an English scene, apart from the fact that this blackbird has made its nest in an orchid.


Small Blackbirds nest in the orchid 2

Blackbirds are introduced – feral – animals in Australia.

Sculptures by the Sea

Today Sue and I (David) went to Bondi and met some friends of Sue’s ( a group of friends with whom she often goes gossiping walking around the foreshore of Sydney Harbour). Small David and Sue at Sculture by the SeaWe went to look at the Sculptures by the Sea exhibition.

As an aside, we used our new Opal cards, which meant our trip  from Blaxland to Bondi (two hours, by a train and two bus rides) return cost us a total $5 !

Sclutures by the Sea is very good.  Sponsored by various firms, they select a number of artworks, some clearly designed specifically for the site, others less specifically inspired.  The one below left was my favourite, but there were many good ones, a small selection I will put below.

Small Sculptures by the Sea 6Small Sculptures by the Sea 10


It was a beautiful day.  We arrived early, which was just as well.  By the time we left (just after lunch) it was really crowded.

Small Sculptures by the Sea 1-2


Small Sculptures by the Sea 7


Small Whale off Bronte BeachThere was even a whale went past whilst we were there.


Nick scores a century

Cricket

Nick and I are playing cricket for Glenbrook-Blaxland Cricket club this year.  I am in 8th Grade, Nick is in 5th Grade.  I have been Mr Consistency this year.  I’ve opened the innings both matches, facing the first ball, and in both matches I have lasted 13 overs and scored 5 runs, being out LBW each time!

Small Nick 1


Nick, however, has done somewhat better.  Today he scored his first-ever century at cricket (he’s scored 52, 53 and 56 previously, but never over 60).


Small Nick 5Today he scored 120.

His team only scored 200 all out, so it can be seen that his contribution was important.  Three sixes, and lots of one-bounce fours – this is Nick, after all.


Small Nicks CenturySmall Nick 4


This is what happens if you’ve scored 120 and are very, very tired ….

Nick 16Nick 15


Nick 17Nick 18


Nick 19Nick 20


Nick 21Nick 22


Nick 23Nick 24


Nick 28


Nick 37

A good weekend

I’ve had an excellent weekend.  It was a long weekend for reasons I cannot be sure of: someone said it was the queen’s birthday (which or what queen?), but I also heard it was a Labour (Labor?) Day weekend.  It’s all the same to me ….

Small Mountain Biking 2Anyway, one highlight was going on a mountain-bike ride with Nick.

Both boys were at home, but only Nick came riding in the Glenbrook National Park with me.  We went down the Ironbark trail, up Bennett’s Ridge to the Oaks picnic area on the Woodford Trail, then down the Single Track back to Glenbrook.  A superb ride through the national park, early in the morning.

Even Nick was glad in Small Mountain Biking 3the end that I got him out of bed before 6-30 AM!  It was hot later in the day, but cool as we pulled up the hill to the top of the Single Track.


Small Mountain Biking 4

This is a picture of me just before haring down the Single Track.


The long downhill of the track must be one of the best rides in NSW/Australia/The World.

Hurtling down a track about a metre wide between trees and plants in the bush, at (I guess) 40-50 kph at times, trying to keep up with Nick (who starts off first, and after about 2km is 20 seconds ahead)!  Exhilarating is only half of it ….

Later the same day I went to the AMRA exhibition in the Whitlam Centre in Liverpool.  An excellent venue, about 40 minutes drive from MtRiv.

Live steam GarrattAs I walked in, there was a live steam Garratt !!!!!

It is a model of the Darjeeling 0-4-0+0-4-0 Garratt.  Radio-controlled, live steam, powered by “Metho” (or was it butane?), 0-gauge.

I want one ….

$8,000 in Australia, though.

Live steam locoThere were other live steam loco.s that were more reasonably priced, however.  “Only” $2k for this one, for instance:


Or about $4k for a Stanier 8F ….


Perhaps something for the garden railway in a our next house?

Stanier 8F in ScaleSeven part 16: Brake Hangers

Brake gear.

A problem with all systems where power is picked up from the rails is that brake shoes realistically close to the wheel treads need to be isolated from those on the other side and from the frames, or else short circuits will occur. DC or DCC, I think. Now my system is going to have no pickups from the driving wheels, but the brakeshoes as made in the kit will short-circuit from one side to the other. What options do I have?

My first thought was to make new brake hangers by acrylic/epoxy molding. So I bought a Sylmasta kit and made molds for the brake hangers for the locomotive and tender.


Small Brake hanger polyester moldingsI then made castings first in polyester (this was the plastic/resin provided in the molding kit):
These were too friable and brittle, however, so by default I tried molding in Araldite, which was more robust, but full of bubbles:
Small Brake hanger epoxy moldings

Even these looked unlikely to survive very long in general use, though. Contacting friends for advice suggested that I was trying to make castings of too much: it would be better to make castings of just the brake shoes.
However to do that meant filing all the brake shoes off the hangers (fourteen!) and both making and fitting accurate copies of the shoes onto each hanger. Then it occurred to me – I don’t need to take all the brake shoe off, just the surface which will be in contact with the wheel tread.
So I found some 2mm wide Plastikard strip, and have carefully filed sufficient off the surface of the brake shoes to glue a strip of Plastikard onto each shoe.


So the one on the left has been filed back, and the ones on the right show the Plastikard in place.


Once I came to try to fit them to the frames the next adjustment became necessary. As the frames are set at nearly the correct prototype width, they are much closer behind the wheels than in Finescale. If the brake hangers are fitted as made, the hangers are too far away from the frames, the shoes are outside the wheel rims and the outside parts of the shoes contact the coupling rods and stop them rotating. So now I became more grateful that the main parts of the brake hangers are metal, not epoxy! The two on the left of the picture above have had the posts from which the hangers are suspended shortened, whilst the right hand one is the original length. I think that this adjustment would have been near-impossible using plastic parts.

Now I just have to fit them, one or two at a time, and make sure the wheels still go round after each fitting.

Stanier 8F in ScaleSeven Part 15: balance weights

Just an update.  Partly because of the difficulty painting behind the driving wheels, and partly because I realised that I needed to put the balance weights on the wheels (and this would probably be much easier if I could lie them flat), I partly dismantled what I had done so far to put together the chassis.  Also I realised that the return cranks were on at an exaggerated angle, and although this makes the valve gear move more satisfyingly, I should probably re-do the soldering to make it more realistic (10 degrees is right).

Of course to put the balance weights on is easier said than done. First of all I had to choose exactly which 8F I wanted to model! I found a picture of number (4)8067 which seems to have the right characteristics: a rivetted tender, balance wheels of the earlier type (not all of the weights are crescents) and based in the north of England. So number 8067 it will be.

Both types of weights are supplied in the MOK etches, as pairs (so four of each shape). Using the S7 Group Slaters wheels makes sandwiching the pairs of etches together relatively easy, one on each side of each wheel: the plastic spokes can be cut back a little to accommodate the etches. Not too much on the outer side, though, as the balance weights stand proud of the rims on the pictures I have seen.

Small Balance weights 1I then filled in the gaps between the etches with Milliput filler.

Now seemed a good time to use Birchwood Casey metal black on the rods and valve gear, to obtain a good “polished steel” finish. I used Hi-Chem “All-Surface Primer” on the wheels (probably only available in Australia, but I’m sure motorcar paint shops anywhere would have a similar product) – it’s a marvellous very thin and very effective metal primer: it sticks to anything, in my experience even glass or granite benchtops! Therein lies a separate story, as you might imagine ….

Small Balance weights 2


Finally, a “dirty black’ initial topcoat. My engine is going to have a realistic (I hope) weathered appearance.

So there you are.

David


Stanier 8F in Scaleseven part 14: putting the boiler on the frames

It’s beginning to look a bit more like an 8F (admittedly I have placed the pony truck in place and the smokebox door just for this picture, though).

Small Boiler meets framesA question however: when I started this project, I saw the picture of a lovely model 8F in brass-and-whitemetal finish. I was looking forward to the day when mine might look similar – but how can that be done if I am also going to have to paint parts of it before I complete construction?
I guess it doesn’t matter really, but if I am to have a realistic painted finish in places like the frames behind the driving wheels, surely this will have to be done by taking the wheels off.  Especially if I wish to have a good finish on parts like the springs, which are right behind the wheels, of course. As you’ll observe from the above picture, I haven’t put the braking gear in place yet. Once I have done that the wheels will be very difficult to take off. At present the wheels can be removed easily, because the excellent design of the MOK kit allows the motion bracket, valve gear and wheels to be removed as a unit.

Small Boiler meets frames 2So, how do other modellers manage it?
How do you make a whole brass-and-whitemetal kit up, and later get a good finish on it, without giving yourself a huge amount of unnecessary work dismantling all the careful modelling done to put it together in the first place?


Answer (I think): you cannot.  On the ‘net are articles describing how people have made up a model completely, then have to spend lots of effort systematically pulling them apart so that they can then be painted!  When it comes down to doing that, I do not think pictures of the unpainted model are so important, so I will paint the frames behind the wheels at this stage (and probably most of the stuff in-between the frames also).

Small Chassis dismantled 1First stage, take the wheels and the motion off the frames.  Fortunately this doesn’t prove too difficult.

This will also give the advantage that I can put the balance weights on the wheels whilst they are flat on the desk, rather than mounted on the frames.

Small Chassis dismantled 2The frames themselves will be easy to paint I hope, although I will have to mask off the sliding hornblocks (bearings) for the driving wheels, and avoid painting the compensation mechanism on the insides of the frames.


The balance weights will have to be chosen.  I hadn’t realised, but there are many variable configurations of balance weights between difference individual locomotive which are otherwise indistinguishable.  So I will need to find a picture of a locomotive in the area where I want to model (not too important) with a rivetted tender (which I think looks nicer), and then try to match the available parts from my kit to make the appropriate balance weights on my locomotive.  So, where do I find a side-on view of a Stanier 8F, pulling a tender with lots of rivets on the side, on the Settle-Carlisle Railway (or, at a pinch, anywhere in Lancashire or the North-West?