Slaters Gauge 3 Midland Railway D299 wagon – 3 and D351 wagon

Even before finishing my D299 wagon I have started my Slater’s kit of a D351 wagon.  Also, I haven’t even finished my model of the MR flat wagon D336.  There are reasons for this, but it’s mostly that I simply like the construction phase and the painting is less pleasurable.  As for adding the lettering – well that’s just stressful!

Here are the two wagons.  The one on the right is the newly-constructed D351.  The only difference between the wagons was the end-door.  When this pic. was taken I had only put primer on the D351 though.


So this weekend I have airbrushed the wagons so that they look very similar.  One will have brakes on only one side (see the left-hand wagon on this picture, as most did until the 1930s.  The other will have brakes both sides.  Slightly different lighting makes them look cream-coloured but they are both Midland-grey!

Clearly the two wagons are very similar and the Slaters kits mean that making the second one is a lot easier.  The detail on these kits is astounding.

These are pictures of the end-door version (D351) – the catches to hold the end-door closed.

I suppose that this is why I find the kits so satisfying to make.  The catches almost look as though they would work!


So there you are – next will nearly complete, I guess …

Slaters Gauge 3 Midland Railway D299 wagon – 2

“Slaters Gauge 3 Midland Railway D299 wagon – 2” because I have shown a little bit of the construction of this kit from Slaters Plastikard in my entry “Gauge 3 action” earlier.

Despite name of the company who made it, this kit has almost no plastic!  It is nearly all wood and metal, which I greatly like.  It is also phenomenally well-designed and made, and all fits together very precisely and accurately. My previous entry left it at the stage where the body had been put together, but then I had the opportunity of having help with my “live steam” Dyak, and so the wagon project was abandoned.  

Well here I am back at the wagon works.

After the wonder of putting together the beautifully laser-cut wooden body, and the tedium of inserting over a hundred dummy bolts (about 1x5mm each!), I have put on the wheels, including the suspension, and the rest of the underframe details.

As you can see from this and the previous picture, these wagons often only had brakes on one side, and that is what I am modelling.

Painting should be straightforward – in theory, if not in practice!  Everything above the bottom of the sole bar in wagon grey, and everything below in black!  What is more, wagon grey was variable in shade, so almost any light- (or indeed quite dark-) grey is realistic!

I found a grey. primer, but once applied, I have decided it is a bit dark to look nice (I want to have a variable grey fleet of wagons, even if I cannot have a colourful collection).  So I will apply a lighter coat of grey later – I had hoped that the primer would double as a final colour.

In any case the primer came from a “rattle can”, and didn’t provide an even coat, not getting into the corners well at all.  Using the airbrushes with a lighter grey should fix that issue as well as making the colour more acceptable (to me …).  On the other hand the primer appears to have covered all the metalwork, which is what I really needed it to do.

Dyak progress May to July 2020

[Updated four times]

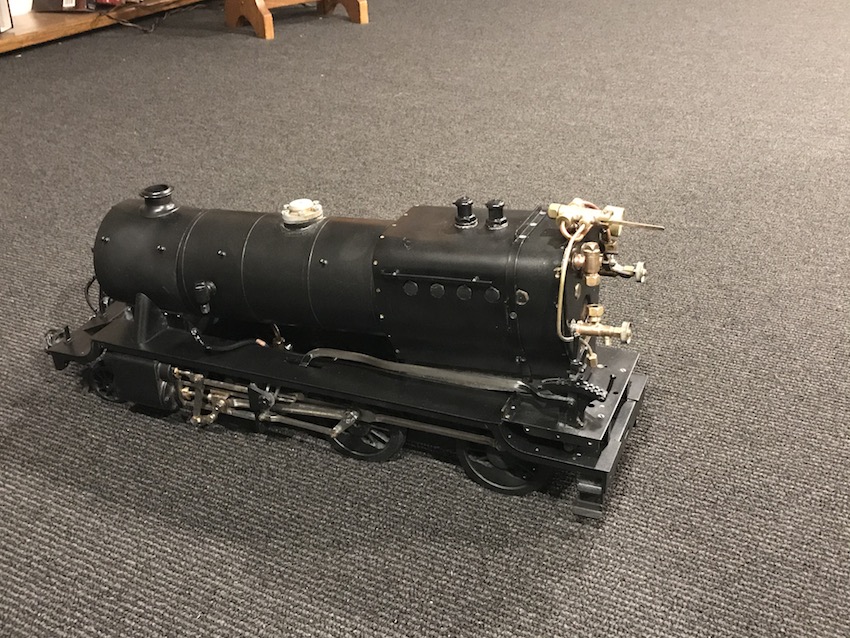
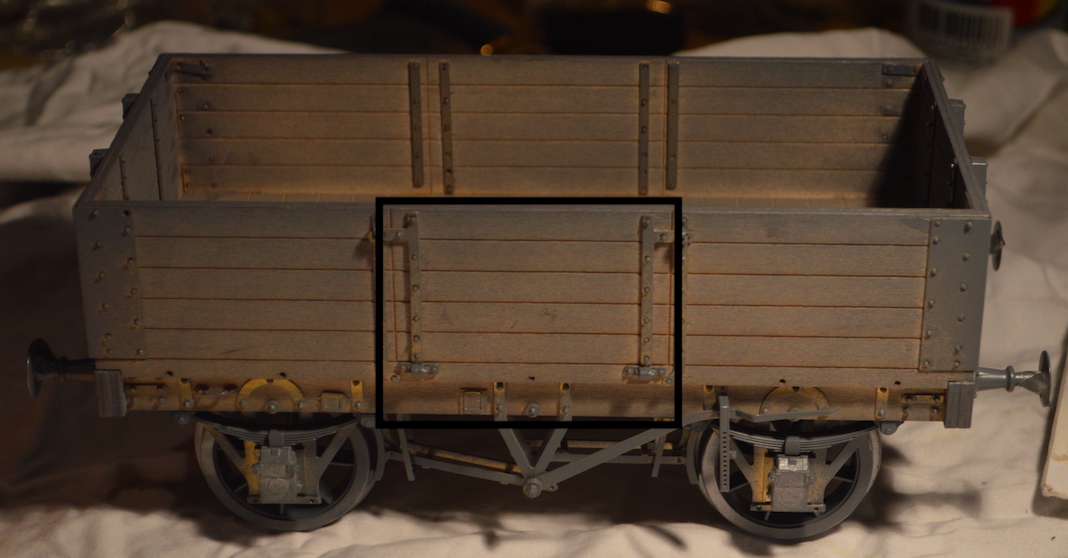
While the Dyak 2-6-0 has its boiler removed for restoration and repair is clearly the best time to consider painting it.  It has never been painted before, and as it isn’t a scale model of any particular, I could really paint it any colour I like (so long as it’s black …).
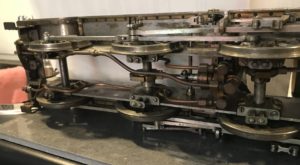
So I am going to have to take the wheels off, to paint the frames behind.

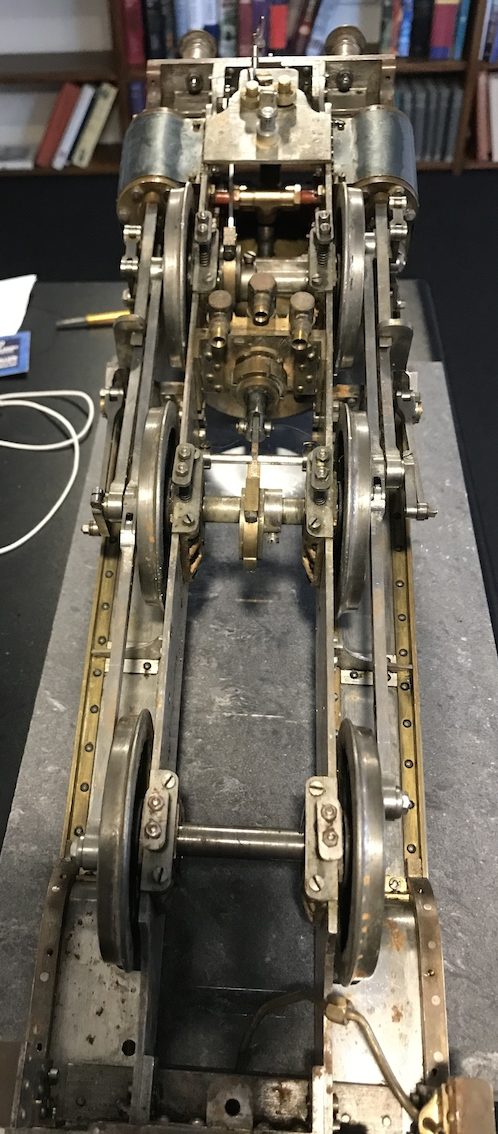
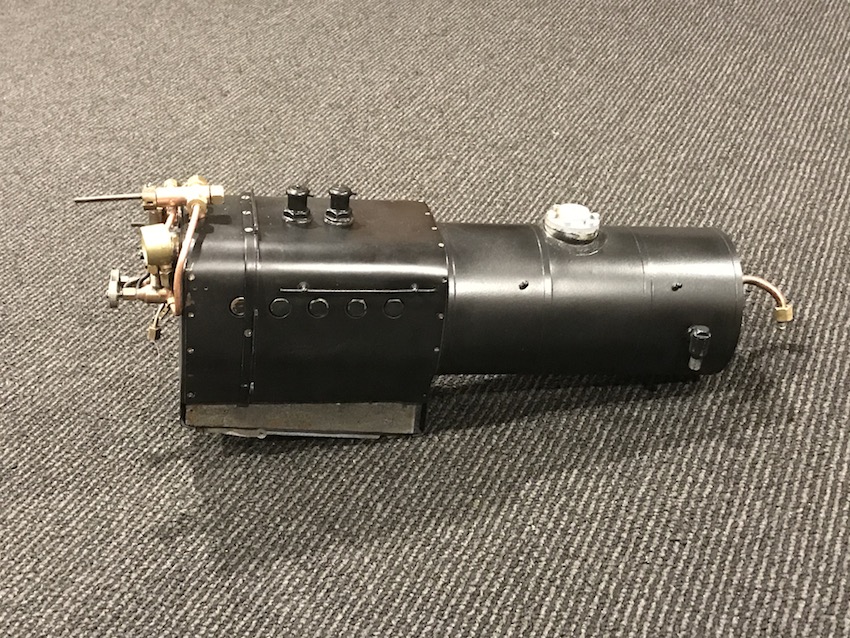
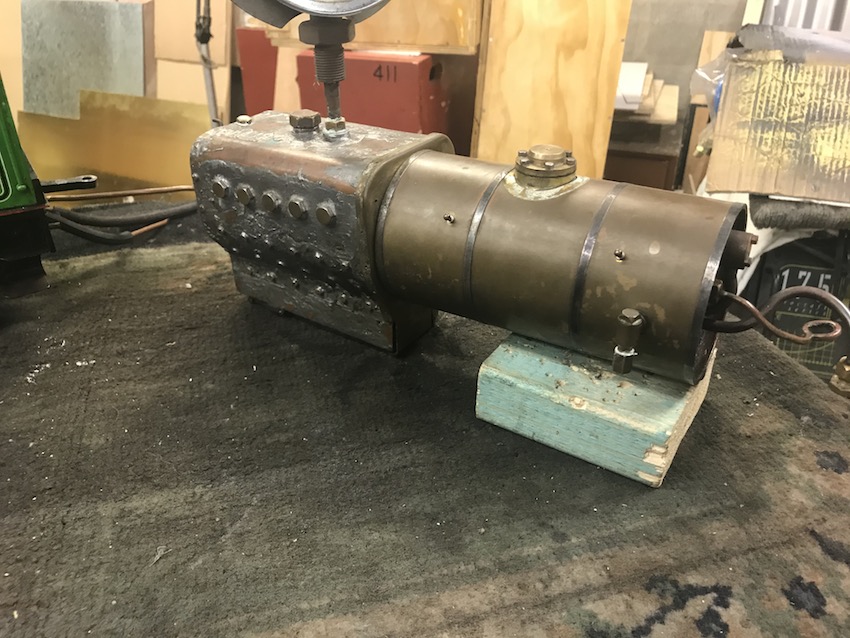
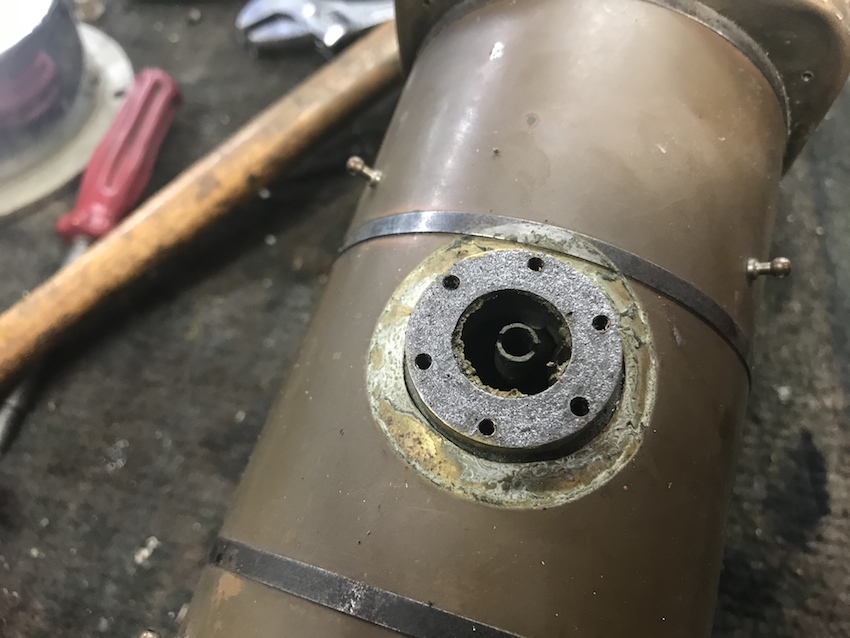
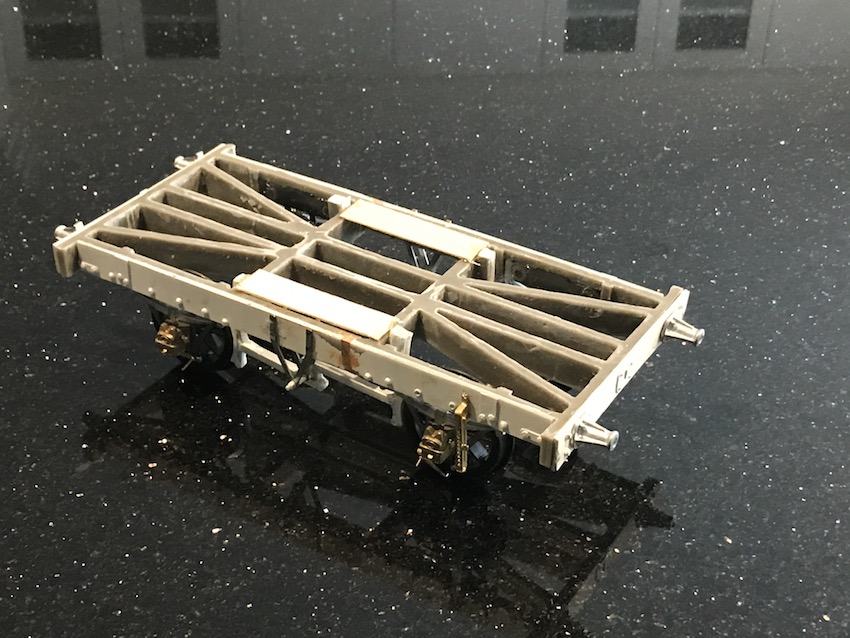
This is not simple.  If you look at the driving wheels, I need to “drop” them as a unit (all six wheels) to make it a manageable task.If you look at the first picture, there are a lot of pipes in the way, and they have to be taken off first.

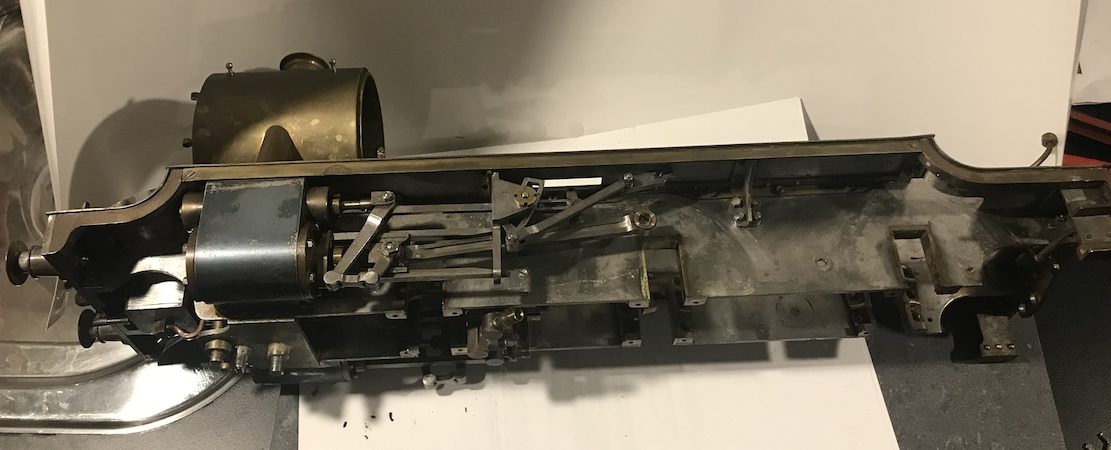
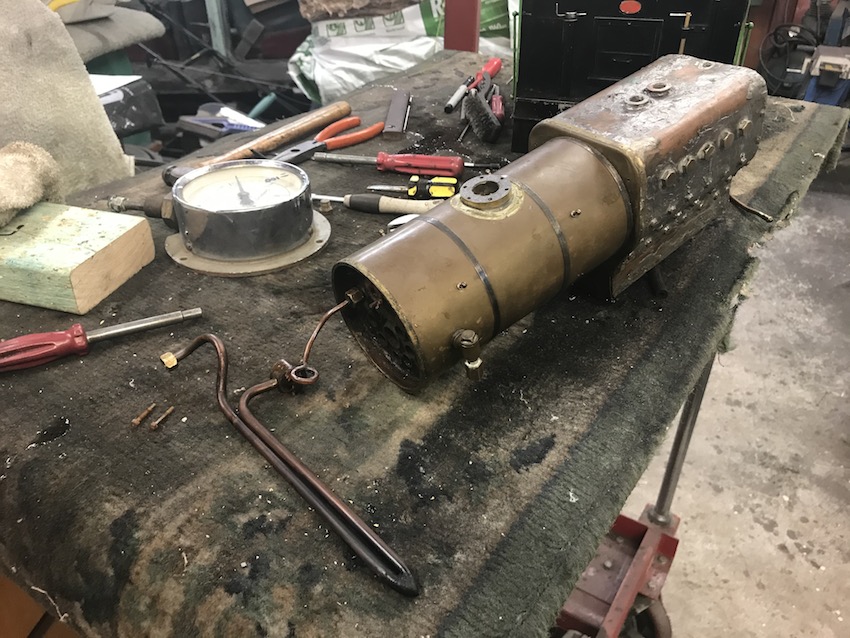
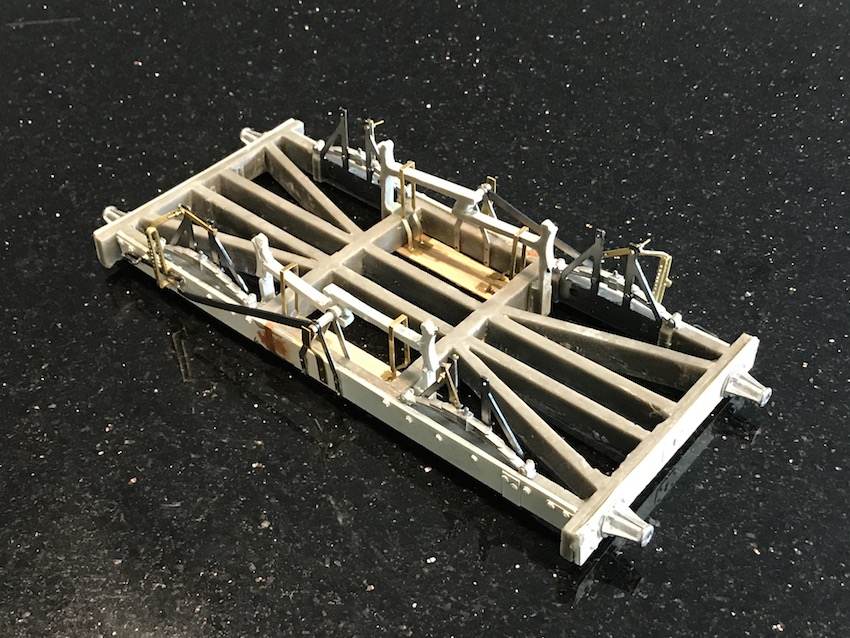
This picture shows from underneath what it looks like with the pipes removed.

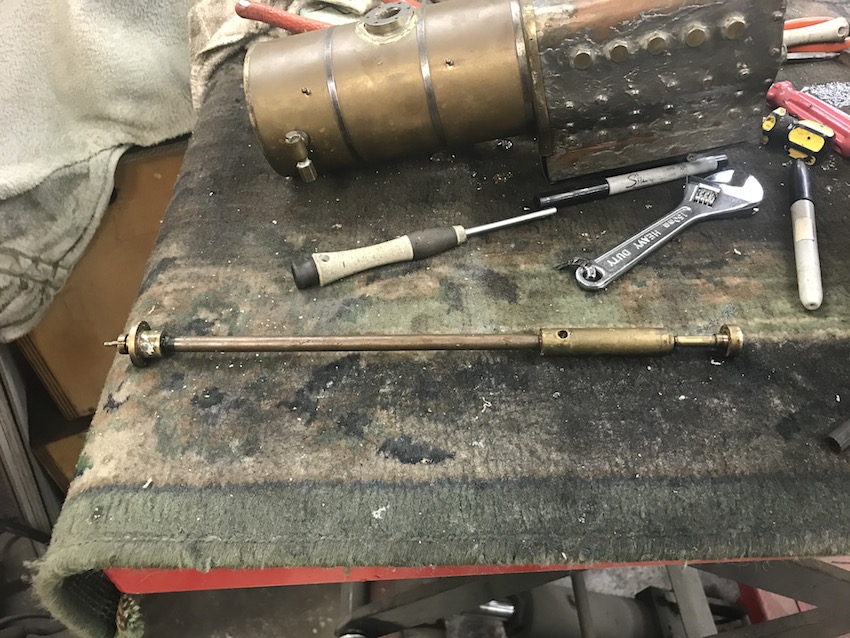
Trouble is, there are still two eccentric drives to be disconnected – for the axle water pump (for pumping water into the boiler as the wheels go around), and the mechanical lubricator.


Once the eccentrics are gone the wheels still aren’t free: the connecting rods and valve gear have to be disconnected first.


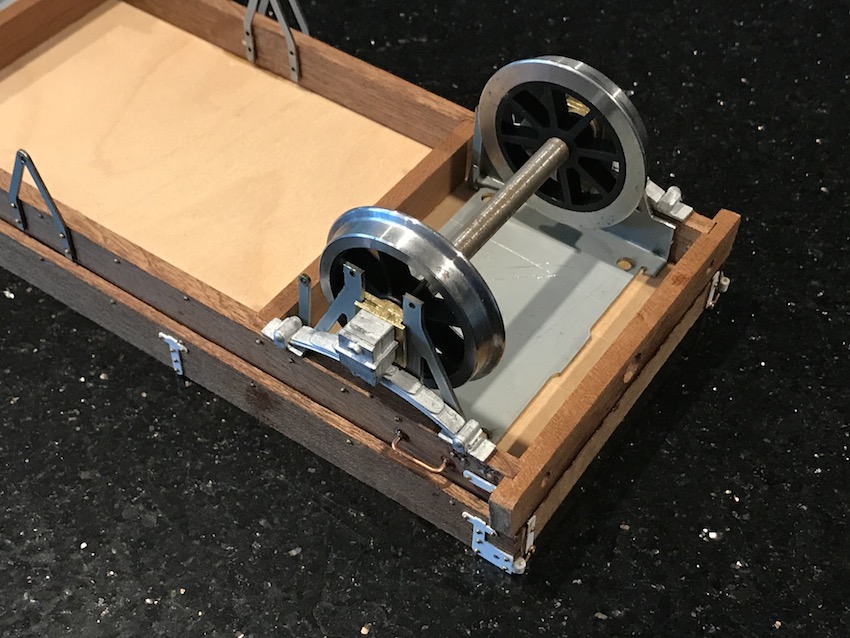
Then finally the wheels can be removed, complete with axle boxes.

All this, just to get black paint behind the wheels …

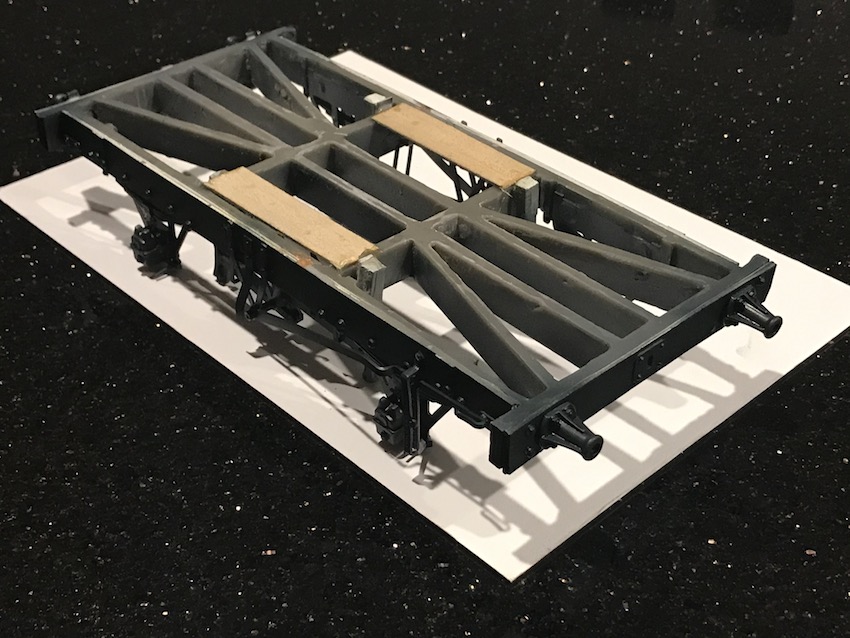
27th May.  Having dismantled the engine as far as I dare, here is the result of painting on the “primer”.  In the end I used a “rattle-can” (aerosol paint) as my airbrush simply wouldn’t handle the epoxy primer I had bought – even after thinning it with the special primer solvent.

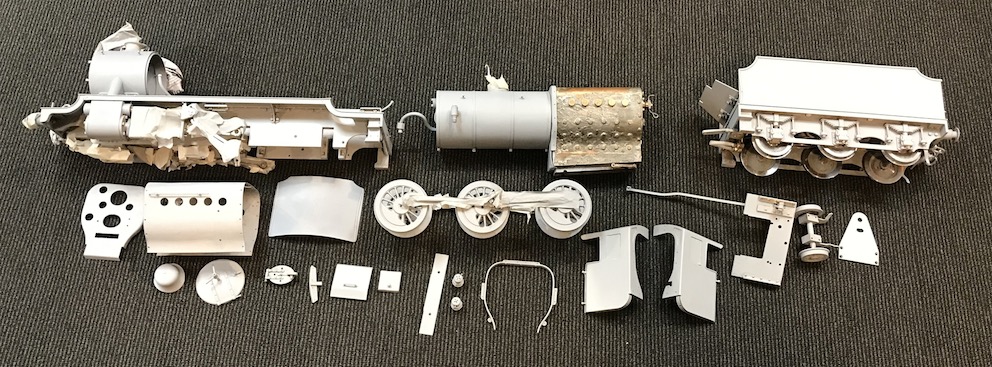
Much of the masking tape can be seen, trying to cover the moving parts and those which clearly shouldn’t be painted.

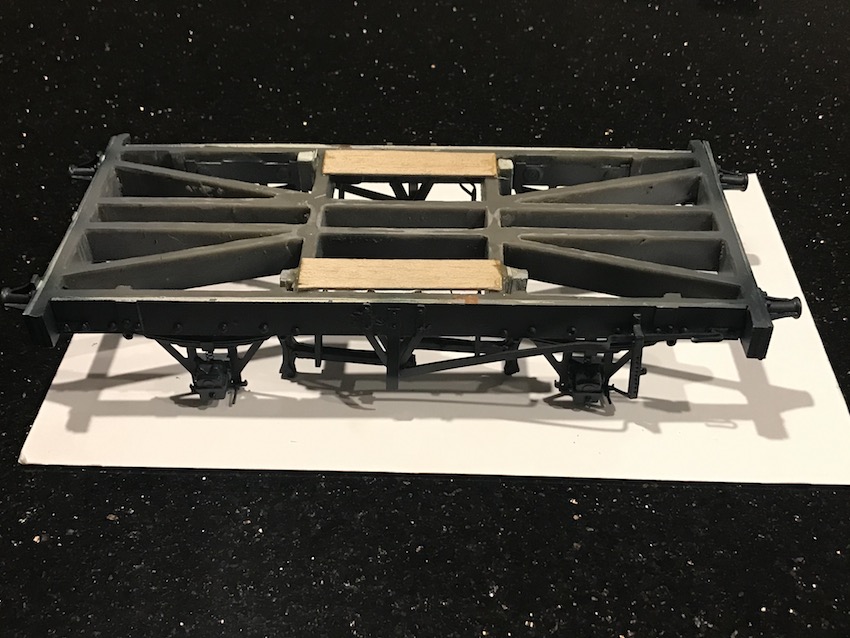
7th June.  Painting it black was better – a rattle-can used at first, covering the majority, but the paint easily could be thinned (with the appropriate solvent), to fill in the areas not easily reached by the aerosol.

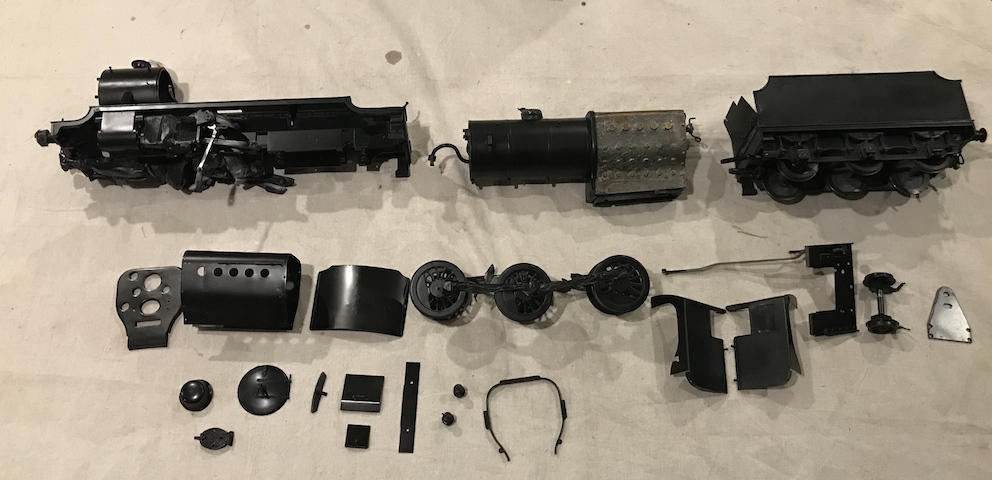
Now to the simple task of putting it back together …

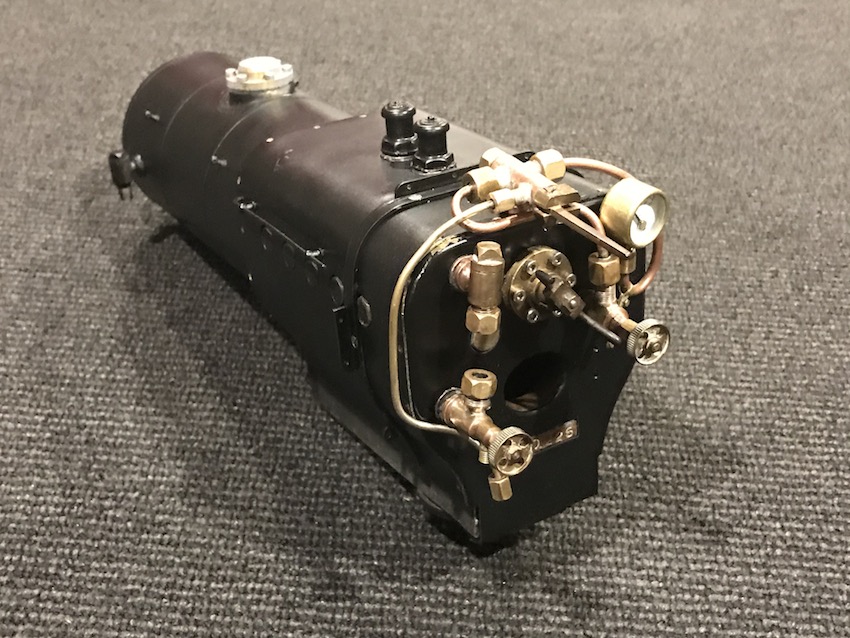
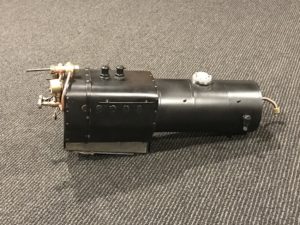
Now I have put the “Cladding” back on – the wrapping around the boiler firebox, and I have put some of the fittings back onto the boiler.  Mostly the controls on the “back head” – the face of the firebox in the cab.


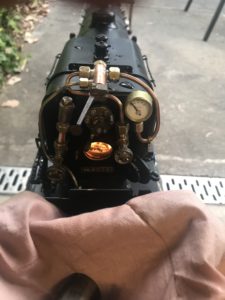
Here is a picture of the back head.


It’s now possible to get an idea (a very approximate one) of what the end result will be like:


This day was a great day …

On 28th June, the Dyak steamed for the first time, I believe, in about 50 years.  It is a great tribute to Warwick Allison that this has proved possible.  My original assessment was I think correct (that it had been very well made, but subsequently abandoned by whoever made it), but it was only with Warwick’s guidance that I could get it going!

So I took all the parts, now painted black, over to his house in Mount Riverview.  First we had to reset the valve gear and make sure that it ran, on compressed air.  Click on the link to view it at this stage:   Dyak black no boiler

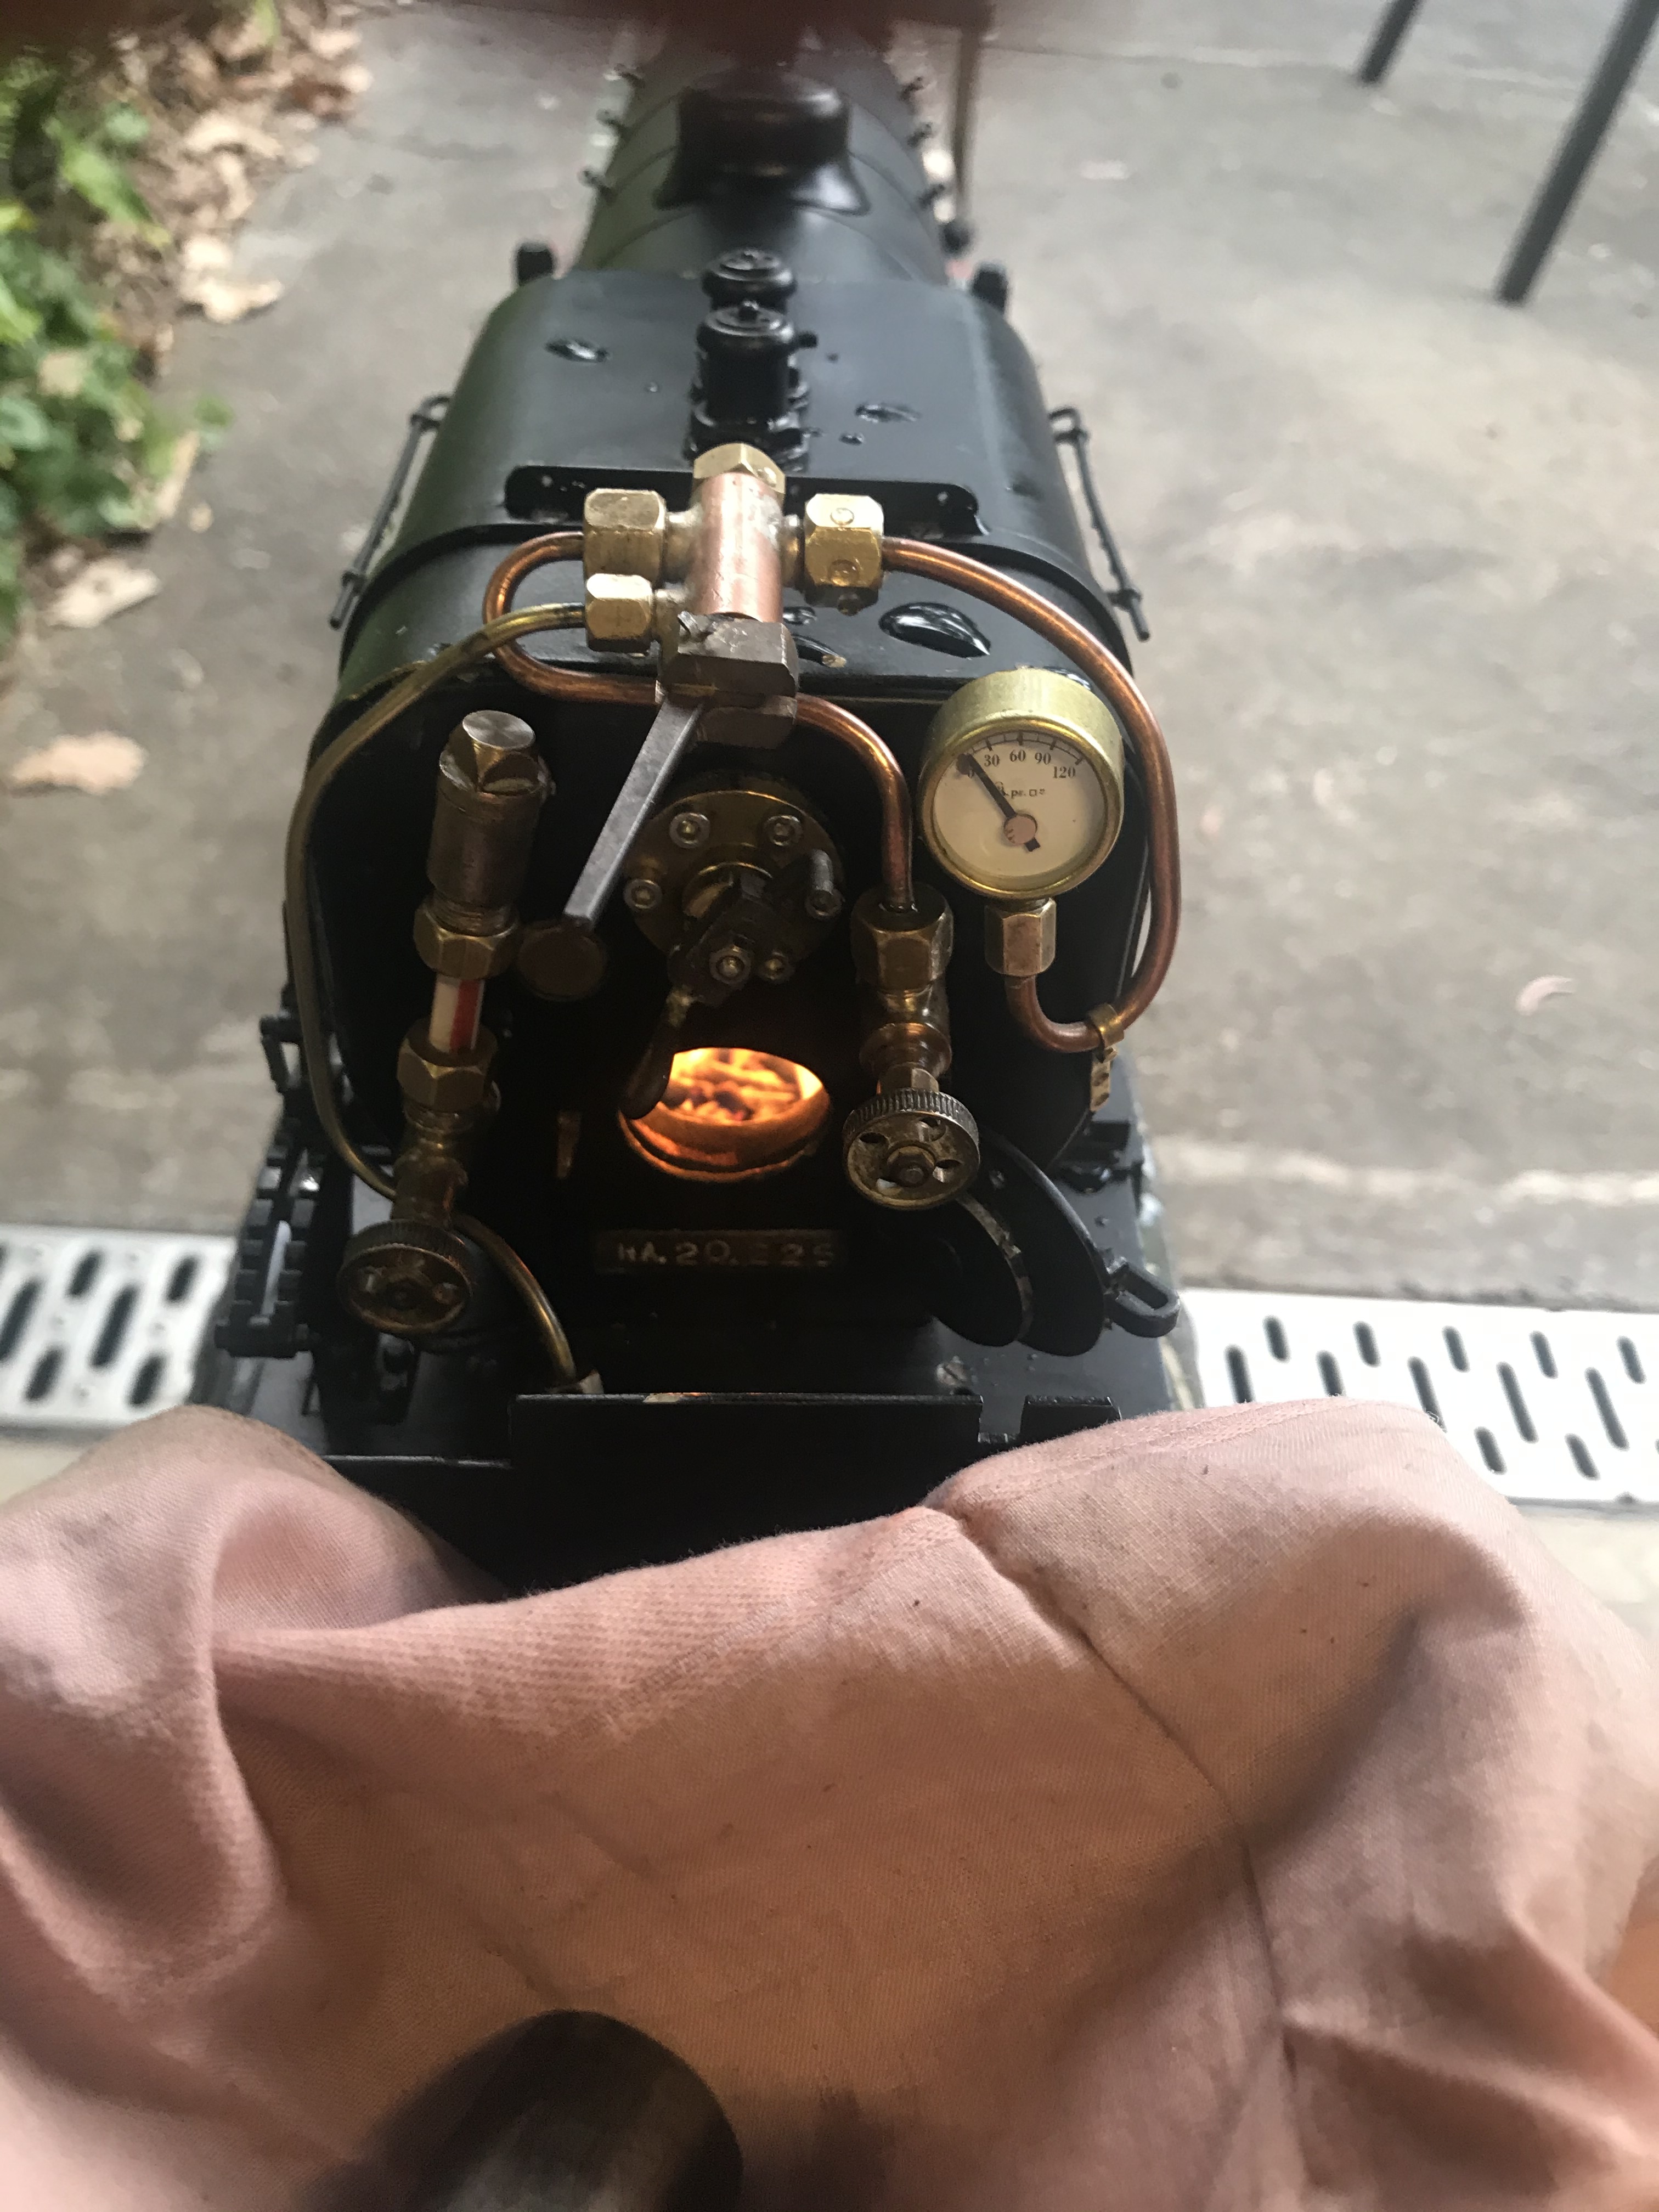
Next was to put the boiler back on, connect it up and make sure there were no leaks on compressed air.  Yes, there were, but with Warwick’s help we found them all and fixed it up.  It still didn’t have the cab on, but it looked much more like a locomotive now.  We began the steam test: filled the boiler with warm water, put a fire in the firebox.  This in itself was a good moment!

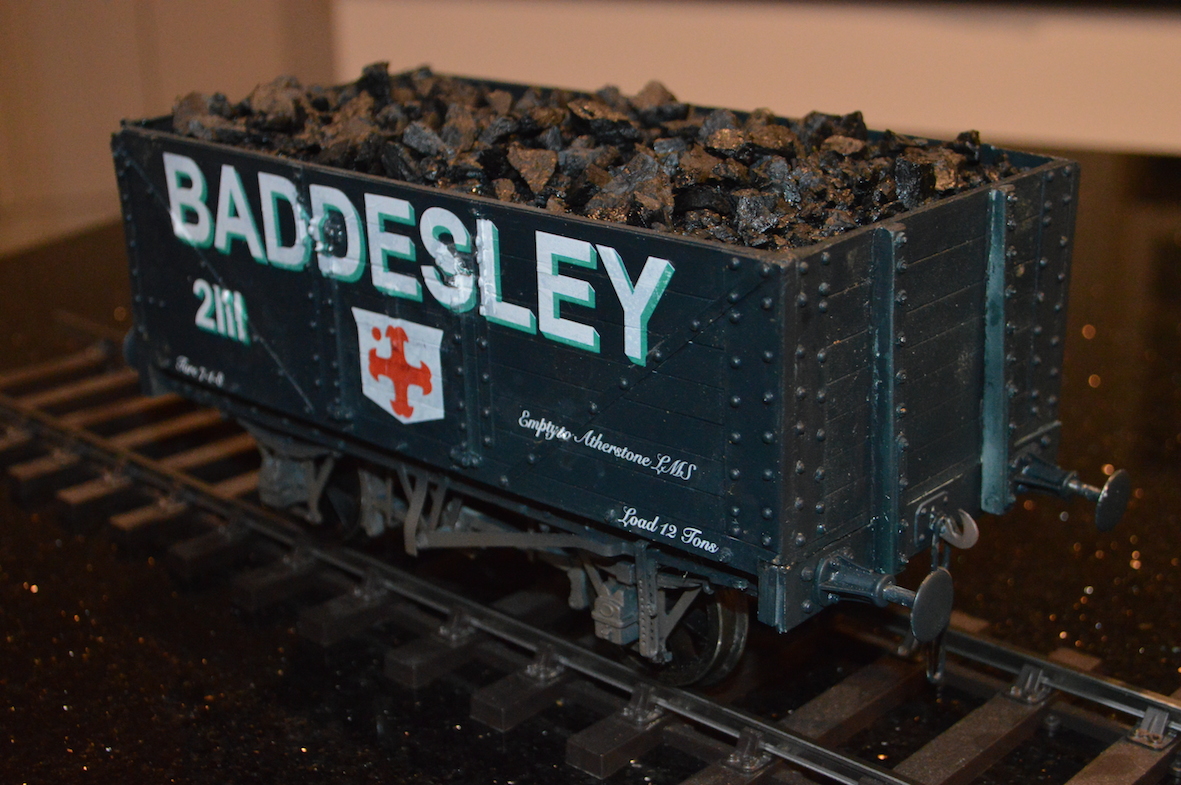
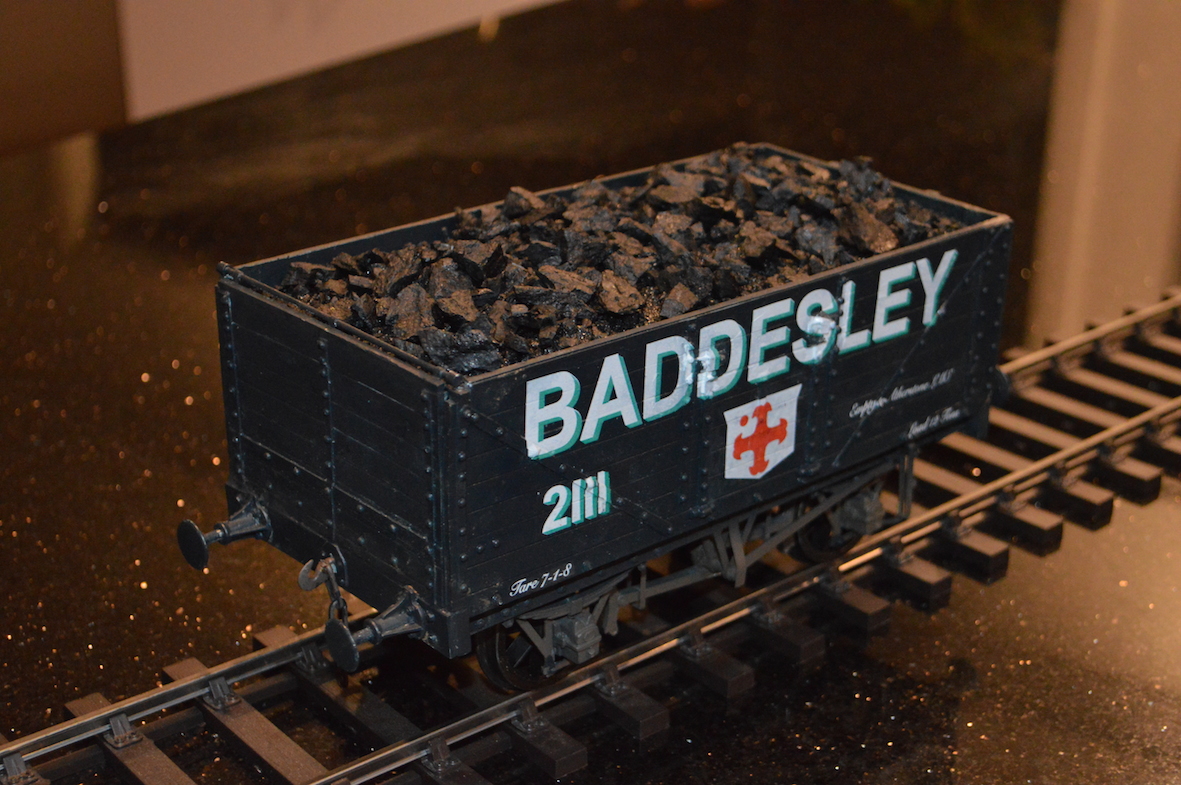
The fire initially was “kitty litter” soaked in kerosene, but after a while real coal could go in the firebox.

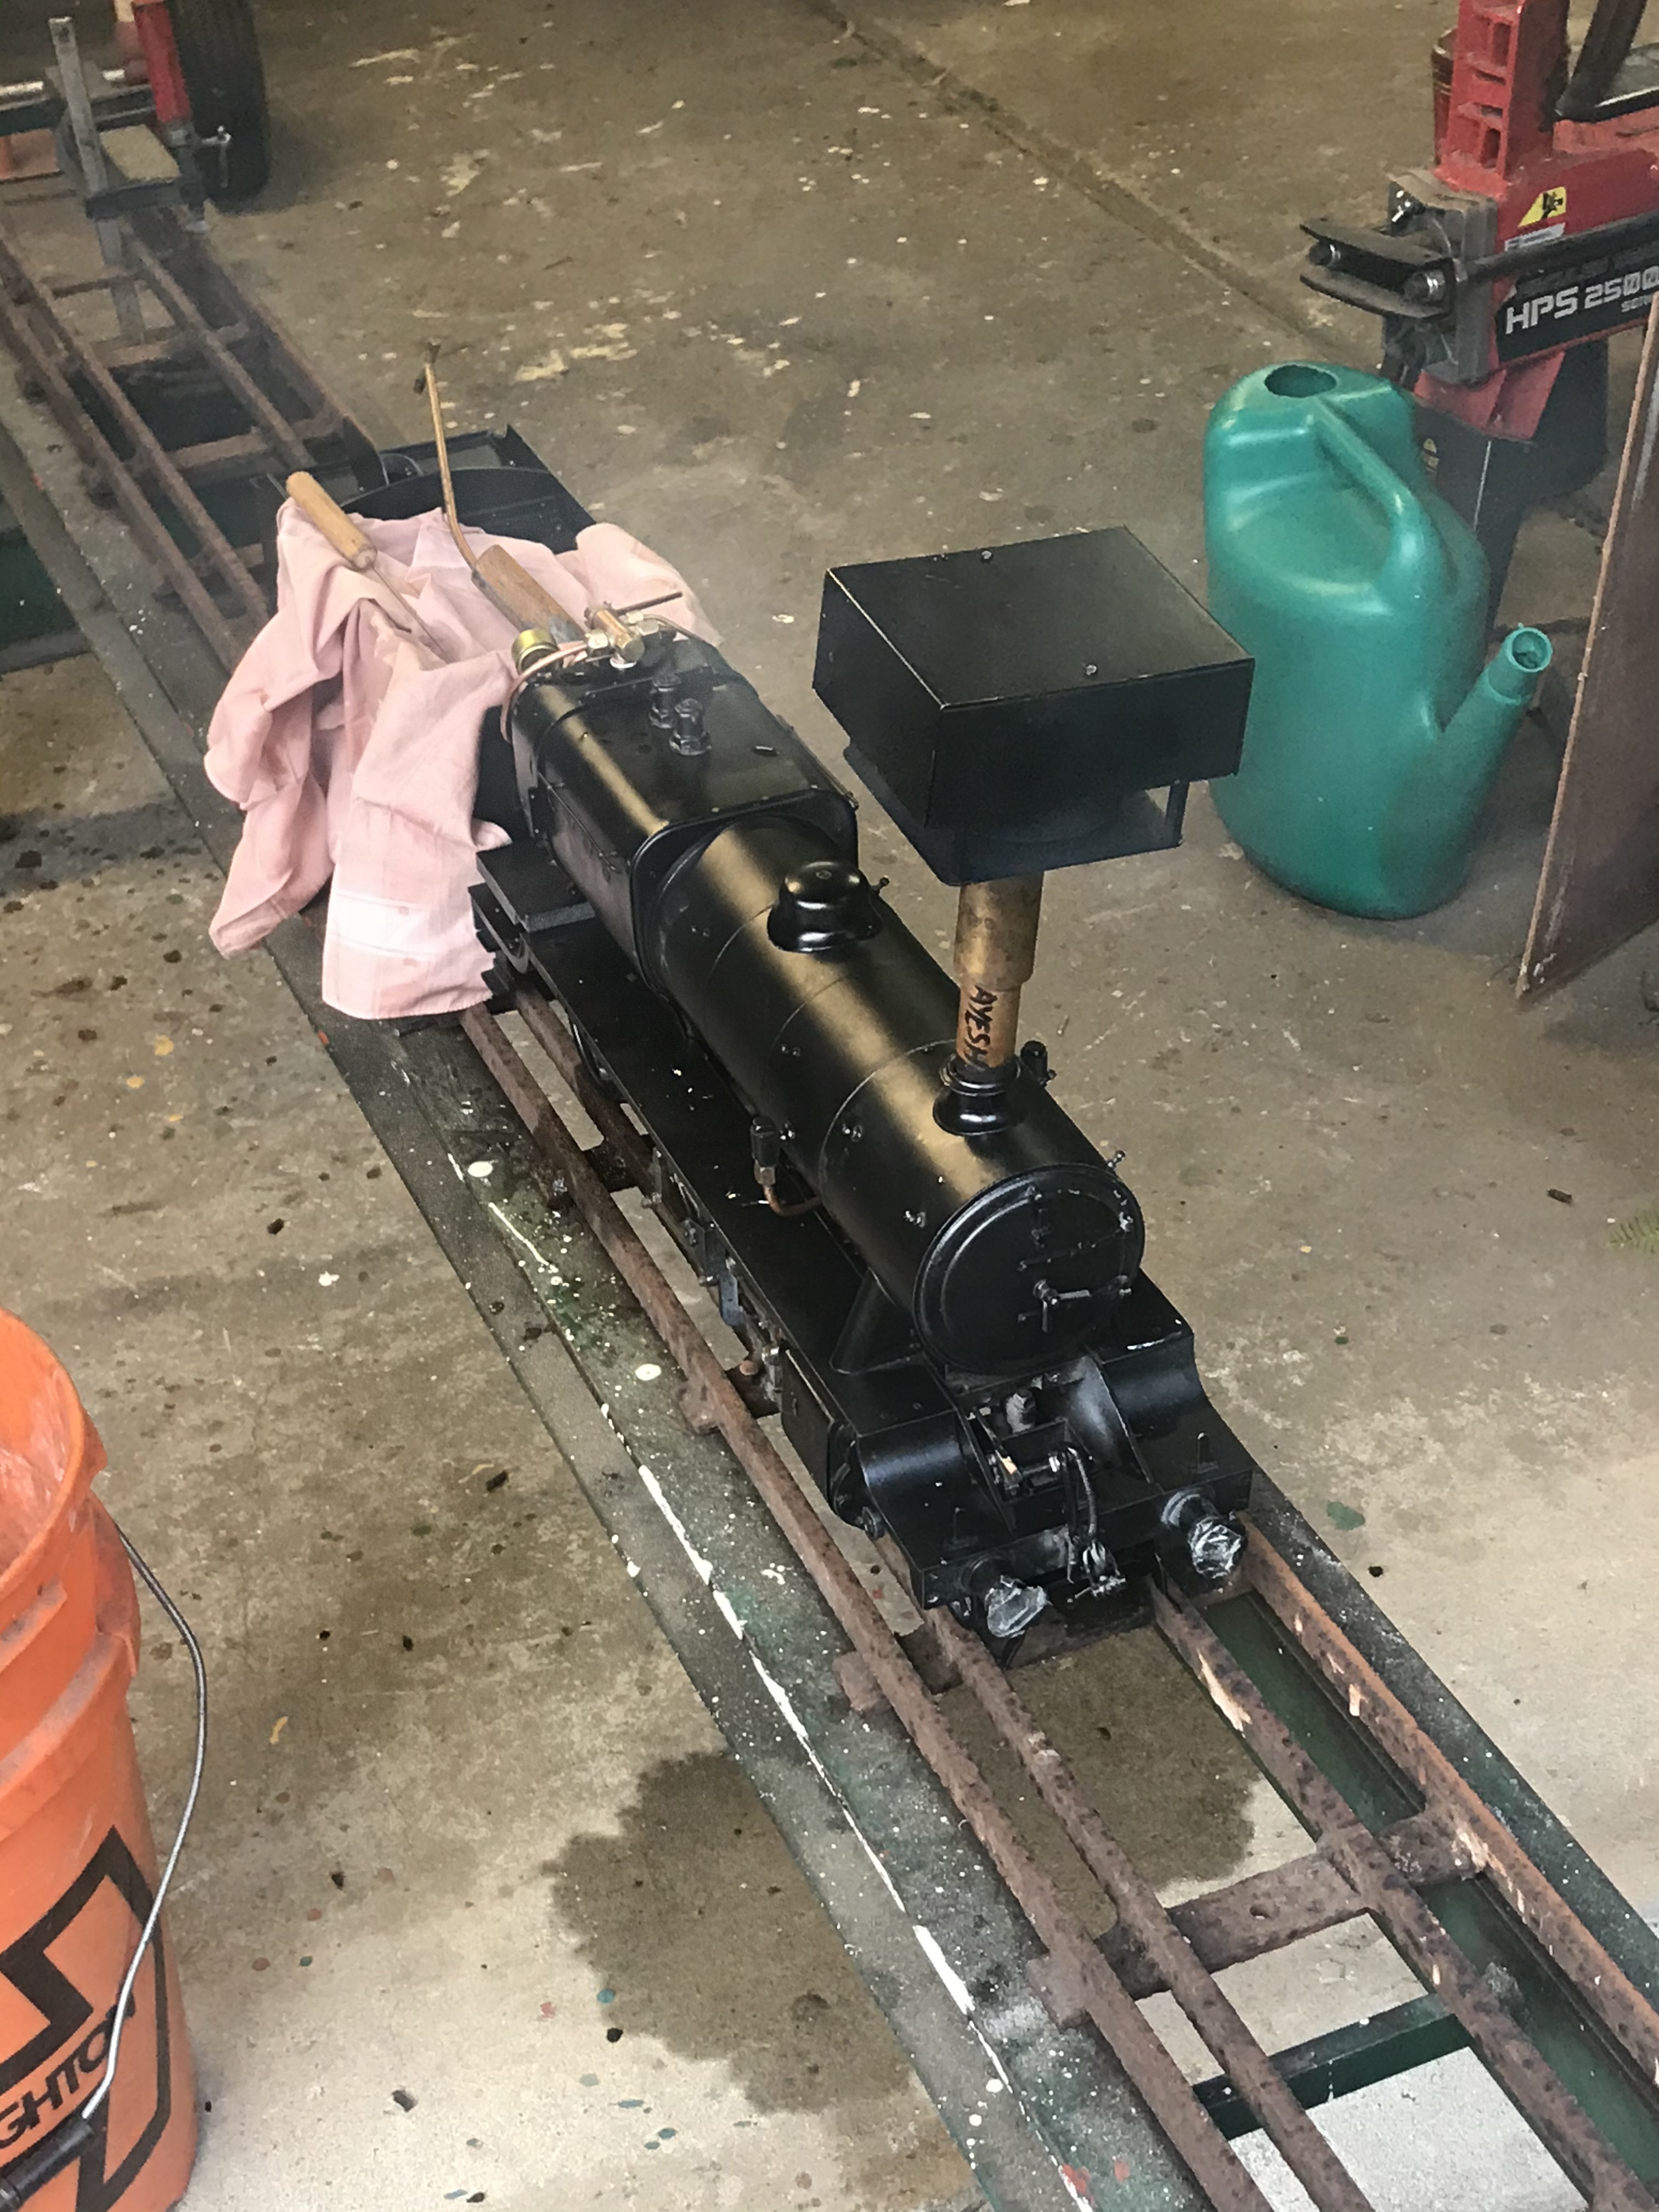
The orange cloth protected the tender, the gadget on the loco. chimney is a fan to “draw” the fire through the boiler.

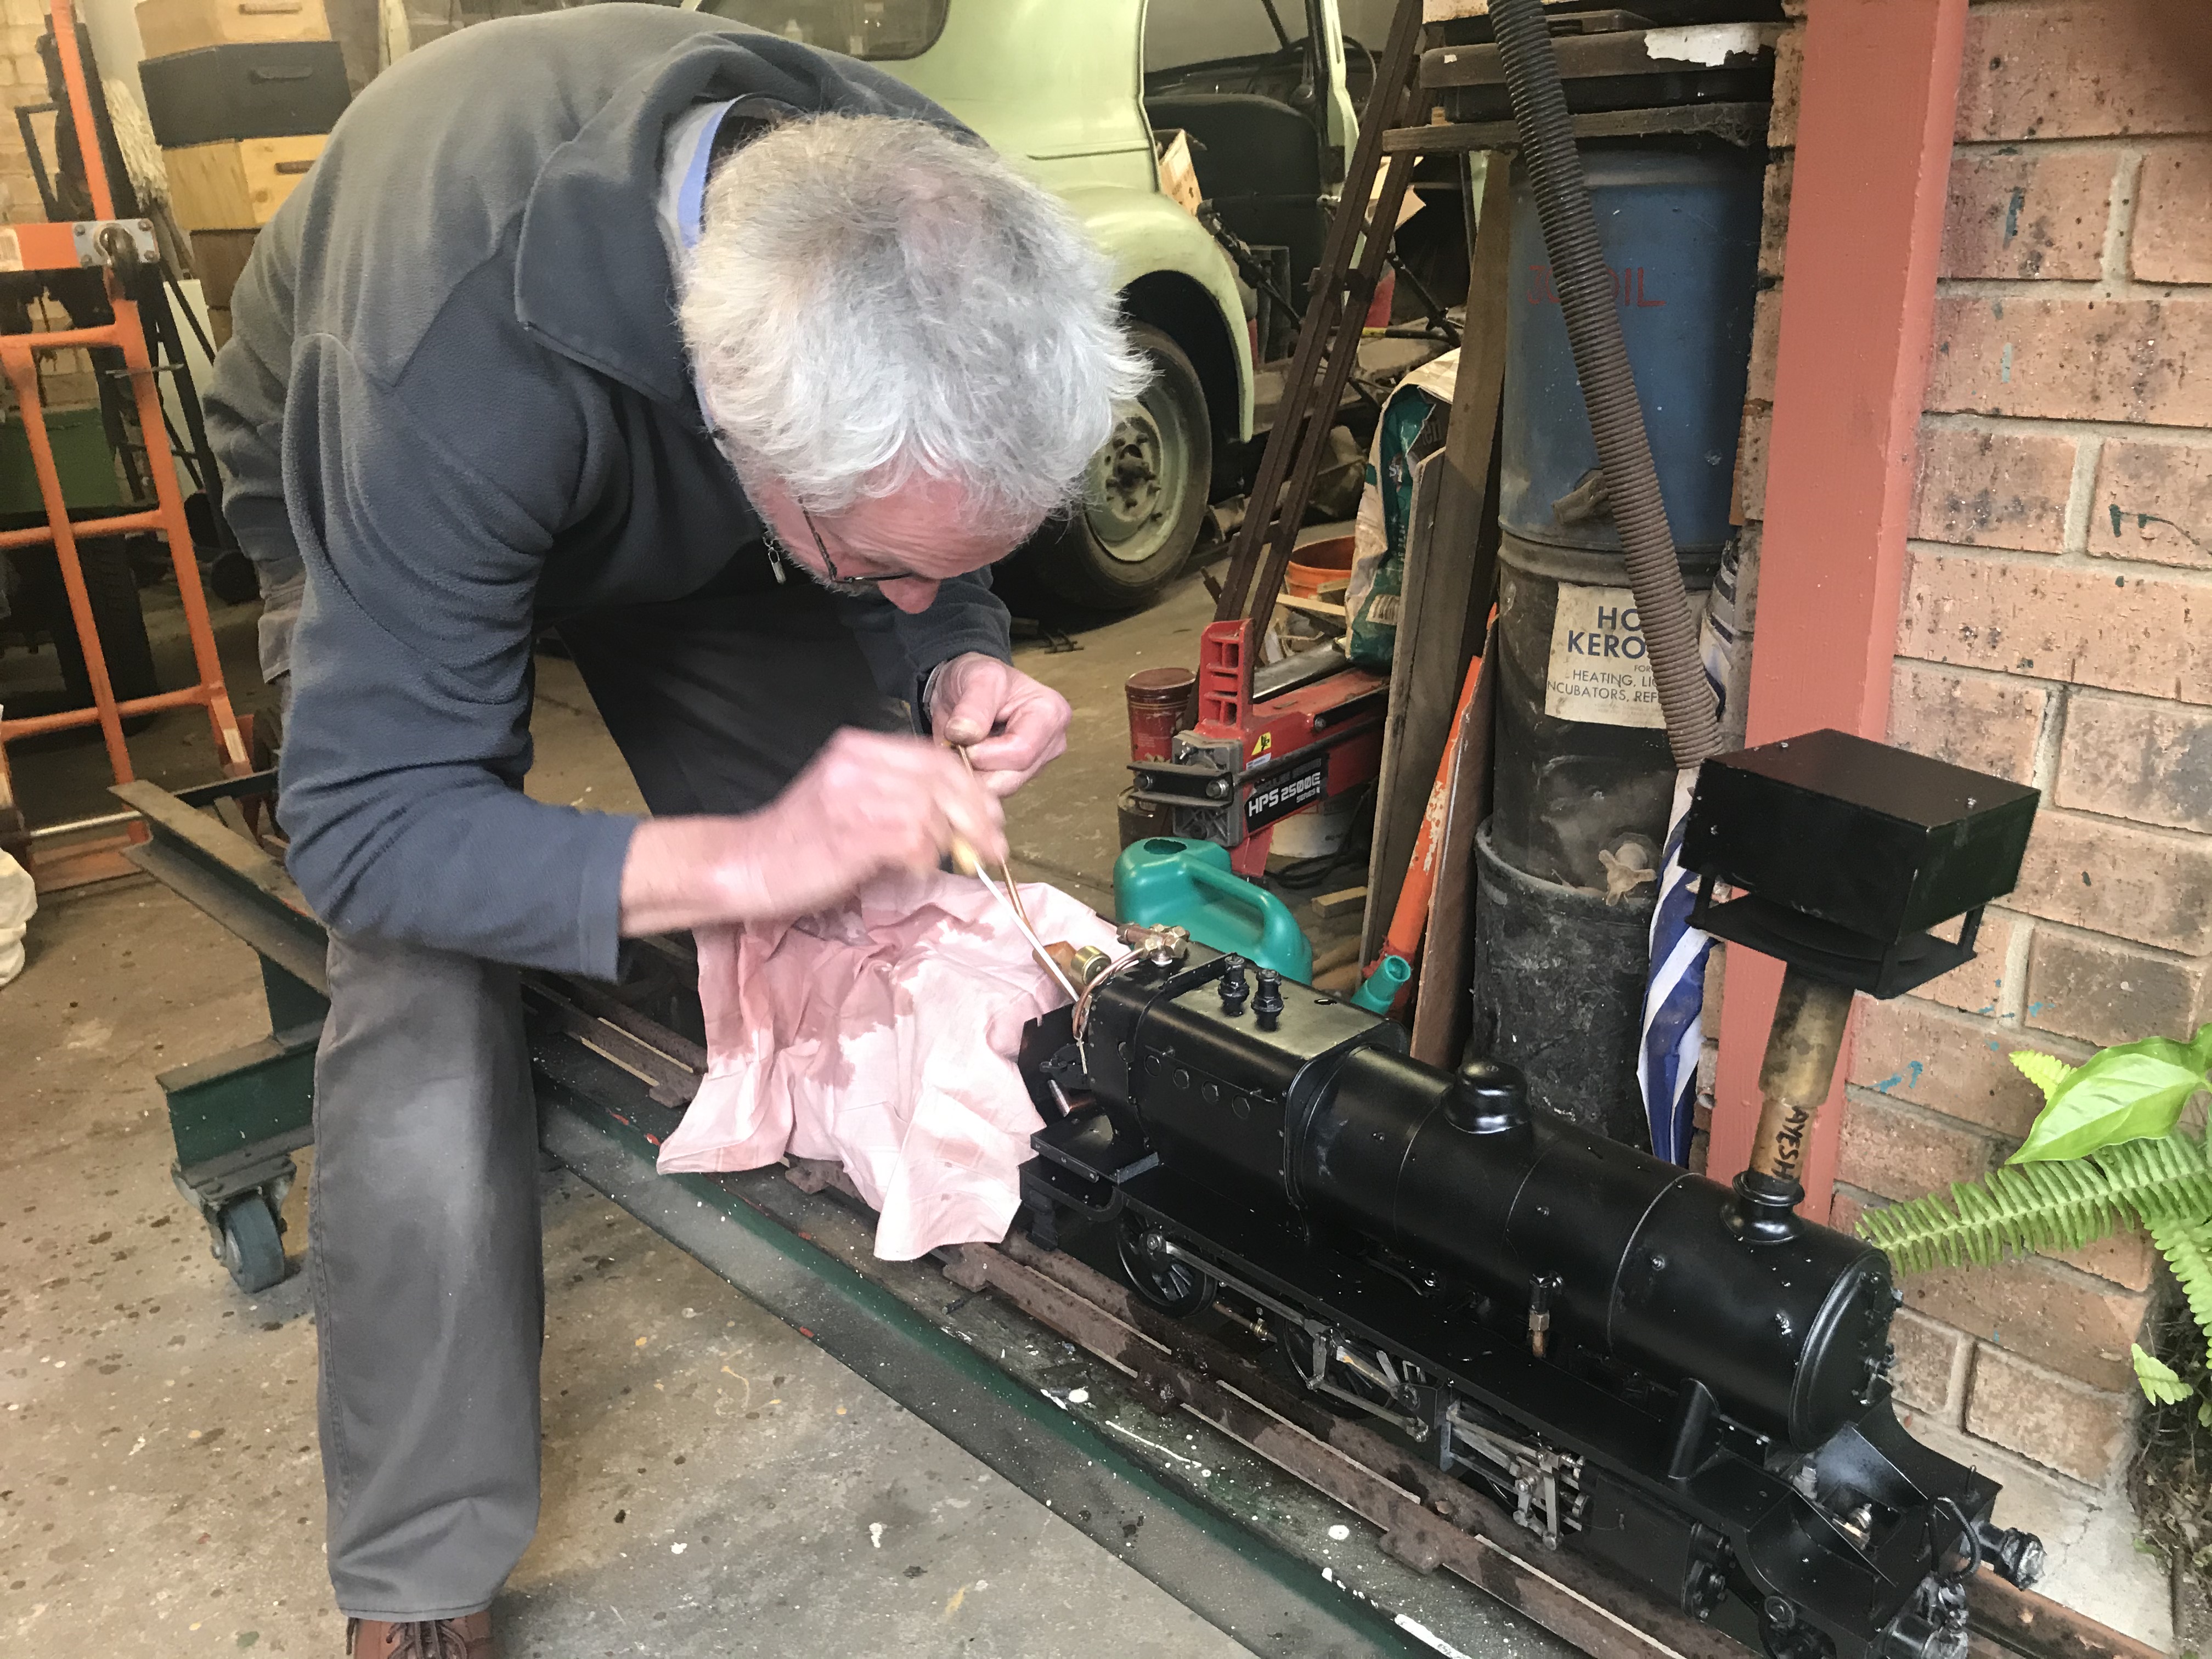
This is me supervising the steam-raising.


After what seems like ages, pressure was shown on the gauge, and I could hear the engine “blower” beginning to work.

Finally the great moment arrives: the engine wheels are propped up above the track, the regulator opened, and for what I guessed to be the first time in 50 years, the engine turns it wheels under the power of steam produced in its own boiler.  

Click on the link to watch:  Dyak first steaming 2.

So in the end I didn’t waste my money on 20kg of useless brass scrap ….


And as of 5th July

Engine running first time ever 5th July

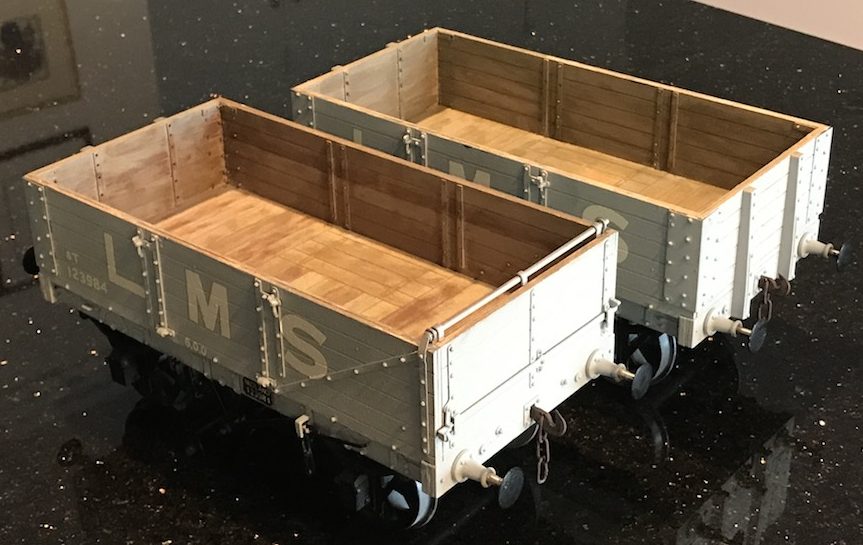
By the way, I have decided that it is an “impressionist” model of a Stanier Mogul.  It doesn’t have a taper boiler, the cab windows aren’t quite correct, and maybe the wheel sizes are wrong, but the tender looks right and the straight unstepped footplate makes it closer to a Stanier Mogul than any other locomotive that I have seen.  There is the minor problem that the design for this model (the “Dyak”) and probably the manufacture of this particular example of it, pre-dates the first example of the real Stanier Mogul being made!

Gauge 3 action

Yet another Midland Railway wagon!  This time it is a D299, which is a bit like the D302 which I have already made (see prior entries), but this time it is a Slater’s kit.  Like previous ones which I have written about, it is largely laser-cut wooden in construction, which I like.    

“Etching” with a laser is also possible, and the parts fit pretty-well perfectly (computer design and computer-guided cutting also).

This is the body after all the wooden bits are stuck together.

There is a long and tedious part now fitting the “strapping” and braces,  and all the tiny rivets through the strapping.


This is the result afterwards.


Next is the underframe.

But there is lots of lovely detail.


The other part of the “Gauge 3 action” relates to my locomotive.  The boiler has now been removed and the leaks found largely to relate to the boiler fittings (all the controls and gauges which come out of or go through the boiler).

A considerable relief – it pressure-tests well when all the fittings are removed and the holes for them plugged temporarily.

Here (right) the front safety vale has been replaced with a (large) pressure gauge.


Once this was established, we could work on all the small parts – the regulator, the manifold fitting, the clack valves, etc (when we come to them I will explain what these arcane terms refer to).

Here is a picture with the “superheater tube” removed (the last tube before the steam reaches the cylinders, where it is superheated to get it well about the temperature at which water could condense in the cylinders).


Next is the regulator removal and remaking.  Here is the old regulator.  The regulator shaft has to go the entire length of the boiler.

Warwick Allison (who is doing much of this work with me helping as best I can) said that for a better long-term result we had better remake the regulator, to which I knowledgeably (ha, ha!) agreed.  This involved me learning a little lathe-work, as well as learning much more about how steam engine actually works!

For instance, why does a steam-engine have a dome (usually)?  Well it is to create a place to gather steam which is well-above the water level.  If water is collected, you see, and gets into the cylinders then (not being compressible like steam is) it will severely damage the cylinders.  Here is the loco. steam-collecting pipe after the dome is removed.

On a final note, Sue has said I can have a garden railway so that I can send a train out to her and her friends, sitting out in the garden, carrying a cargo of sparkling wine.  So I had to check that my flat wagon would carry the load ….


Midland D336 and another wagon

First the Other Wagon: this is in fact a Railway Clearing House 1923 coal wagon, and the main reasons for making this particular kit are firstly that it’s inexpensive, and also that these wagons can be colourful, and can be made in a design that is compatible with my favourite locomotive – an industrial Garratt 0-4-0+0-4-0, not that it is very likely that I will ever be able to make one in Gauge 3 [but see my previous entries about the one which I made in ScaleSeven (1:43.5 scale)].

The difficulty was that no-one makes suitable transfers for the Baddesley Colliery.  However in due course and with a lot of help from friends new and old I have been able to have suitable transfers made (!) – see http://www.westernthunder.co.uk/index.php?threads/baddesley-transfers.8434/

Here is the wagon as my model stands: it isn’t finished quite yet, but the colourful design on the black background is seen to advantage, I think.


My other wagon-building project at present is the D336 flat wagon.  This has progressed also.

I have had a little trouble with this, because I couldn’t see what the loops attached to the W-irons (the metal supports for the axle boxes) were for, and so {thinking they were for use on a different model sharing the same undergear} I cut them off !
This was partly because the pictures I have of D336 real wagons don’t show anything like the loops on the W-irons.


It turned out to be a mistake, as the whitemetal moulded representation of leaf springs were supposed to fit into the holes.  However this didn’t matter – the leaf springs could be glued onto the sole bars perfectly satisfactorily.

This shows the underneath of the wagon, with the W-irons, the leaf-springs, axle boxes and wheels in place,


Gauge 3 – good news and bad news

The bad news is to do with my steam-powered locomotive. I took it to my friend’s house to have its boiler “hydraulic test”, which it failed spectacularly.  A hydraulic test is when you fill the boiler up with water, put it under pressure, and see if it leaks.  I had high hopes of this, after all it had run on compressed air.  My friend Warwick Allison clearly had high hopes also, but when we tried it, water leaked out all over the place – from the regulator fitting, from the front boiler plate, from the top of the backplate, possibly elsewhere.  “I think it’s a ‘boiler off’ job”, said Warwick’s son-in-law (Andrew, who is a boiler inspector).  When air leaks out, you cannot see it.  When water comes out, it is very obvious!

Clearly a fairly major setback, but I always knew this could be a major undertaking.

The good news is progress on a fourth G3 wagon.  This is a long flat truck, and model of the Midland Railway D336 single-plank wagon, the kit coming from Peter Korzilius.

As you can see, the basic construction is out of wood – “mahogany stripwood” (a little  ideologically unsound?) with a plywood floor.


Reproduction of the metal framework is in styrene, with little brass rivets to represent, well, rivets.

This is also a very satisfying wagon to make, and I like working in wood.


The other good news is that the man in Victoria who has offered to make the transfers for my coal wagon has finished them.  They were a bit difficult because of white lettering with green shading and a red cross design on a white shield, but the colourful nature of the wagon is its main attraction, so we will see if I can apply the transfers adequately once they have been posted to me.

Gauge 3 Woodbury Midland Railway D302 wagon finished

It’s finished!

Finally my model of a Midland Railway D302 5-plank open wagon is complete

Painted to look realistically dirty.


I’m pleased with the weathered look.  I have painted it to look like a wagon in the early LMS days (London Midland and Scottish Railway), with the old Midland lettering visible through the paint as it “wears away”.  So the LMS letters look just a little dirty, the M and the R are only just visible.


More of “Another Wagon”

-This other wagon is a model of a Railway Clearing House (“RCH”) design from 1923, the model produced as I’ve previously said, by Mike Williams.


I have now put most of the underframe together, as this shows: the brake gear is on, and the springs, etc.


The details go together quite well, and although I have had a little more trouble than with more expensive kits, by the time this is done I think it will look fine, and it is only about 60% of the price!

For instance the brake gear,  instead of being made of individual components (as in more elaborate (and expensive) kits, is a single resin moulding.  The brakes on this moulding did not line up properly with the wheels so I had to saw the moulding in two, then fit it to the underframe.  It will look fine once painted, so this really isn’t a major problem.


I’ve now had a chance to put on the “primer”, and as this is black, it will do well as the final colour also, I’m hoping ….

This actually shows one of the ways in which this kit has been “a little more trouble”: given that there is no floor, there was nowhere to fix the brake safety straps to, so I had to add the strips of balsa wood which you can see.  Not a major problem either, of course.

Gauge 3 Woodbury wagon and another

I’ve painted the wagon in undercoat and then a topcoat of what I thought would be a good representation of the Midland Wagon Grey, but it looks too light/pale to me.  The answer might be to put on the MR transfers (white) and then “weather” it to a darker colour.  I’m not sure.

Here it is, without the wheels or buffer heads.  The inside needs to be made a realistic wood finish also.

Meanwhile, I have started another wagon!  This time it is a Williams models “Flexi Kit”.  These are an “economical” type of model, which Mike Williams is a little hesitant to sell, actually – he thinks they are lacking the detail of other kits, and though less expensive are not (in his view) good value.  There is no internal detail, and no floor inside the wagon.  However for coal wagons (which this is a model of) filled with coal, these features would not be visible anyway.  So if I make a model load (with real coal incidentally), the lack of internal detail will become irrelevant!

The way it is constructed is very different, as you can see.  The first part is to put the “W-irons” (the bits holding the axleboxes) onto the underframe.

The underframe has NO detail, and this is added by glue-ing detail facings onto the frame – which you can see in the picture.  I think the resin mouldings of the facings must have shrunk when moulded – they are too short by a couple of millimetres.  Fortunately there are no details in the central portion, so I could simply put a cut into the facing and line up the detail (bolt-heads for the W-irons) and then fill in the central cut with Milliput filler, later.

The brake gear is much less complex to put together – it is a single resin moulding, seen here in the top of the picture.

Mike is correct in that it looks crude when first seen.  However with care I think the wagon can be made to look good.


It’s interesting to start the wagon from the bottom and work up, whilst my previous wagons I have built the bodywork first and added the W-irons, wheels and brake-gear later.  The details on the mouldings look OK, so with care I suspect a perfectly acceptable wagon will emerge.  

We will see.  Click on pics. to enlarge.