This ‘blog may be updated as I build the wagon, but to start off with …
In gauge 3 I have found at least three companies make model wagons largely from wood. This is good, rather than using largely plastic, and I approve for all sorts of practical reasons, as well as ideological ones.

So this is my latest model, made by Woodbury wagons. It represents a Midland Railway “5-plank” open wagon, meaning that the sides were five planks high.
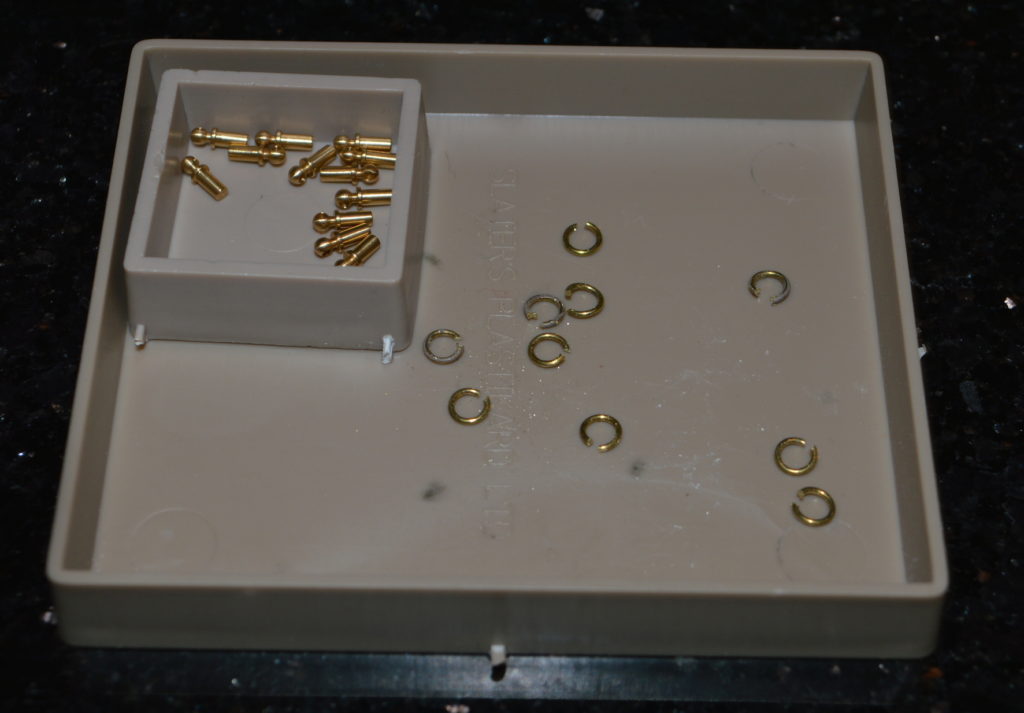
One of the peculiar things about the larger scale compared to 7mm/foot, is that some of the parts are smaller! If you look carefully at the second piece down from the top, on the centre of the side-piece of the wagon it a little pile of 1/32 inch rivets. These are used to model the rivets on the real wagon, and each one has to be inserted into a hole through the simulated “strapping” parts on the sides and ends of the wagon, as you can see in the picture – the model strapping is made from this strips of acrylic, with holes bored (actually laser-cut) where the rivets are to go.
The is a somewhat laborious task – each wagon will have over two hundred of the tiny pieces to put in place. It will look good in the end, I have no doubt.
Laser-cutting of the pieces has made this not just possible, but remarkably accurate and so easier- the holes in the strapping and the holes underneath in the plywood match up exactly. Very impressive. It takes an awful long time to do, however.
NEXT ENTRY
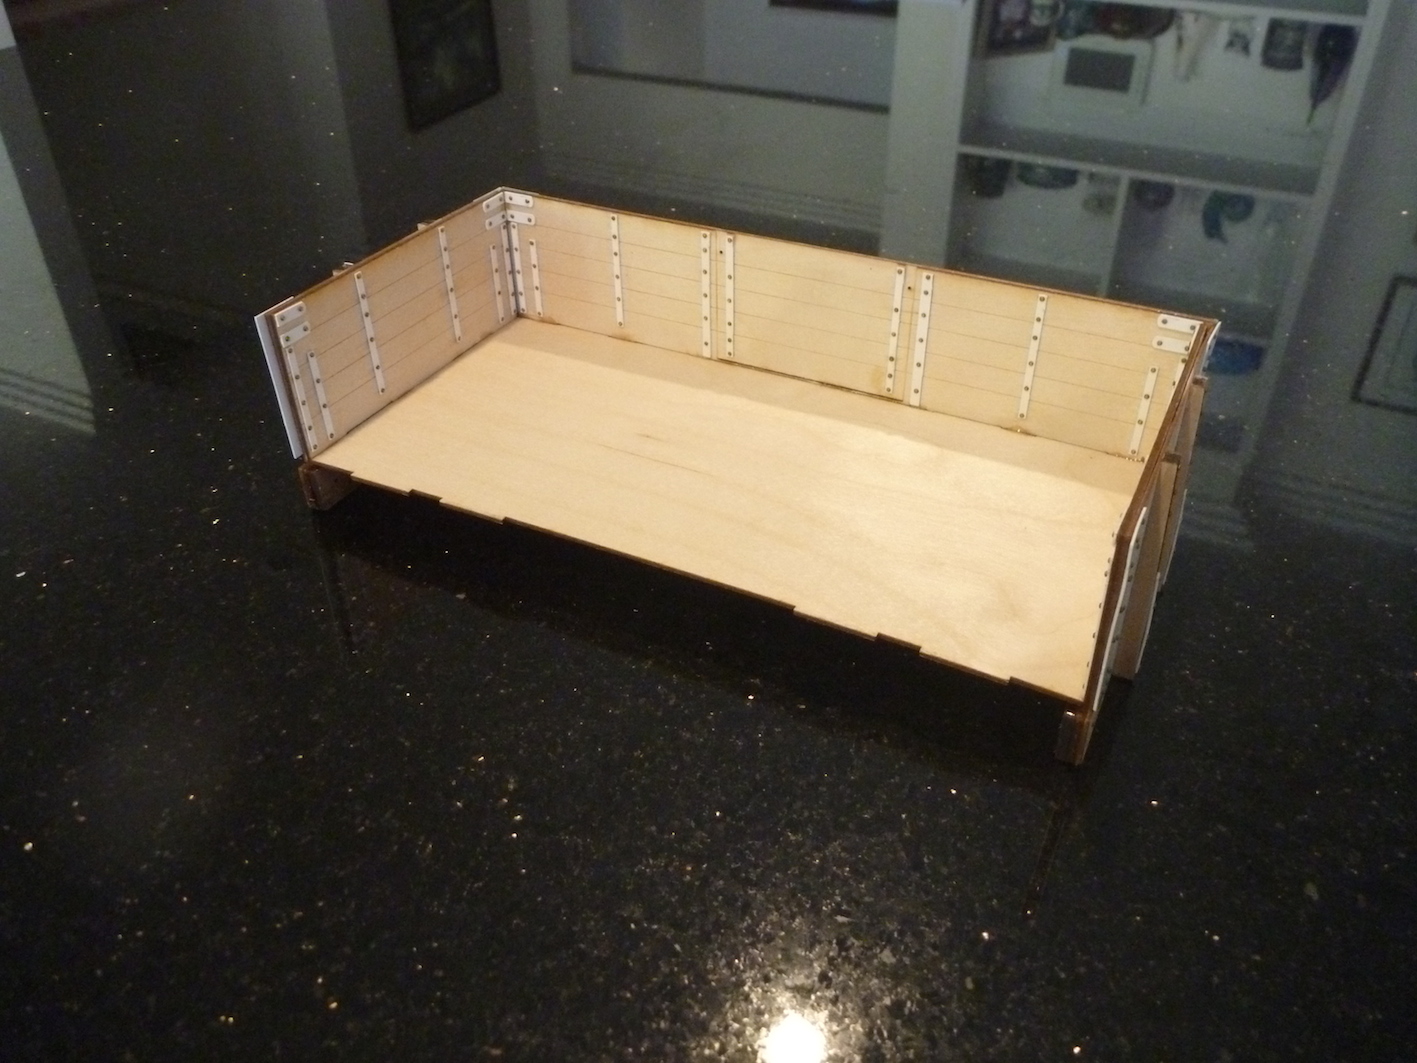 After laminating the sides together (each side and each end has two flat parts to laminate), the time comes to start putting it all together.
It looked good at first, but then I realised that one end had a minor mis-match with a 1mm step between the side and the end. One of the little-known virtues of Araldite is that it is somewhat heat-labile: by dipping the corner into boiling water the hardened glue softens and can be pulled apart. In stages the whole construction could be dismantled.
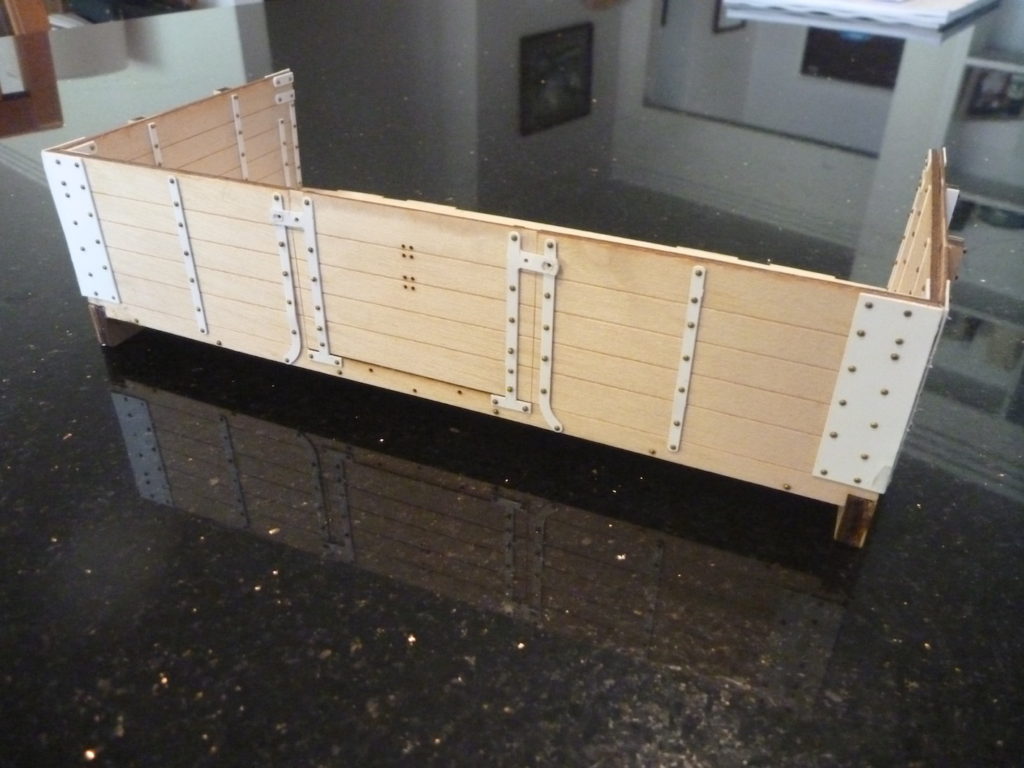
So I did that, however leaving the end pieces in place but removing and then repositioning the side, at the correct level. This is all made so much easier by the precise dimensions cut by laser, I suspect. So far, a very impressive kit indeed.
NEXT ENTRY
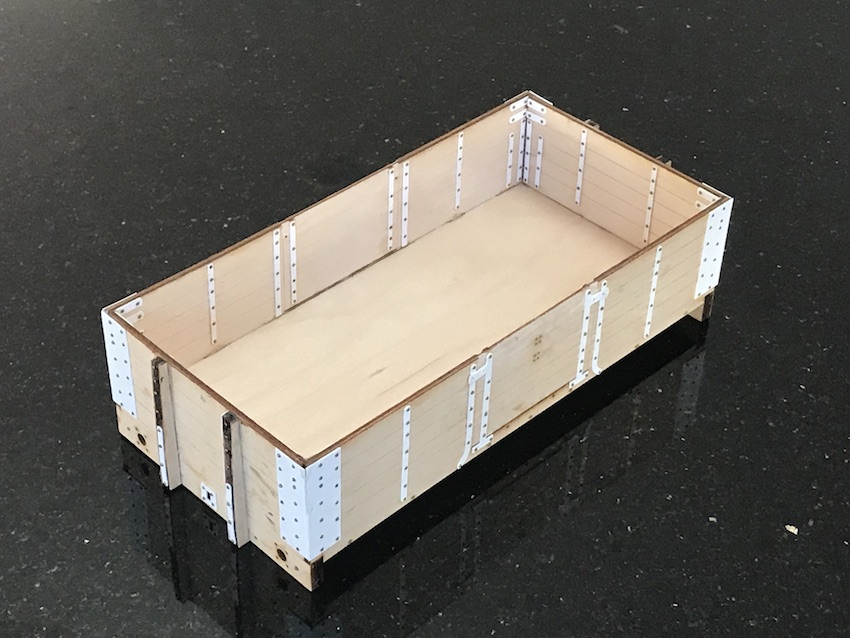
Now I can show the not-quite-complete body of the wagon. It has been a title bit of a struggle, but it has turned out almost perfectly square without too much trouble really.
NEXT ENTRY
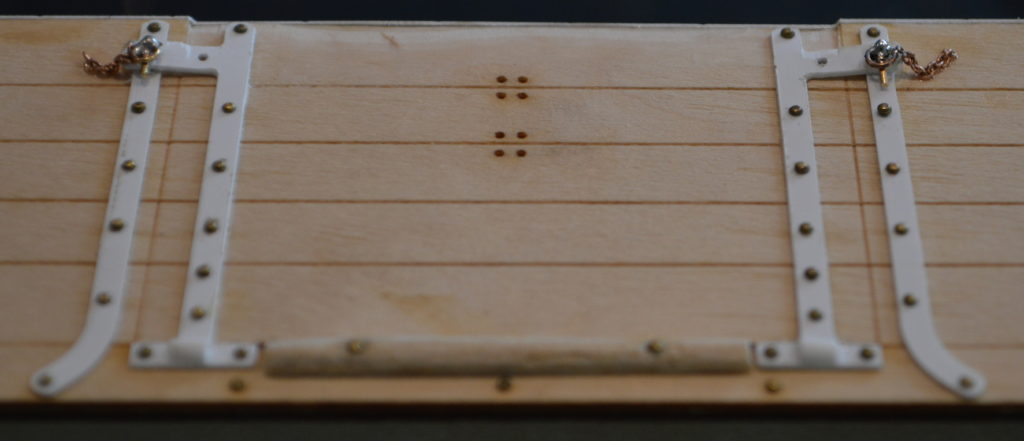
I decided that next I should make the fasteners which keep the side-doors closed – a pin held in place with a loop of metal. Clearly these are prominent features but quite small, and not provided in the kit. So I decided to make them from 7mm-scale hand-rail pins and loops of brass wire made by wrapping a length of 0.5mm wire around a 2mm drill, then cutting the resulting spiral longitudinally to make a lot of loops (albeit with gaps in each loop).

Some fine soldering work and adding small lengths of straight wire produced the necessary fasteners:
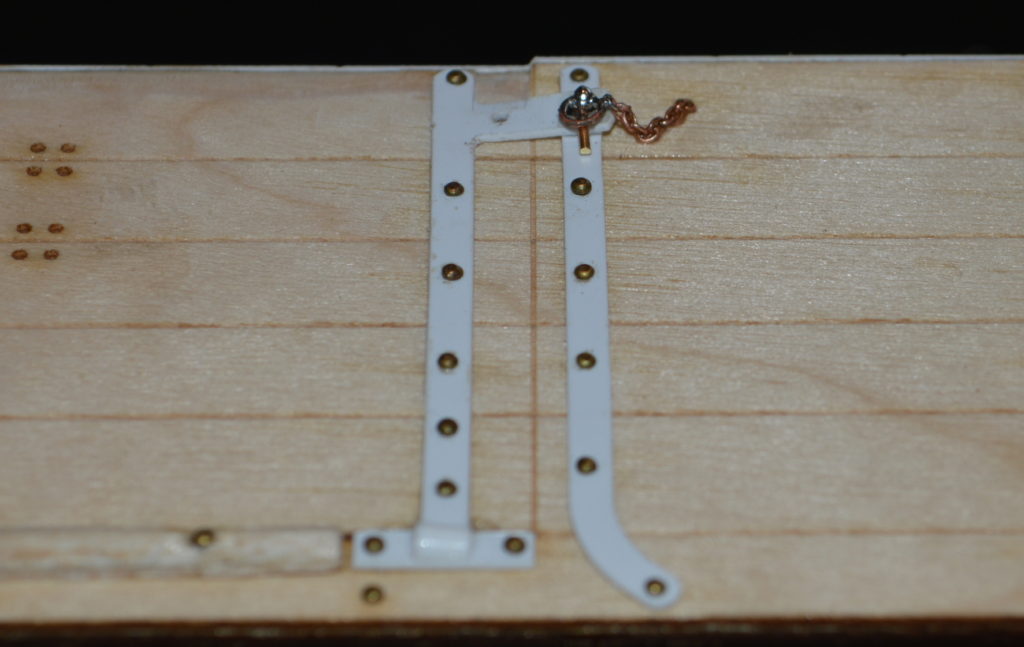
Adding a small length of copper chain specially purchased
I think the end result looks good, and very realistic – which is the main idea, of course.